Wondering how to add an address autocomplete WordPress form to your website? Then, this article is just the thing you need right now.
If your WordPress form has an address field, we suggest you add the autocomplete feature to it. This way, it’s easier for your users to fill in the address field and submit the form successfully.
That’s why we’ve prepared a detailed guide on how to create an address autocomplete WordPress form. So, read till the end.
But before the tutorial, let’s discuss the benefits of the address autocomplete feature and the best way to add it to your form.
Table of Contents
How is Address Autocomplete Option Helpful in an Online Form?
You could just use a regular Address field for any WordPress form. So, why add the address autocomplete option to it?
Well, here are a few significant ways the address autocomplete option is helpful:
- The address autocomplete field automatically suggests places to your users based on their input.
- Users can select accurate addresses from the list of available address suggestions.
- Since users don’t have to type the full address, they can fill out the form relatively quicker.
- The autocomplete feature makes form-filling easy and fast. This can help increase successful form submissions and decrease form abandonment.
Therefore, it’s wise to include an autocomplete address field in your forms.
However, WordPress doesn’t offer this feature by default. So, what’s your best alternative?
We’ll cover the best way to add an address autocomplete field in the next section.
Best Way to Create an Address Autocomplete WordPress Form
Since WordPress doesn’t allow adding the address autocomplete feature by default, you’ll have to rely on plugins instead.
The right WordPress plugin will let you add the feature to your form without hassle. And one such plugin is Everest Forms.
The popular drag-and-drop form builder plugin may be the perfect addition to your WordPress website.
This powerful tool does it all! It lets you create custom forms without touching a single line of code.
You can use its 20+ form fields to build contact forms, leave request forms, order forms, or any form you require.
Moreover, it offers an Address field where you can enable the autocomplete option easily. Thus, we recommend the Everest Forms plugin as the best way to equip your forms with this feature.
How to Add Address Autocomplete Fields in a WordPress Form?
In this tutorial, we’ve used Everest Forms to demonstrate the process of making an address autocomplete WordPress form.
Follow these 7 simple steps to add the WordPress Google address autocomplete option in your form.
Step 1: Install and Activate Everest Forms Pro
Begin by installing and activating the Everest Forms Pro plugin on your site. This premium version works on top of the core free Everest Forms plugin.
Thus, you’ll need to set up both the free and premium versions of the plugin for the address autocomplete feature to work.
Note: You need the premium version because the Geolocation add-on that provides the autocomplete feature is a premium extension.
It’s available in the Plus plan and above. So, you must purchase any plan among Plus, Agency, and Professional to get the add-on.
We have a separate guide on how to properly set up Everest Forms Pro on your website. So, check that out if you need help installing and activating the plugin.
Step 2: Install and Activate Geolocation Add-on
If you’ve set up Everest Forms Pro correctly, you should be able to access all the add-ons available. Please remember that the add-ons you get access to depend on the plan you’ve purchased.
So, open Everest Forms >> Add-ons in your WordPress dashboard.

Scroll down to find the Geolocation add-on and click Install Addon. To complete the installation, press the Activate button afterward.
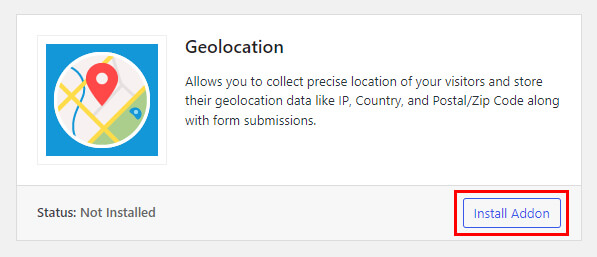
This will set up the add-on for you to use in your WordPress forms.
Step 3: Get the API Key from Google Console
The third step is to get the API key from Google Console. This will help you connect the Everest Forms plugin to Google Console.
First, visit the Google Console Dashboard. You must be logged in through your Google Account to access this dashboard.
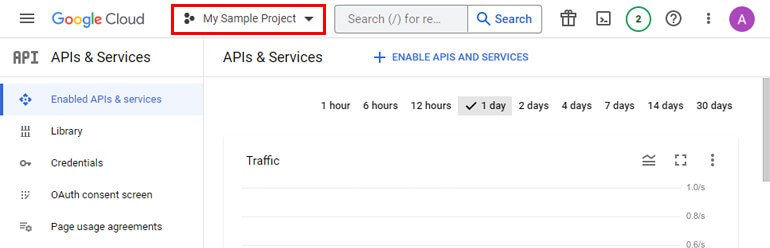
Then, select your project from the top of the dashboard.

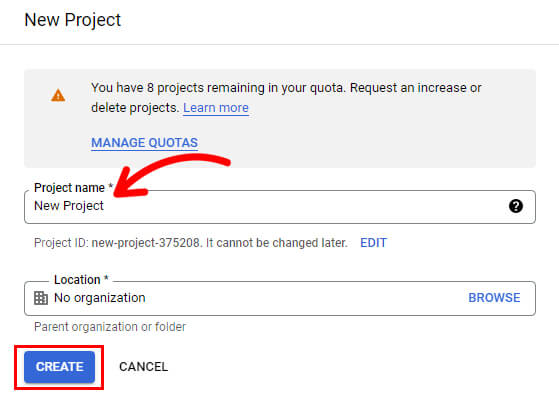
If you don’t already have a project, you can create one by clicking New Project. Next, give your project a name and press Create.
After you choose the project, you will arrive at the APIs & Services page for the project.

Suppose you’re not automatically redirected to this page. In that case, you can open it annually from the Navigation Menu on the top left.
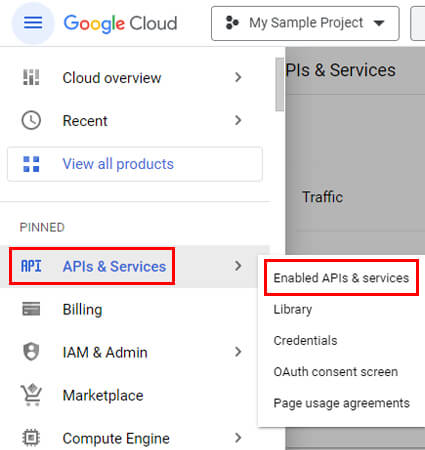
Press the menu and open APIs & Services >> Enabled APIs & Services.
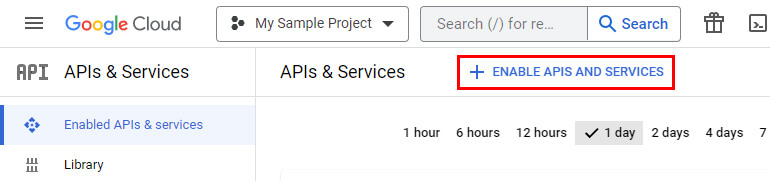
Here, click on +ENABLE APIS AND SERVICES.
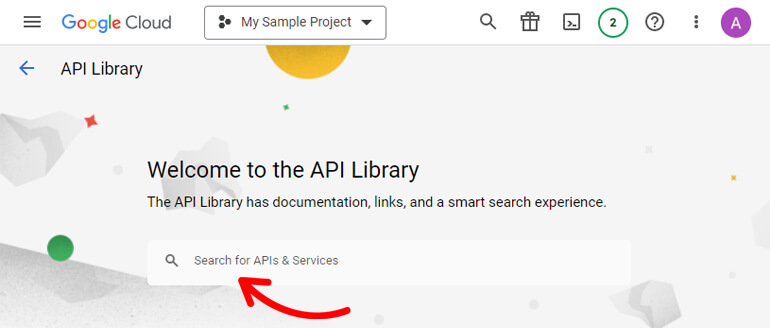
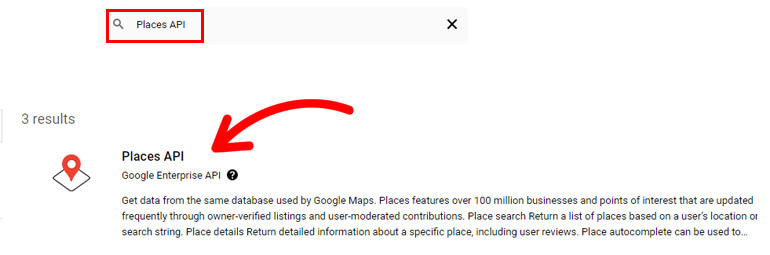
In the API library, search for the Places API and Enable it.
Note: To successfully enable the API, you must have a billing account. So, enable billing for your Google Cloud Console before you proceed.
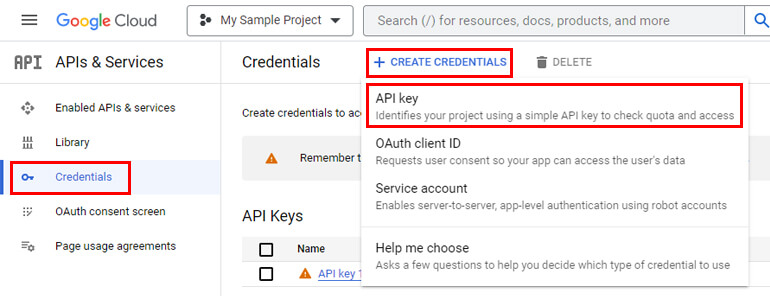
Once you’ve enabled the API, navigate to APIs & Services >> Credentials. Now, click on +Create Credentials and then select API Key.
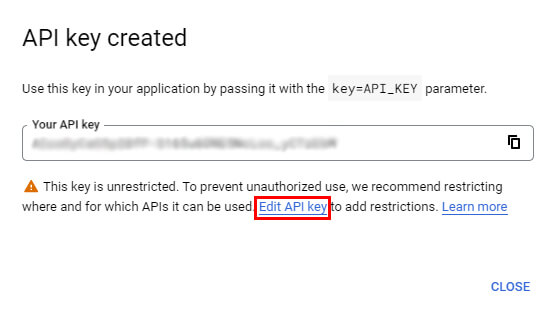
This generates a new API Key for you. But before you copy the API key, you must add some restrictions to it. For that, click on Edit Key.
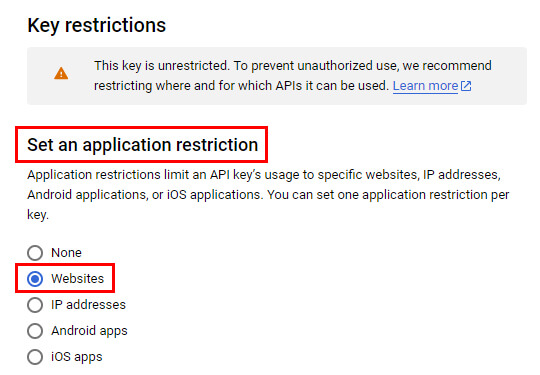
First, you must Set an application restriction. This lets you limit which websites, IP addresses, or apps can use the API key. In our case, let’s choose Websites.
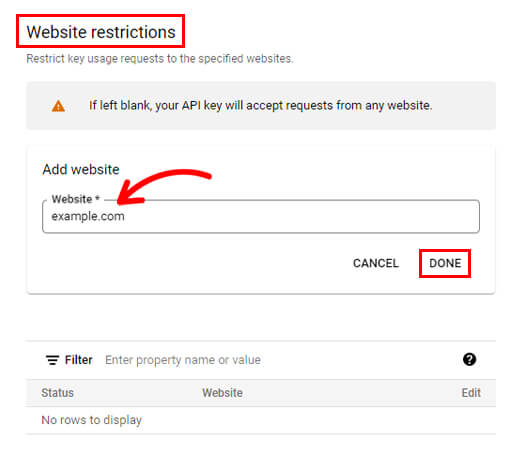
Next, add the website where the API key will be valid and press Done. You can add multiple websites if you need.
After that, you must set the API Restrictions by choosing the Restrict key radio button. This lets your key know which enabled APIs it can call.
Since we only need Places API, let’s choose that from the dropdown. You can enable and add more APIs like Maps JavaScript API as per requirements.
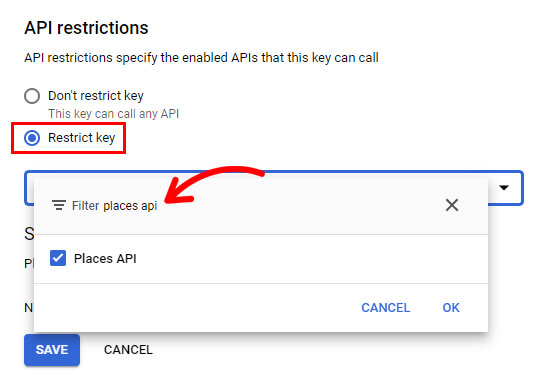
Finally, hit the Save button.
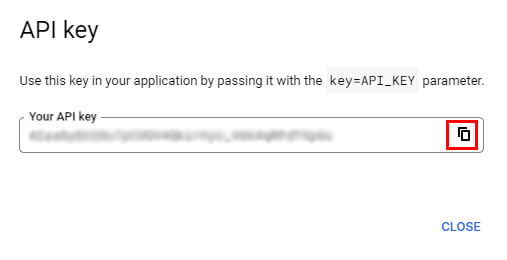
All you have to do now is copy the key for later use. Do keep it safe since you’ll need it for the next step.
Step 4: Add API Key to Geolocation Settings
Back in your WordPress dashboard, go to Everest Forms >> Settings >> Geolocation.
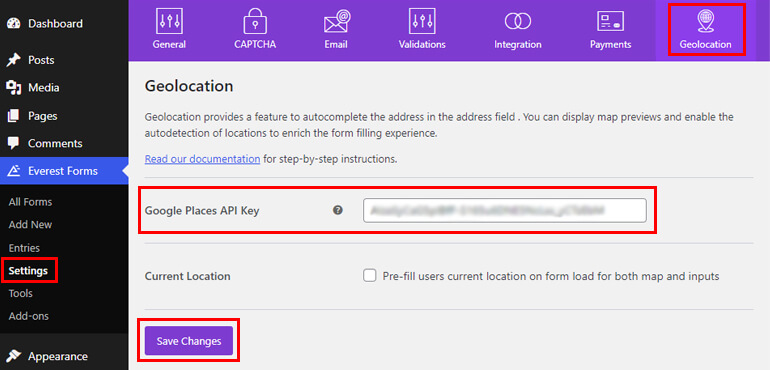
Paste the API Key you copied into the Google Places API Key field. Afterward, press the Save Changes button.
This completes the connection between the Google Places API and Everest Forms.
There’s one more option, Current Location, in the Geolocation settings. When you turn this option on, your forms automatically detect and fill in the user’s current location in the Address field.
It’s completely optional, so whether you turn it on or not depends on your requirements.
Step 5: Create a New Form with Address Field
You’ve successfully connected Everest Forms to the Google Places API. However, you still need the form where the autocomplete address feature is applicable.
For that, you must create a new WordPress form with the Address field.
The question is: what type of form do you make? Well, it’s entirely up to you!
The best thing about Everest Forms is that it lets you create any type of form you need. Contact forms, survey forms, job application forms, reservation forms, and so on.
Hence, go to Everest Forms >> Add New.
Everest Forms offers several pre-built templates for various forms. Thus, you can customize one of them if you’re short on time.
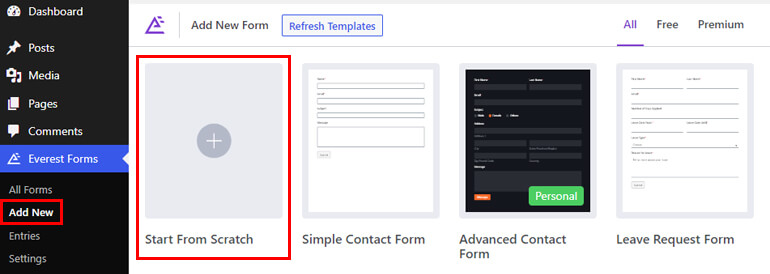
But designing a form from scratch is just as easy! Just drag and drop the required fields and customize them.
We’ll build a simple contact form with an address field from scratch for this guide.
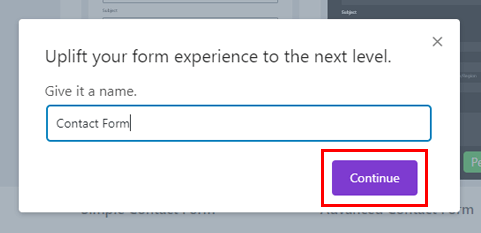
So, click on Start from Scratch. Next, enter the form title and hit Continue.
This takes you to the form builder. As you can see, all the form fields are grouped together on the left. You can drag and drop them into the form rows on the right.
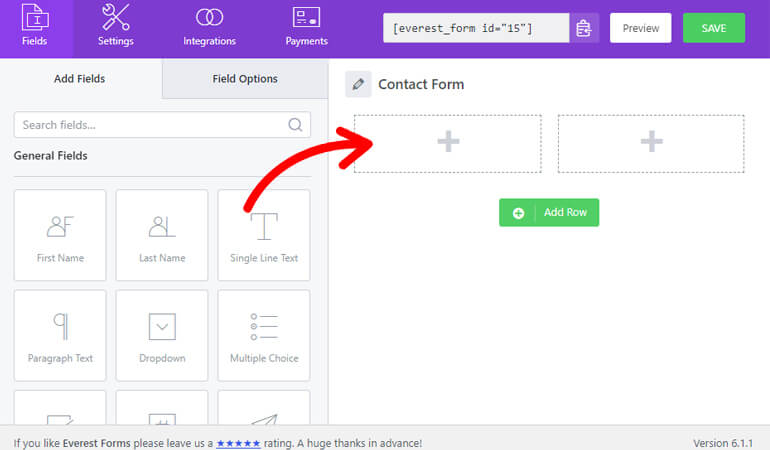
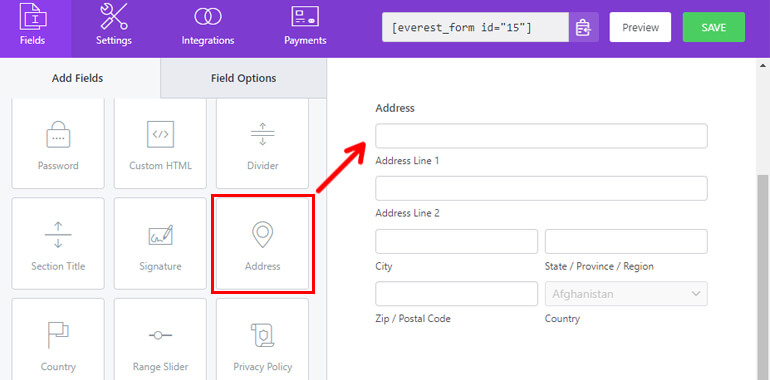
Thus, add any fields you need into the form, such as Name, Email, Subject, Message, and most importantly, Address.
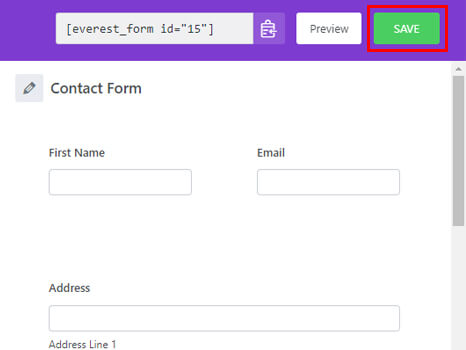
When the address autocomplete WordPress form is complete, press the Save button at the top to save your new form.
Step 6: Enable Address Autocomplete for Address Field
With each field, you get plenty of customization options. Likewise, you get several options for the Address field, one of them being the address autocomplete feature.
Although we’re focusing on the Address field here, make sure you customize the other fields as well.
Click the field you want to edit; its customization options will open on the left.
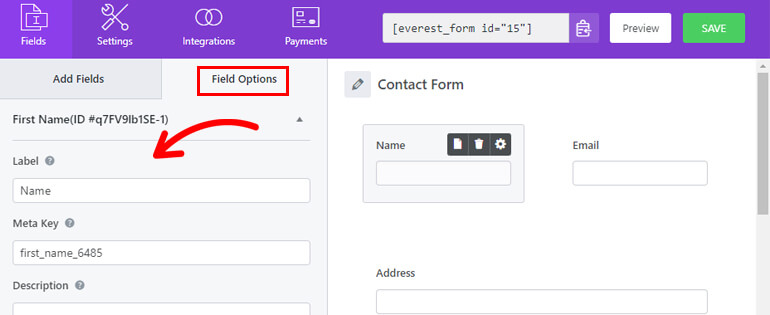
From here, you can change the field Label, Description, Field Visibility, etc. You can also enable Required, Enable Tooltip, Hide Label, and add CSS Classes.
In addition, you’ll be able to set conditional logic for the individual fields as well.
But let’s get back to our highlight field here. As you click on the Address field, the Field Options display similar options as we discussed above.
However, the Advanced Options include some features curated for the Address field.
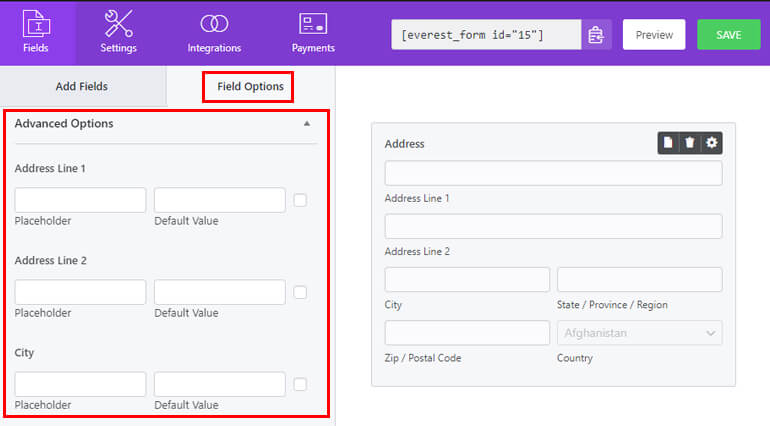
For example, you can change the Placeholder and Default Value for Address Line 1, Address Line 2, Country, etc. Plus, you can choose which countries you want to make available to users from the Default Countries List.
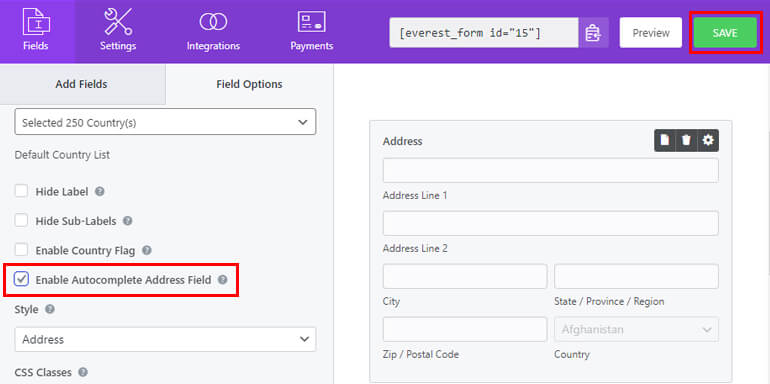
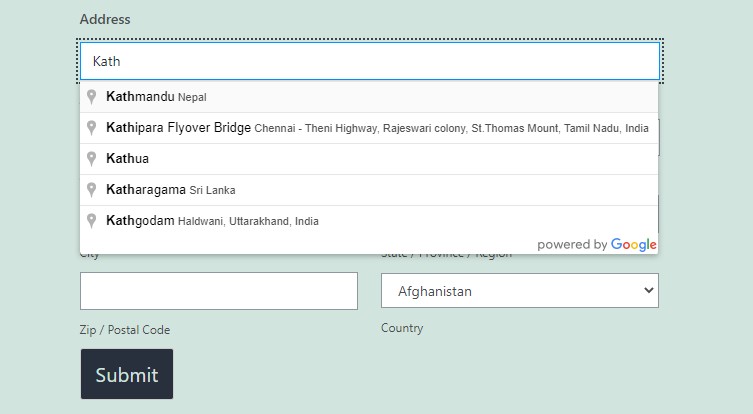
Most importantly, you can enable the address autocomplete feature by just ticking the checkbox.
Hit the Save button, and your Address field will automatically suggest places to users filling out the form.
If you want to display Google Maps instead of text address, you can choose Maps from the Style dropdown. Select Address With Map to show both.
We have an article on adding Google Maps to your form. So, check that out if you’re interested.
Step 7: Display the Address Autocomplete WordPress Form on Your Site
Congratulations! You’re on the final step of this tutorial!
Since the address autocomplete WordPress form is ready, you must add it to your website’s front end.
Everest Forms lets you do that in a few simple steps.
Start by opening the page or post where you want to add the WordPress form.
Once you’re in the Gutenberg editor, select the block inserter (+) button.

Search for the Everest Forms block and add it to the page/post by clicking on it.
Next, choose the form with the address autocomplete field from the dropdown. This automatically adds the form to the page/post.
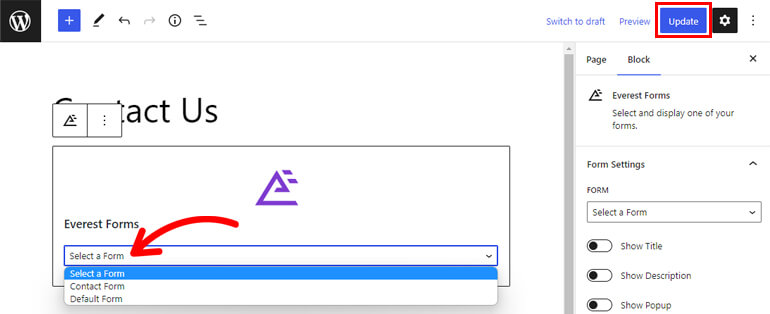
Finally, hit the Update button at the top.
You can also add the form to an entirely new page/post. Just follow the same steps and press the Publish button at the end. And you’re done!
The address autocomplete WordPress form is now accessible from the front end to your users.
Wrapping Up
As you can tell by now, building a WordPress Google address autocomplete form is super easy. Especially when you have the Everest Forms plugin at hand.
This incredible plugin lets you connect your forms to the Google Console quickly. So, your users can easily fill the Address field using the autocomplete feature.
But did you know? Everest Forms has so much more to offer.
You can use it to customize email templates, schedule form submissions, auto-populate form fields, and more.
Read all about this plugin on our blog. Check out our YouTube channel for easy video tutorials if you’re a visual learner.
Also, follow on Twitter and Facebook for updates on weekly posts.


![Zakra 3.0 | Zakra Pro 2.0 Release [Major Updates!]](https://i.ytimg.com/vi/g3rifl7kWvg/maxresdefault.jpg)