You can customize your WordPress emails with Everest Forms for quick and easy email template editing. Wondering how?
Well, Everest Forms enables you to create and customize multiple email templates for your WordPress forms. You can design the email templates any way you want. Then, send them to admins or users after a successful form submission.
It’s super simple, as you’ll learn in this tutorial.
But before we start the tutorial, let’s understand why Everest Forms should be your first choice for customizing email templates in WordPress.
Table of Contents
Why Use Everest Forms to Customize Email Templates in WordPress?
In this article, you’ll learn how to use Everest Forms to customize your WordPress emails.
But why use Everest Forms specifically when there are other methods of editing an email template?
Well, these are some of the key reasons that make Everest Forms the best way to customize email templates:
- You can change the font, color, and layout of the email template without the need for coding.
- Everest Forms lets you customize each template live where you can view the changes in real-time.
- You can build as many email templates as you need for your site.
- You can choose specific email templates for individual forms on your website. So, users and admin will receive the designated email notification after successful form submission.
That’s why Everest Forms is the best choice for customizing email template style for your forms in WordPress.
With that said, let’s start our step-by-step guide on how to customize your WordPress emails with Everest Forms.
How to Customize Your WordPress Emails with Everest Forms?
With Everest Forms, customizing WordPress emails for your forms is super easy! Just follow the steps we’ve explained below accurately.
1. Install and Activate Everest Forms and Everest Forms Pro
The first thing, as always, is installing and activating the Everest Forms plugin.
The email template customization feature is available only in the pro version. That’s because the Email Templates add-on is a premium feature that’s accessible with the Agency or Professional plan.
Thus, you need to buy either of these plans. Then, install both the free and premium versions of the plugin on your website.
If you need help with the installation, refer to our guide on how to properly set up Everest Forms Pro.
Once the setup is complete, move on to the next step.
2. Install and Activate the Email Templates Add-on
Installing Everest Forms Pro is not enough. You must also install and activate the Email Templates add-on.
You’ll find this add-on in the Add-ons page under Everest Forms.

Press the Install Addon button and then Activate it.
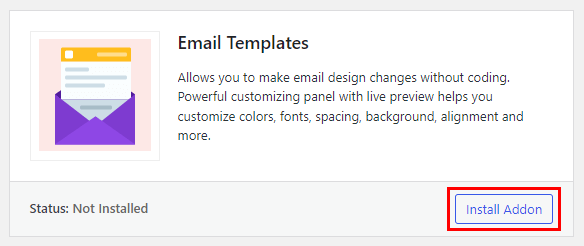
This will add an Email Templates page to the Everest Forms menu.
3. Create a New WordPress Form
Next, let’s build a new WordPress form using Everest Forms. When a user submits this form, the admin and the user will receive the designated email notifications.
Everest Forms already has a default contact form in the All Forms page. So, you can use this instead of creating a new form from scratch.
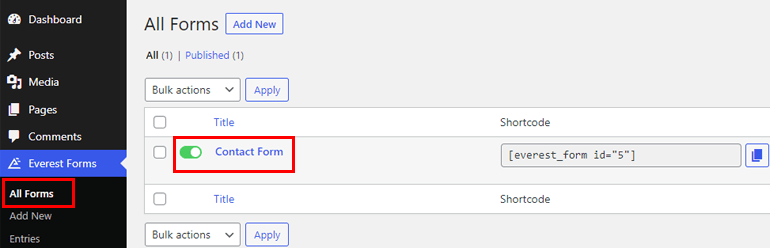
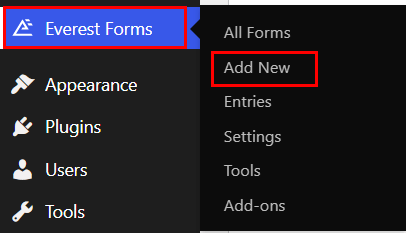
Otherwise, open Everest Forms >> Add New.
You can select one of the pre-built templates from Everest Forms. Thus, you can build any WordPress form you need without any hassle. Survey forms, job application forms, leave request forms, you name it!

For this tutorial, we’ll guide you through the process of creating a simple contact form from scratch.
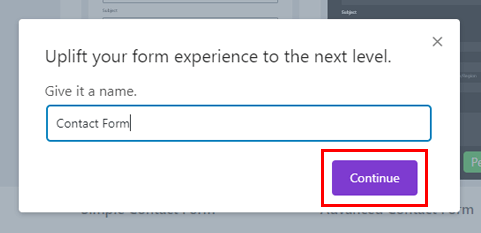
Hence, click on Start from Scratch and give your form a name. Then, click Continue.
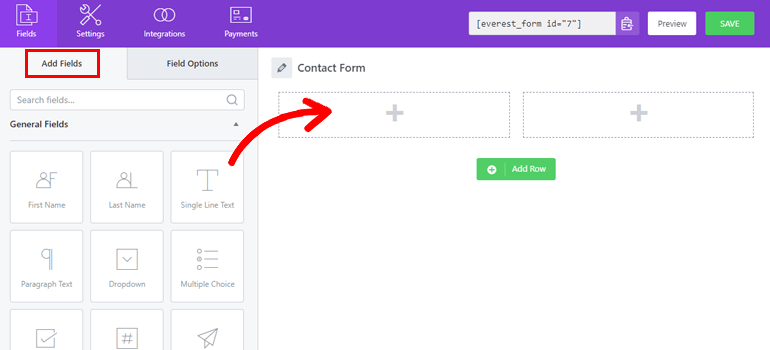
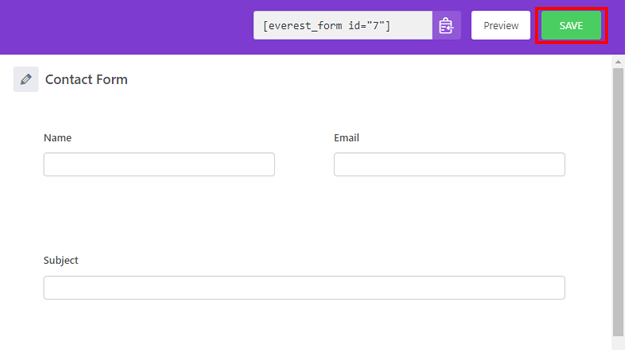
In the form builder, you’ll see that the right side has all the form fields. Just drag and drop them into the form on the right.
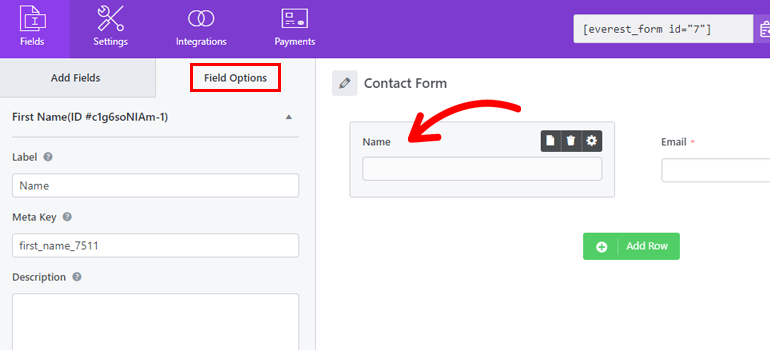
After adding all the form fields, you can customize each form field from the Field Options.
When the form building is complete, hit the Save button at the top.
For a detailed guide, refer to our article on how to create a contact form in WordPress.
4. Customize the Email Template
The key step of this tutorial is customizing the email template for the form you’ve created above.
To do this, go to Everest Forms >> Email Templates. The page is empty right now since you haven’t created a new email template.
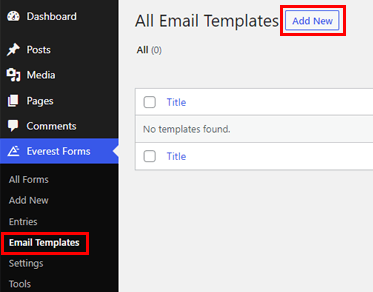
Thus, click on Add New at the top. You’ll arrive at the Add New Email Templates page. Everest Forms offers 5 beautiful pre-designed templates for you.
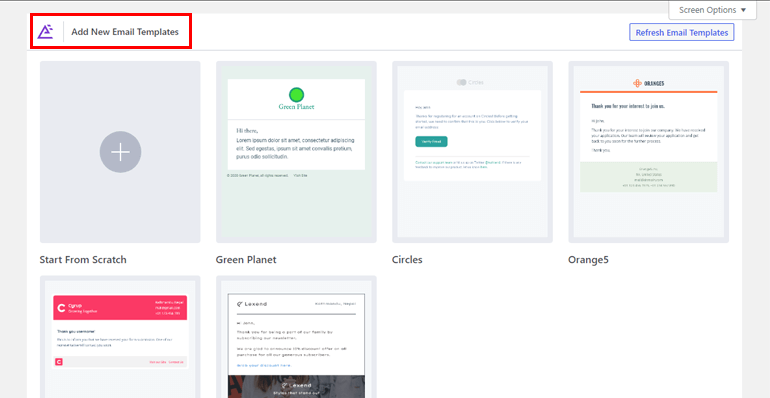
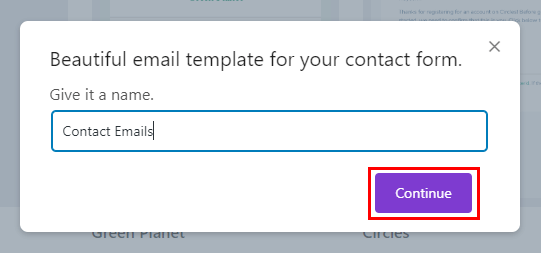
You can simply click on the template you like and give it a name to get started. This takes you to the live editor.
You can see the customization options on the left and the template on the right. All the changes you make will be visible immediately on the template.
Thus, the customization process is simple and fun!
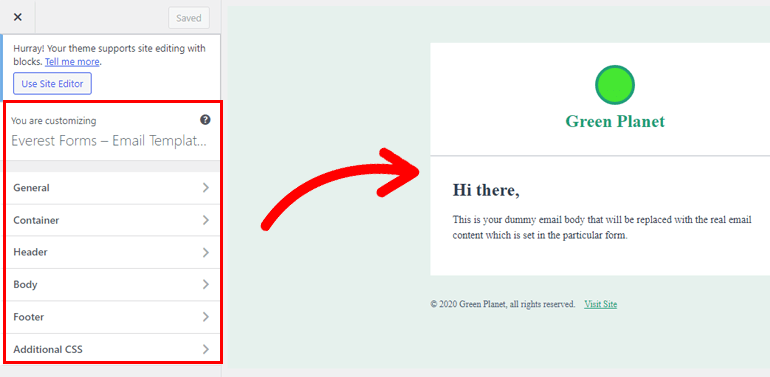
The live editor lets you edit every part of the template, from the header to the footer. Let’s look at the customization options briefly:
- General: This section allows you to change the general Typography and Colors of the headings and text.
- Container: The Container options lets you style the Inside and the Outside of the email container. You can edit the background image, border type, spacing, and more.
- Header: The Header section has three options: Logo, Content, Layout and Styling. You can edit the logo in the header, add text content, and play with the header layouts and style.
- Body: Here, you’re able to change the typography, colors, and styling of your main email body.
- Footer: This section allows you to customize both the Primary Footer and the Footer Copyright. You can change the logo, content, background color, alignment, etc.
- Additional CSS: The additional CSS feature lets you to add CSS classes to customize the email template. This is optional and only relevant for people with coding skills.
Besides the templates, you can Start from Scratch and build a custom template using all the customization options.
So, build and customize as many templates as you need for your emails with the live editor. After you’re done, proceed to the next step.
5. Configure the Email Settings and Select an Email Template
Next, you must configure the email settings for the form notifications. This includes selecting an email template among the ones you’ve created above.
You can do so from Email under the Settings tab. Make sure that the Email option is toggled on at the top.
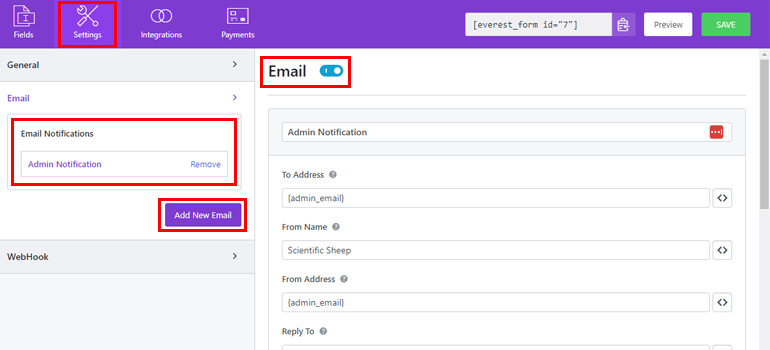
Everest Forms already has an admin email notification ready for you to use. Otherwise, you can create an entirely new email notification with the Add New Email button.
When you click on it, a popup asks you to give the email a nickname.
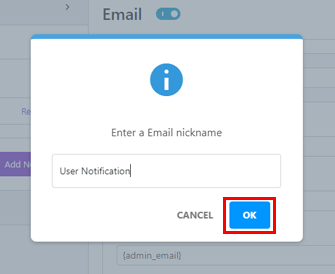
Choose a name that makes the purpose of the email clear. It’s helpful since you’ll be creating several email notifications. And you don’t want to confuse one with another.
For instance, you can name the email “User Notification” and press OK.
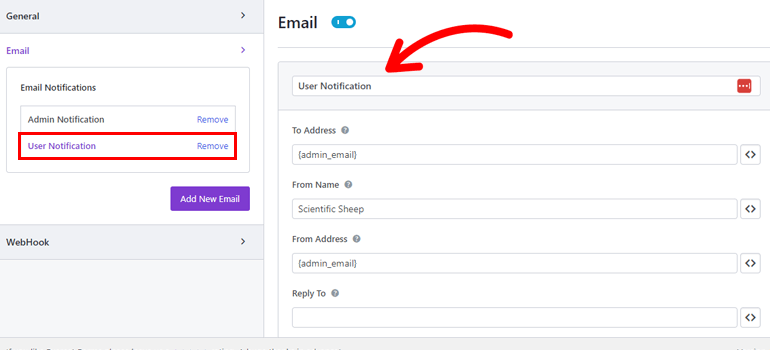
Now, you have an admin email and a user email notification. You can configure both of them as required.
Therefore, if you want to configure the user email, click on User Notification. This opens all the parts of the email you can configure on the right.
- Email Nickname: You can edit the name of the email from here.
- To Address: Provide the email address of the person receiving the email notification with the smart tag <> button. In this case, the recipient is the user who submits the form.
- From Name: Next, enter the name you want to display in the email. You can enter your company’s name or choose a smart tag from the available options.
- From Address: This address is where the email notifications are being sent from. So, it’s usually the admin email. You can always change it using the <> button.
- Reply To: Here, enter the email address where you want to receive the user’s replies. It can be the site admin email or a different one. It’s up to you.
- Email Subject: Type in the subject of the email here, such as “New Form Entry.” You can also add smart tags to the subject for information about the entry.
- Email Message: This is the main email body. Customize it to explain what the email is about and display the necessary information using smart tags.
- Send File as Attachment: If you enable this option, the plugin will send the form submission file as an attachment in the email.
- Choose Email Template: Choose a suitable email template for the email notifications. From the dropdown, you can select any of the templates you’ve created and customized above.
- Enable Conditional Logic: You can also enable the conditional logic to apply advanced conditional rules to the email notifications.
And that’s it! When the editing is complete, hit the Save button. You can add as many email notifications as you need to the form!
So, as soon as a user submits the form, the email notifications will reach their recipients accordingly.
Besides email, you also get General settings under the Settings tab.
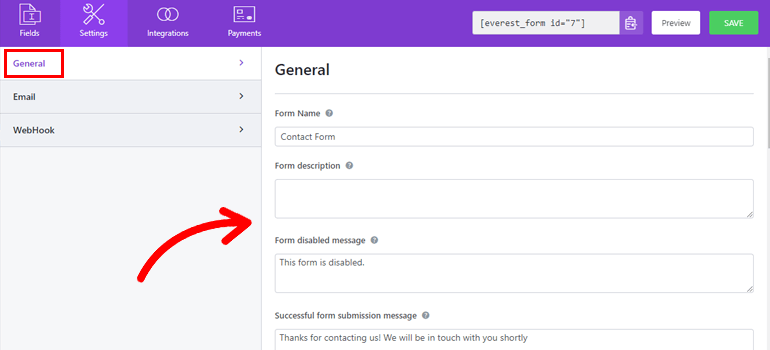
You can change the form name, description, form disable message, submit button text, etc. You can also set custom redirection, layout design, and form class.
Furthermore, the plugin lets you enable anti-spam honeypot, AJAX form submission, and more.
Moreover, you can send the form data to any external URL with the WebHook settings.
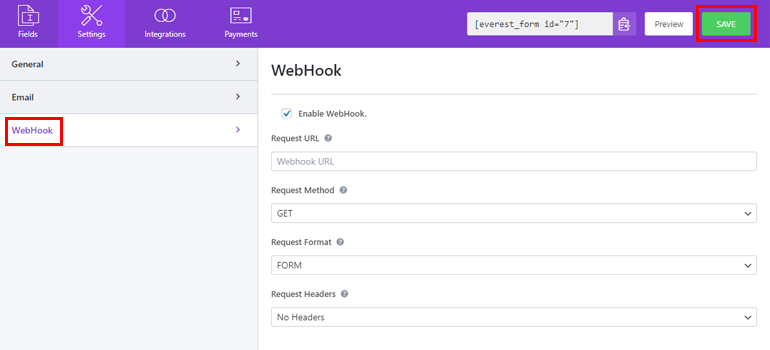
After configuring all the form options, hit the Save button to update all the changes.
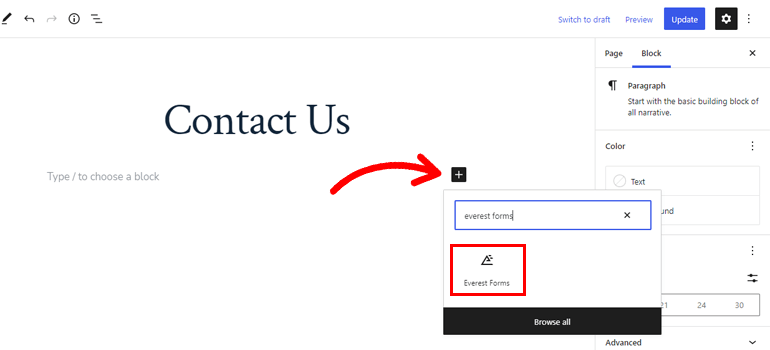
6. Add the Form to Your Website
Now that your form’s ready and you’ve customized its email templates, it’s time to publish it on your website.
To do that, open the page or post where you want to add the form. Using the block inserter, add the Everest Forms block to the page or post.
Next, select the form you’ve created above from the dropdown and hit Update.
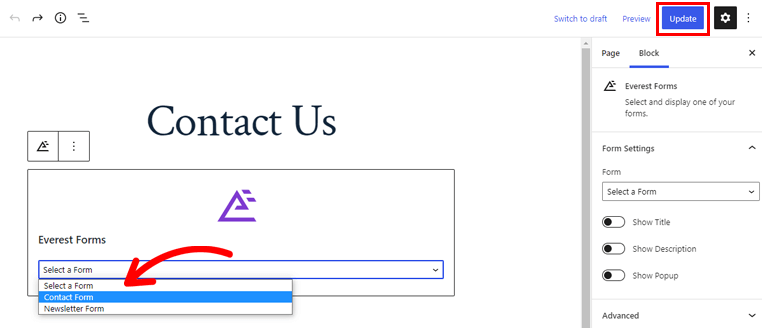
You can also create a new page or post instead of adding the form to an existing one. Then, add the form using the same method as above and Publish the page.
And you’re done! You’ve successfully created a WordPress form and customized its email template style.
With the form now displayed on your website, users can fill and submit the form. This action will send email notifications with the custom design to the users and admin.
Wrapping Up
Everest Forms lets you quickly customize your WordPress emails without relying on coding.
You can edit the email header, footer, body, container, and more with a live customizer. That’s why Everest Forms is the best way to customize your WordPress emails.
The premium version of Everest Forms offers more features for you to explore. For example, you can accept iDEAL payments, upload files to Dropbox, convert form submissions to PDF, and more.
Try Everest Forms for yourself and equip your website with the right tools.
If you’re interested, our blog has more articles you can read to learn about Everest Forms. We also have a YouTube channel with complete Everest Forms tutorials for you.
Lastly, follow us on Twitter and Facebook to stay updated.


![Zakra 3.0 | Zakra Pro 2.0 Release [Major Updates!]](https://i.ytimg.com/vi/g3rifl7kWvg/maxresdefault.jpg)