Online surveys are the best way to gather these user feedbacks on your site. Whether it’s your customers or employees, you need to collect the feedback towards your products and services. If you are wondering how to add a WordPress survey on your site then, Don’t Worry!
In this tutorial, you’ll learn how to create a WordPress survey form easily with the help of a WordPress survey plugin. But, before that, you might want to learn the advantages of adding a WordPress Survey on your site.
Table of Contents
Why Create a WordPress Survey Form?
- Saves time and resources: Adding a WordPress Survey to your site saves your time and effort as you can gather the data and information form users in one place without personal communication
- Convenient for users: As the users can give their feedback at the frontend, they don’t have to go through the trouble sending emails.
- Increases reach: It is easier for the website owners to collect feedback from a large number of users as the survey form is easily accessible on the site.
- Evaluate results: The WordPress survey plugins allow you to see the survey reports on the admin panel so, you can evaluate them effortlessly.
Now, you can start creating a WordPress survey form. Just follow the easy steps below.
STEP 1: Install Everest Forms
First and foremost, you need to install the Everest Forms plugin and the Survey, Polls and Quiz add-on on your site.

Everest Forms is one of the best WordPress survey plugins available. It has a user-friendly interface with an easy drag-and-drop form builder. Therefore, even beginners have no trouble creating a WordPress survey form. It’s Survey, Polls and Quiz add-on allows you to create unlimited surveys, polls, and quizzes. You can use the form fields such as Single Line Text, Multiple Choice, Checkboxes, etc. for the survey questions. And, it provides three major survey fields such as Rating, Likert and Scale Rating for professional surveys. Also, you can view and analyze the results of the survey easily with graphical reports.
For details on the prices, you can check out the Plans and Pricing page and choose the best plan for you.
STEP 2: Create a New Form
After you install both the Everest forms plugin and Survey, Polls and Quiz add-on, you can start creating your WordPress survey form. For this, go to Everest Forms → Add New. Then, you need to name the form and select a form template.
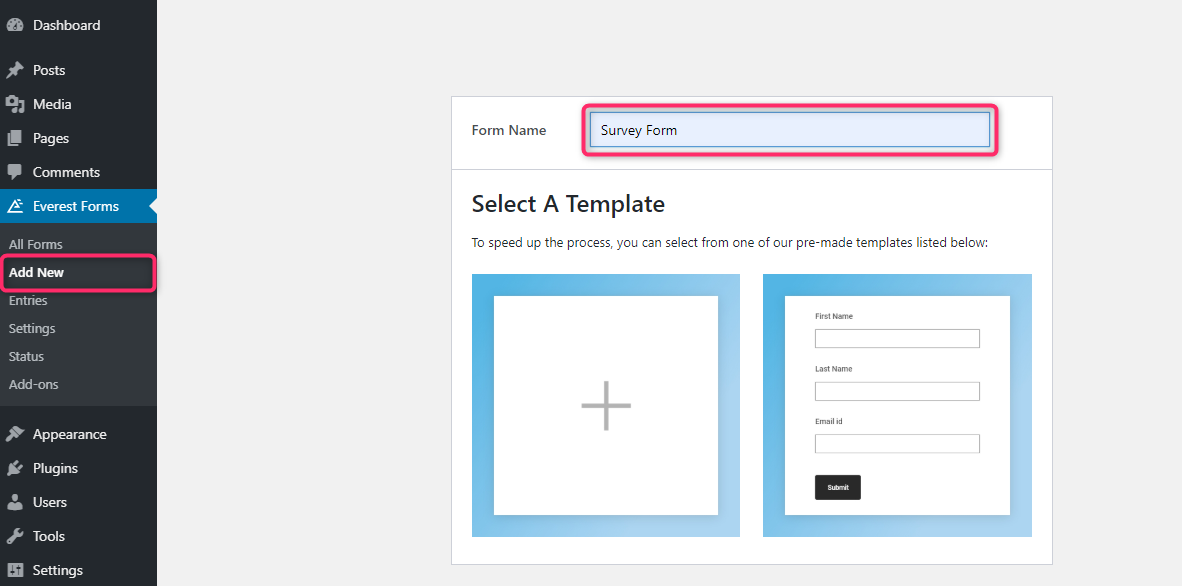
Now, you can see the form builder interface where you can simply drag and drop the required fields to the form. Here, you can insert the required form fields such as Name and Email field so that you have the basic information of the users.
STEP 3: Enable the Survey Reporting
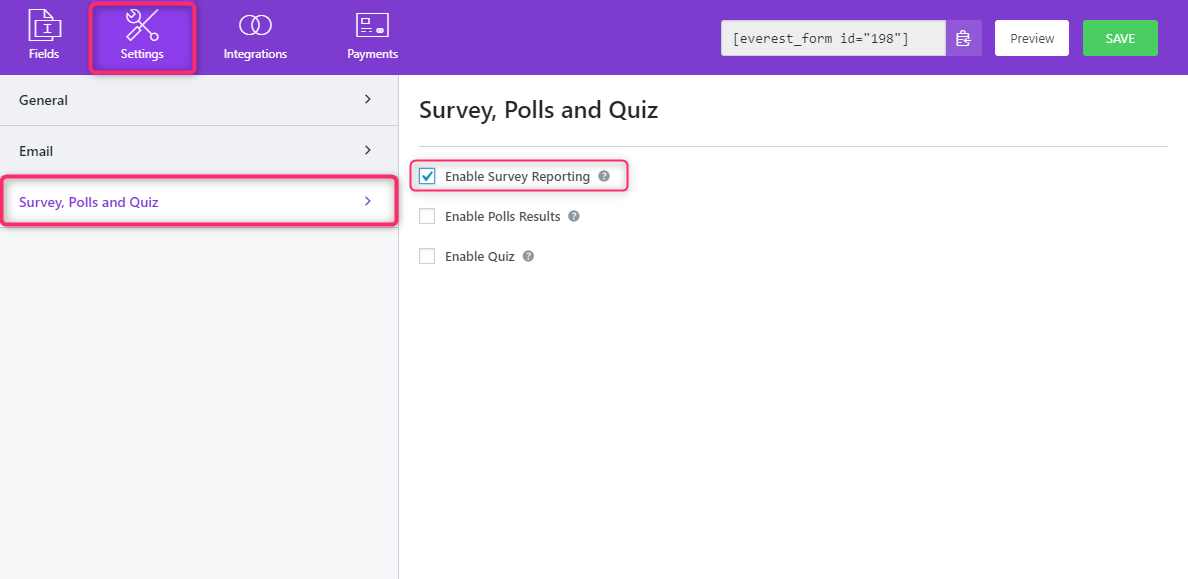
Next, you need to enable the Survey, Polls and Quiz option. So, go to the Settings tab and click on Survey, Polls and Quiz option.
Here, you can see three options for Survey, Polls, and Quiz. Check the Enable Survey Reporting option which allows survey reporting on all the supported form fields.
STEP 4: Choose Survey Fields
Now, you can head over to the Form Builder and add the fields that are required for your WordPress survey form.
First, you can use the General Form Fields such as Checkboxes, Multiple Choices, Dropdown for survey questions with more than one choice. So, you can see the survey reports for these fields too.

Survey Fields
With the Installation of Everest Forms Survey, Polls and Quiz add-on, the Survey Fields are added to the form builder. It includes three fields designated for surveys. They are:
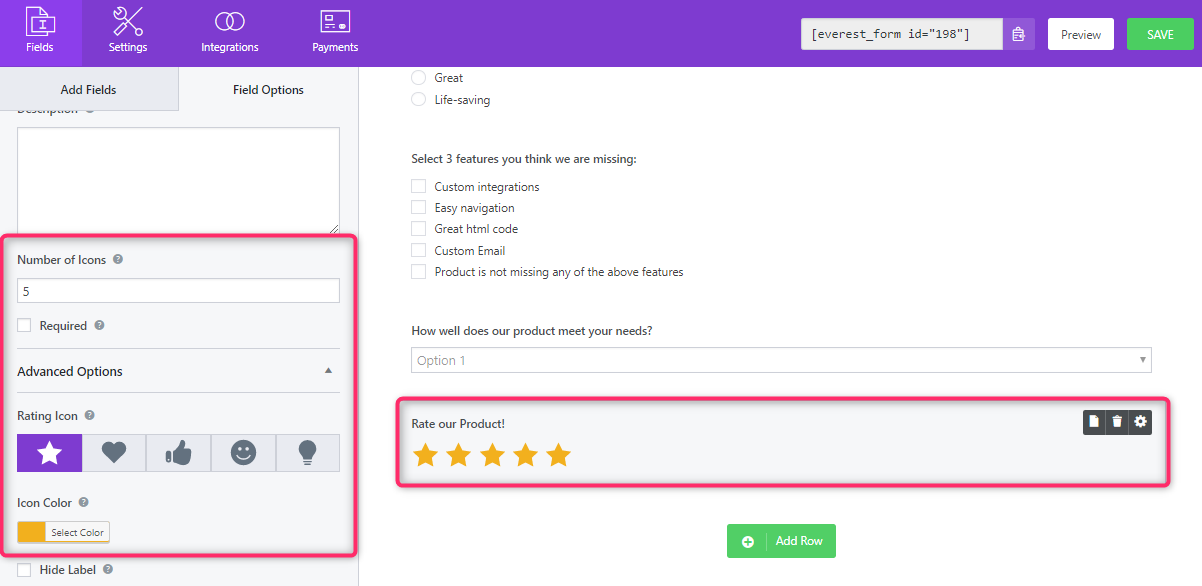
I. Rating
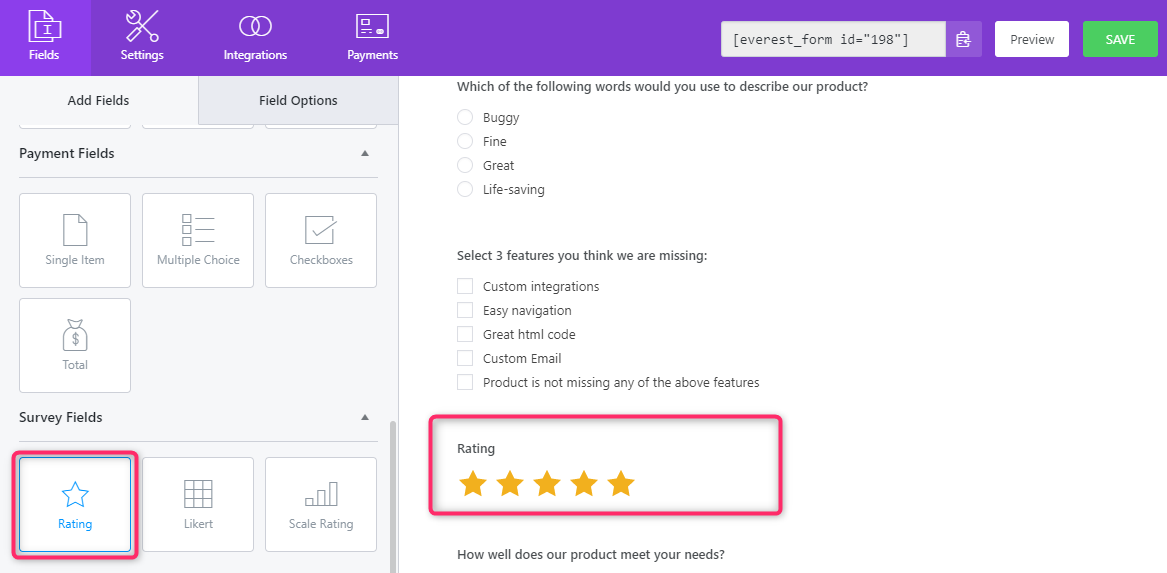
The Rating field allows users to respond on a visual scale. The default icon is Star but, you can change to Thumbs, Smiles or Hearts by clicking on the field. In the Field Options, you can change the Label, Description. Also, you can customize the rating field as your requirements by the additional options.
- Number of Icons: You can enter the number for the icons to be displayed in the rating.
- Rating Icon: This option allows you can choose a rating icon other than Star. There are five options to choose from.
- Icon Color: Also, you can change the color of the rating icon according to your liking.
II. Scale Rating
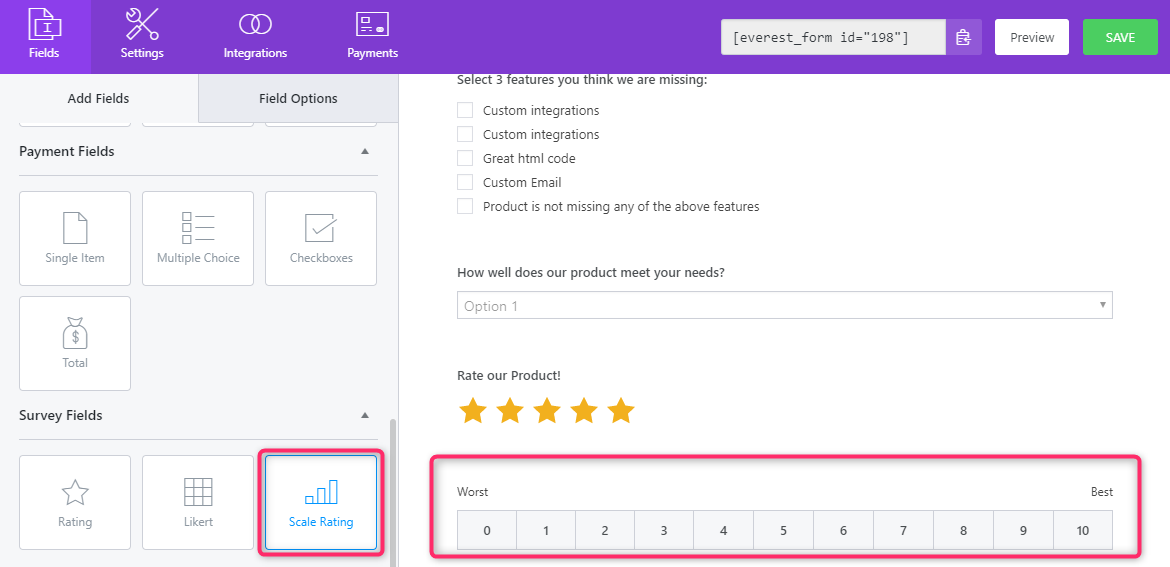
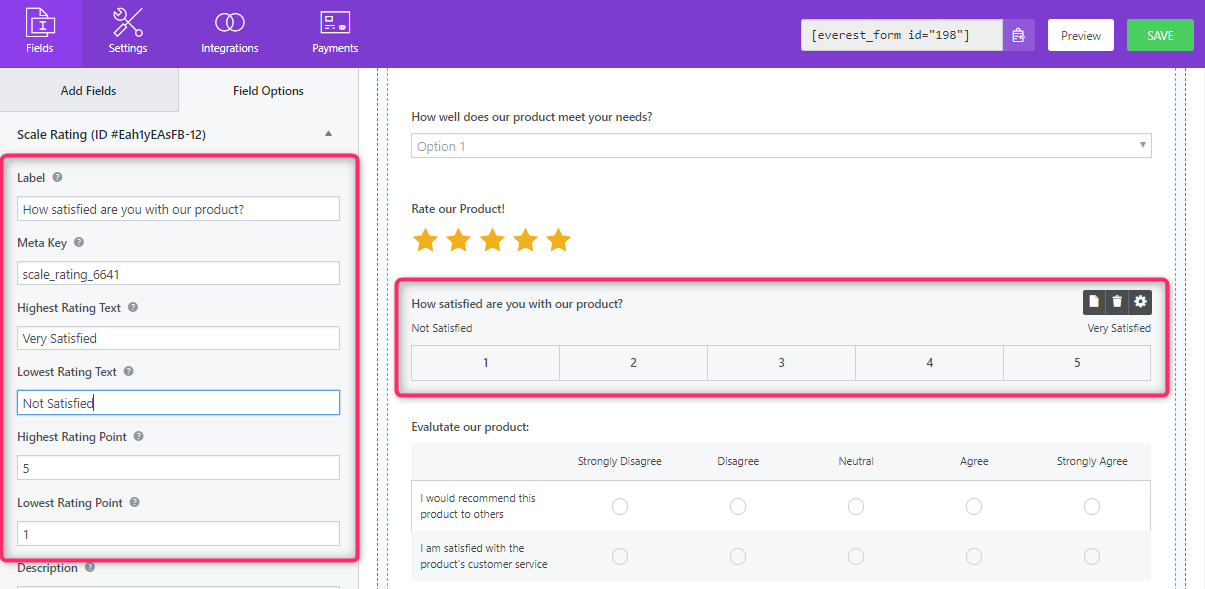
The Scale Rating Field allows users to respond in points on a scale for 5 or more. You can change the highest and the lowest rating points in the Field options. In the Field Options, you will find these options to customize the Scale Rating Field other than Label and Description.
- Highest Rating Text: This is the label for the highest rating point on the scale. The default text is Best but, you can change it to your liking.
- Lowest Rating Text: This is the label for the lowest rating point on the scale. The default text is Worst but, you can change it to your liking.
- Highest Rating Point: You can change the value for the highest rating point in the Scale.
- Lowest Rating Point: You can change the value for the lowest rating point in the Scale.
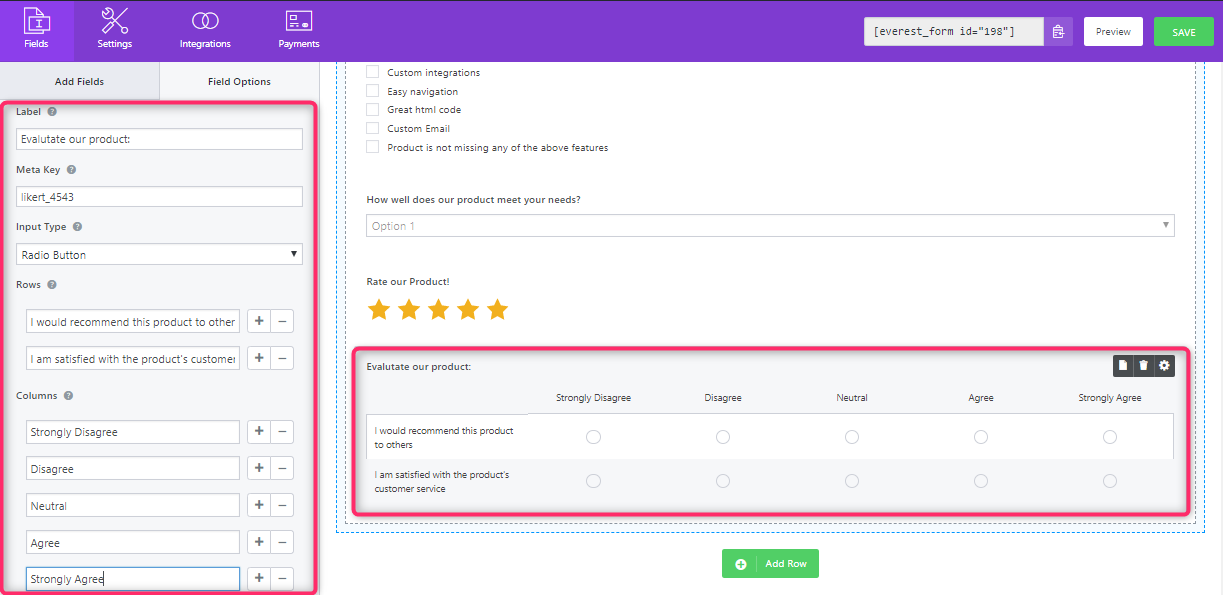
III. Likert
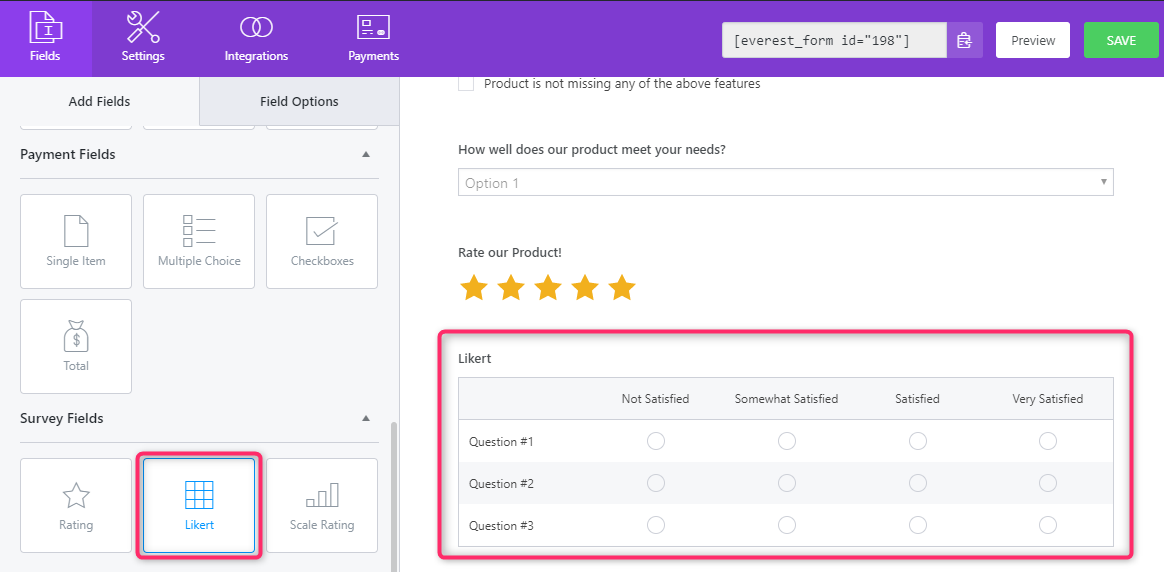
The Likert field allows users to choose a response to a series of questions. You can add as many questions and responses on the Likert scale. To add Questions and Responses, go to Field Options. Then, add the questions in Rows and their responses in Columns.
After you’re done adding survey questions, don’t forget to click on the SAVE button. Also, you can Preview the form to see if there are any mistakes or problems in the survey form.
STEP 5: Display the WordPress Survey Form
To add the Survey form on any WordPress post or page, you can simply copy-paste the Shortcode provided at the top of the form builder to the editor.

Or, you can insert the Everest Forms block on the text editor and select the for WordPress survey form that you created.
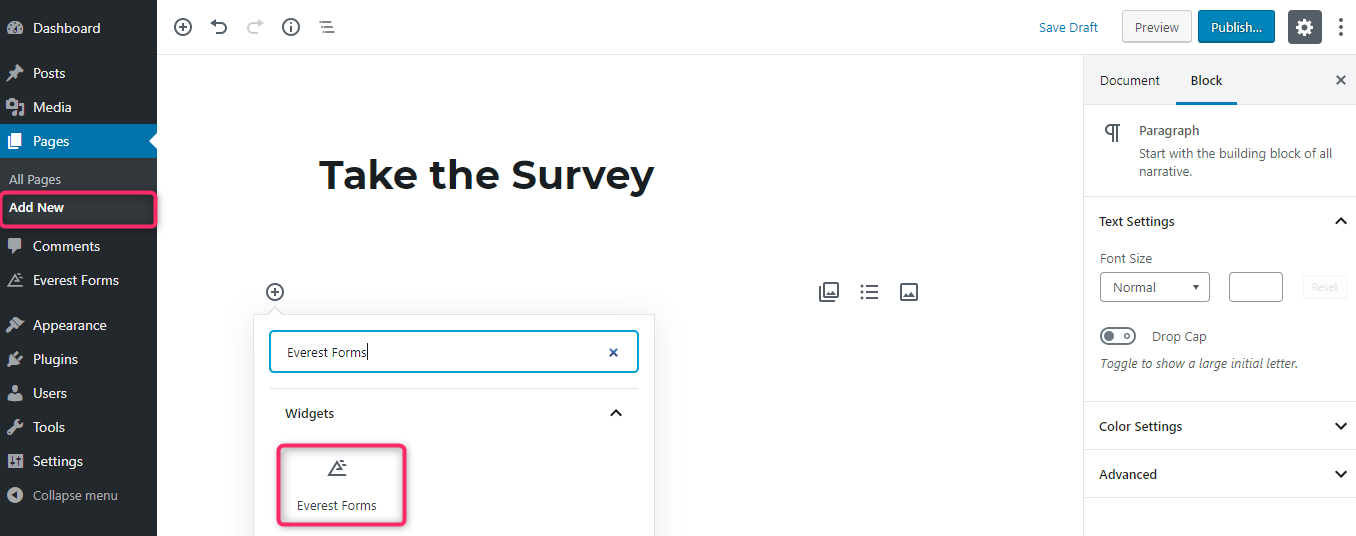
You can see the form preview in the text editor as well. Also, you have the options to show the form title and description. After that, you can publish the page or post on your site.
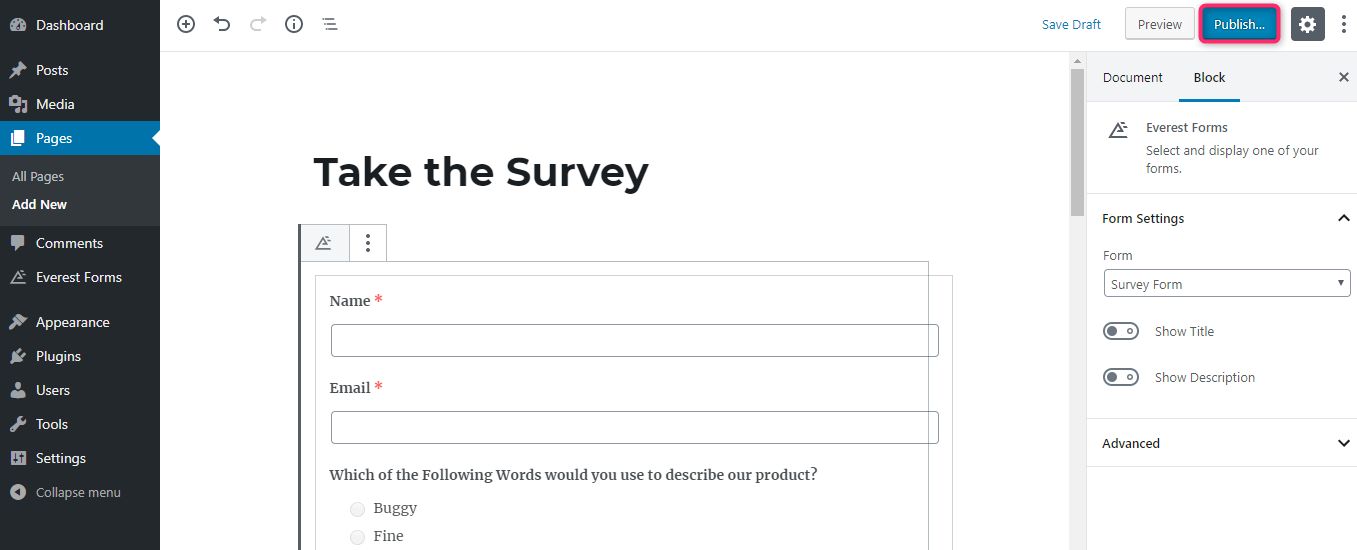
And, you’re done! The WordPress survey form will look something like this.

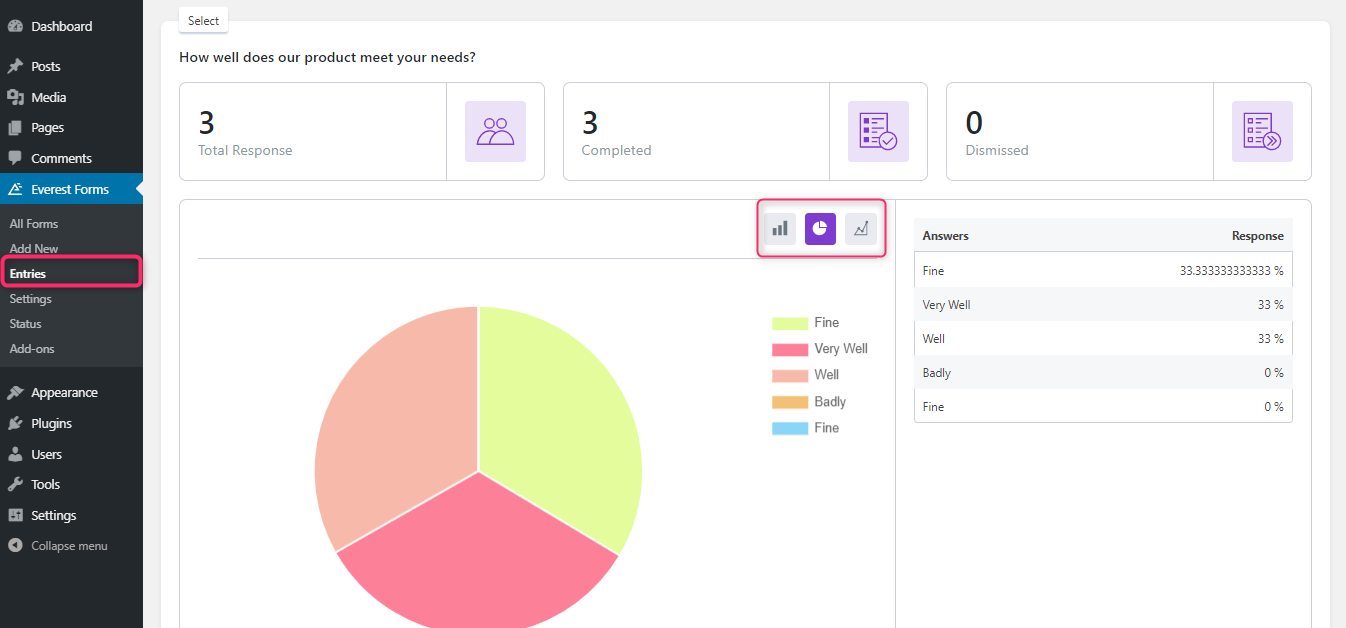
STEP 6: Analyze Survey Reports
After you add the survey form on your site, you need to analyze the results. And, Everest Forms allows you to view the graphical reports of the survey forms. For this, you can go to the Entries tab and select the survey form you created. Here, you can either view the individual survey question results or the View All Summary of the survey.
Summing it Up:
Hence, you can easily create a survey form using Everest Forms to gather user feedback. Add as many questions to your survey as the plugin allows you to customize the form to the fullest. Not to forget, the three major survey fields that you can use to create a professional survey form.
Moreover, you can view the graphical reports of the survey results instantly on the dashboard. So, just follow this step by step guide and create an awesome WordPress survey form for your site.
Finally, you can share the article if you found it helpful and stay tuned for more tutorials like this.


![Zakra 3.0 | Zakra Pro 2.0 Release [Major Updates!]](https://i.ytimg.com/vi/g3rifl7kWvg/maxresdefault.jpg)