If you want a thriving community of genuine users on your website, you must enable user registration in WordPress.
After all, users are a vital aspect of any successful WordPress website. And the best way to encourage your audience to join your community is to allow them to register through the frontend.
The good news is that WordPress provides a default membership feature that lets you allow user registration. We’ll show you how to use this feature as we progress through this article.
For now, let’s understand why enabling user registration is so crucial for a WordPress website.
Table of Contents
Why Enable User Registration in WordPress?
If you’re familiar with the user management system in WordPress, you’re probably aware that the site admin can easily create a new user from the dashboard. All the admin needs to do is enter the user details and create the new user.
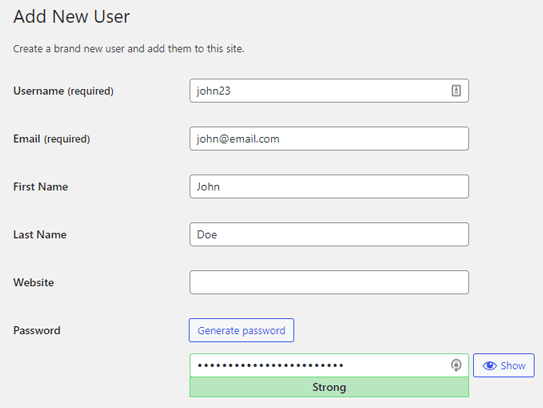
Sounds simple right? But, this is only feasible when the website has a handful of users. An admin possibly can’t create thousands of users in such a manner.
That’s why allowing users to register themselves through your WordPress site’s frontend is so important.
Once you enable user registration in WordPress, your users will be able to fill in their personal information into a registration form and submit it to register themselves. A new user is automatically created, and their data is saved on your website.
It cuts down the unnecessary work on the admin’s part while also making the user management process more convenient.
Not only that, you can ask for any extra information you need from your users through a custom registration form.
If you’re interested in learning how, do read ahead! We’ve prepared a step-by-step guide to how you can enable user registration in WordPress. Plus, you’ll also learn to create a custom registration form through which your users will register.
How to Enable User Registration in WordPress?
Allowing user registration for your WordPress website is easier than you can imagine. We’ve made it simpler with this easy-to-understand tutorial below.
So, go through each step and follow along to enable user registration quickly!
1. Allow Users to Register on Your Website
Before anything else, you’ll need to log into your WordPress website as an admin. Once you access the WordPress dashboard, navigate to Settings >> General.
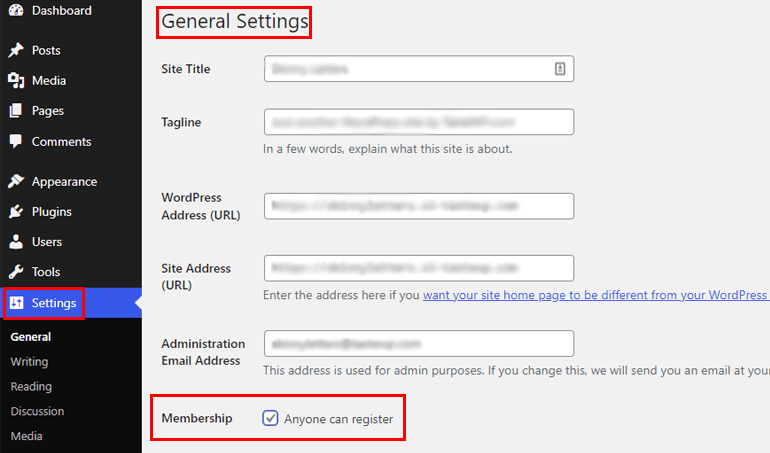
Here, you can see the Membership option that’s turned off by default. This means that users can’t register themselves on your site yet. Only the admin has the power to create a new user from the backend.
Simply tick the checkbox next to the Anyone can register option and click the Save Changes button at the end of the WordPress Settings page. Now, your users can easily register through a frontend registration form.
But what about the registration form you’re going to use on your site? Well, WordPress already comes with a default registration form that you can use. However, it comes with limited form fields and functionalities, which can only be customized through coding.
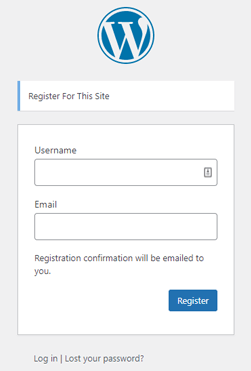
That’s why you’re better off creating a new custom registration form with custom fields instead. Learn how to do this in the next step!
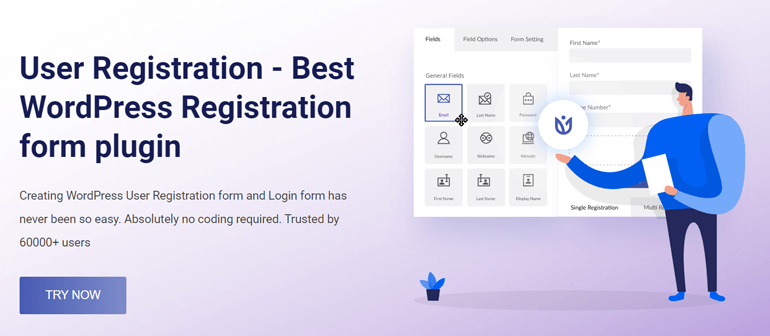
2. Install and Activate the User Registration Plugin
Our first choice when it comes to WordPress signup form building is the User Registration plugin, without a doubt. This beginner-friendly tool with a drag and drop form builder interface lets you create unlimited custom registration forms without a hitch.
On top of the smooth building experience, you also get smart user management tools. For instance, you can assign user roles through forms, restrict user access, monitor user registrations through a separate dashboard, etc.
Given all its top-notch features, we’ll use this popular plugin to create a custom registration form in this guide.
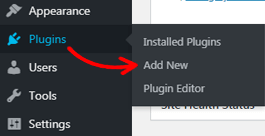
So, first of all, you’ll need to install and activate the plugin on your site. For that, open Plugins >> Add New in your WordPress dashboard.
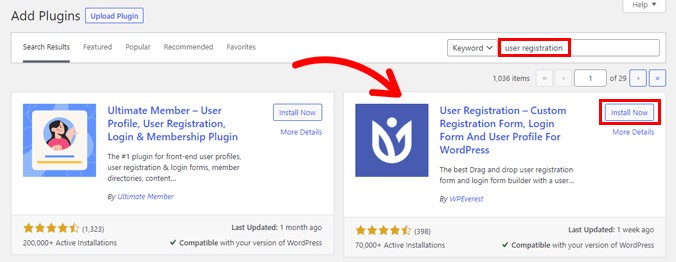
Search for the User Registration plugin in the search bar, and it’ll show up in the results. Now, click on the Install Now button to start the installation process.
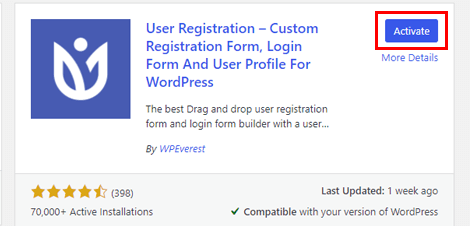
Make sure you also Activate the plugin once you install it.
Once the installation is complete, you’ll be greeted by a welcome page. From here, you can Get Started with the plugin setup or directly jump to the form builder by clicking on the Create a First Form button. Otherwise, press Skip to Dashboard to open your website’s admin dashboard.

For now, let’s look at the setup process. Simply press the Get Started button to start.
You’ll arrive at the Install Pages step first. The plugin automatically installs the in-built Default Registration Form on your website. Once you hit the Install & Proceed button, the Registration Page and My Account Page will be installed as well.
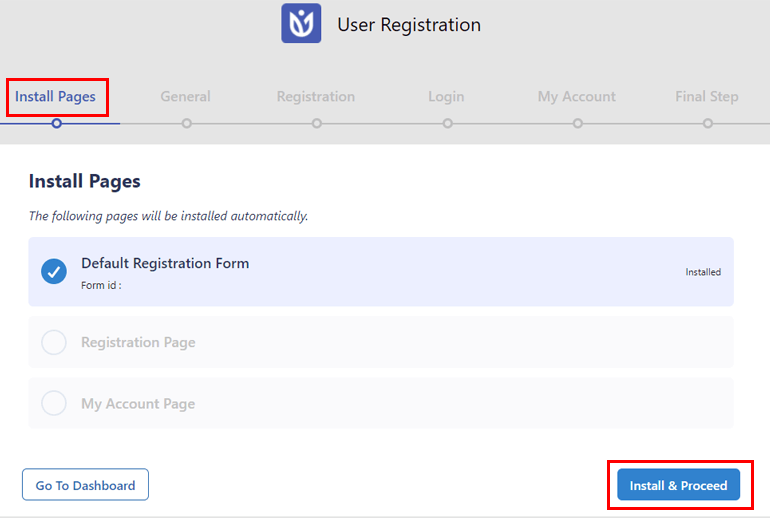
You can find the pages in the Pages tab of your dashboard. This means you won’t need to create a user profile page and registration page from scratch; you can use these sample pages instead.
After the installation is complete, click on Next to go to the General options. As you can see, the Anyone can register option is enabled by default. Keep this on to enable user registration for frontend forms you’ll create using User Registration.
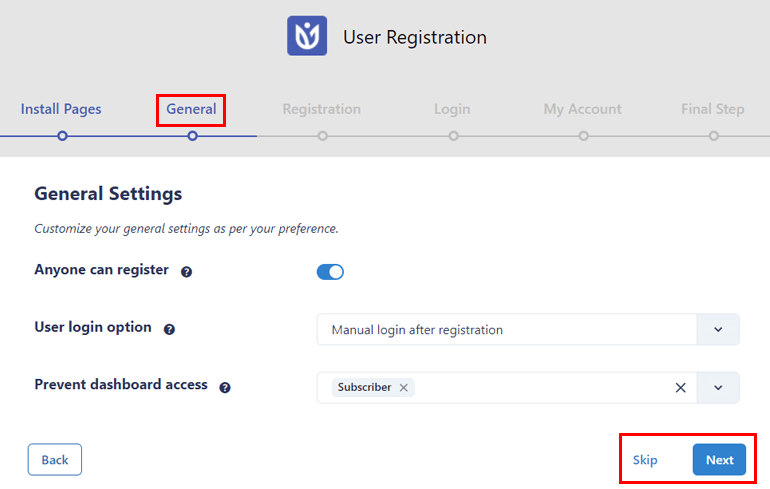
Once you’re done with the General options, click Next. Likewise, configure the remaining settings for Registration, Login, and My Account to move on to the Final Step.

From here, you can either go to the dashboard, edit the default form, or create a new form. We’ll learn how to create a new form in the following step.
3. Create a New Custom Registration Form
You’re now fully equipped to create a new custom user registration form. Just click the Create New Form in the Final Step of the setup process.

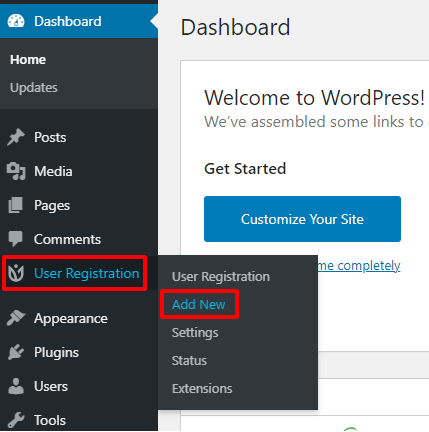
If you’ve already exited the setup page, you can open User Registration >> Add New.
This takes you to the form builder, which looks like this:
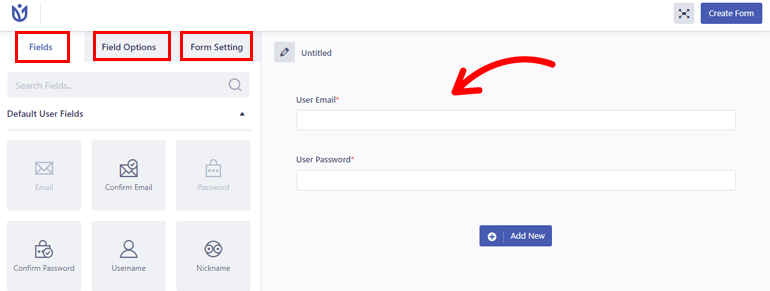
As you can see, all the available Fields, their Field Options, and the Form Setting are neatly placed on the left. While on the right, you’ll find the actual form with two fields: User Email and User Password.
Start by giving the form a name, say, Registration Form.
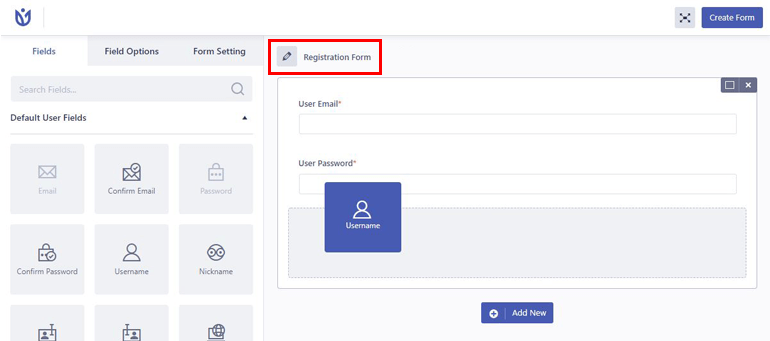
Now, all you have to do is drag and drop any field you need from the left into the form on the right.
In the free version, you can choose from the Default User Fields and Extra Fields. If you need more fields like Advanced Fields and WooCommerce Fields, you’ll have to buy the plugin’s premium version.
After adding the required fields, it’s time to customize them. Simply click on the field you want to edit, and its Field Options will open up on the left.
You’ll notice that the options are categorized into General and Advance as you scroll down. From General Settings, you can change the field Label, Placeholder, Description, and so on.
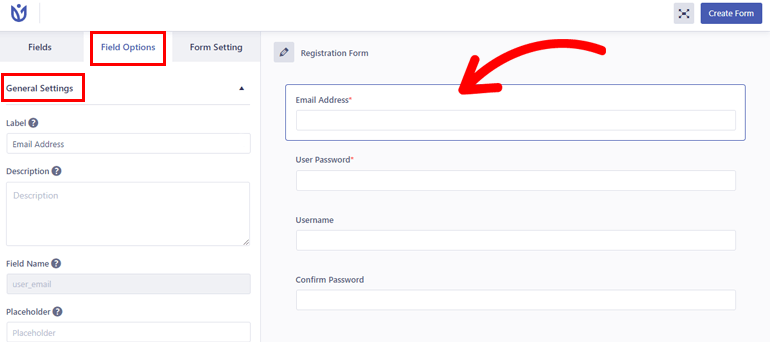
Likewise, the Advance Settings lets you add custom CSS to the field. Depending on the field, you’ll get more options, such as Limit Username Length for the Username field.

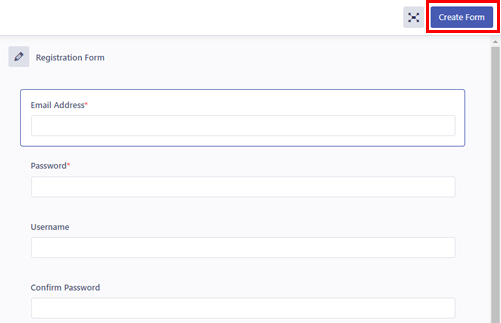
Continue editing all the fields and hit Create Form at the top of the form builder.
Now, you’ll see the form shortcode at top of the form builder along with the Preview button.
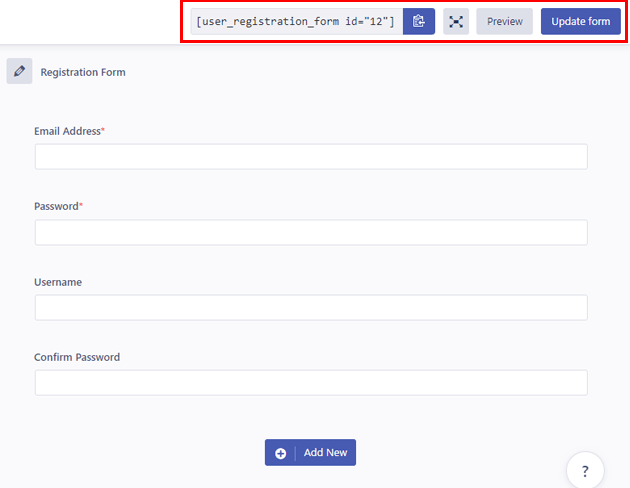
Likewise, you can always make more customizations and click on the Update form button to save the changes.
4. Configure the Registration Form Settings
Next up is the registration form settings configuration. You can set the settings for individual registration forms from the Form Setting tab of the form builder.
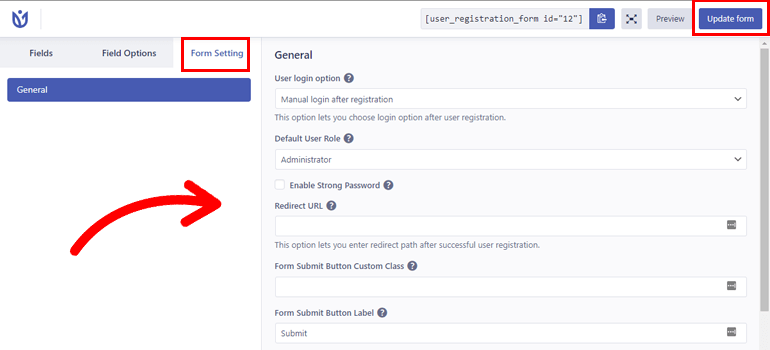
Here, you’ll be able to set a user login option, choose a default user role, and change form templates. Moreover, you can enable reCaptcha protection, change success message position, and set custom success message text.
After you’ve completed customizing your registration form completely, you can click on the Update form button as you did before.
And with that, the registration form is ready to be displayed on your website.
5. Place the Registration Form on Your Site
As we mentioned in the very beginning, enabling user registration in WordPress is not enough. It’s also essential to have a registration form ready on the frontend of your website to let users register themselves through the form.
We’ve already created the custom registration form in the previous steps. All that’s left to do is display the form on your website.
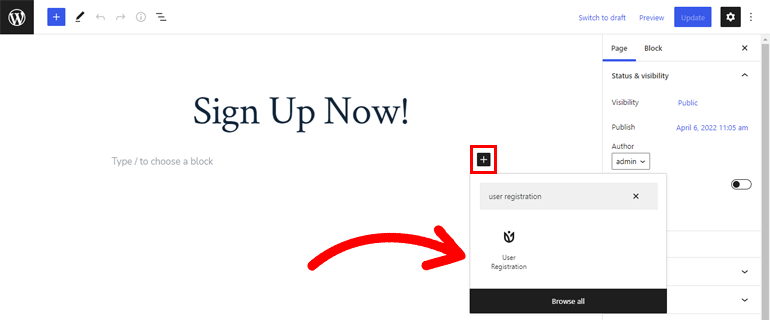
Simply open a page or post you want to display the form in, and you’ll be taken to the block editor. Here, click on the block inserter (+) and add a User Registration block.
Then, select the Registration Form radio button and choose the registration form you just created from the dropdown.
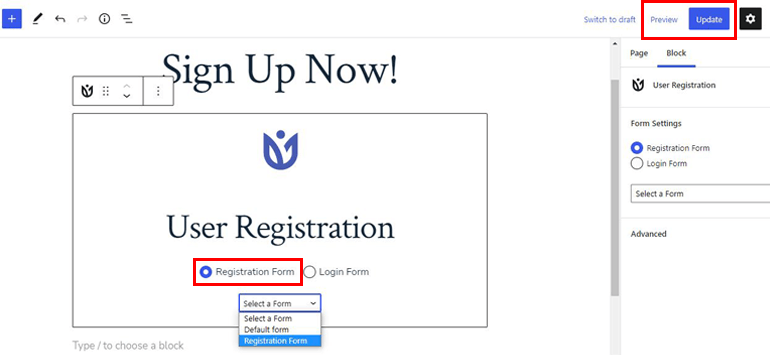
Finally, press Update on the top of the editor to save the form. You can even preview what the form looks like with the Preview button.
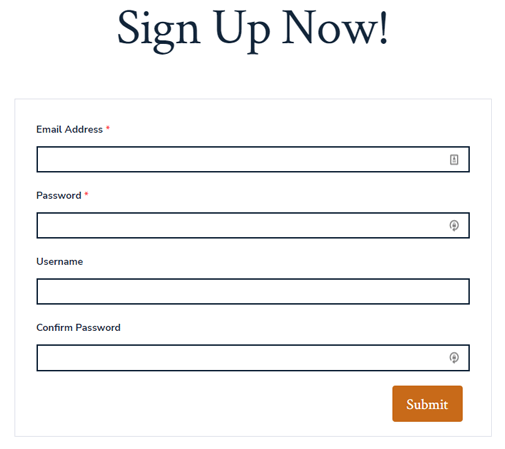
Now, this page or post will display the registration form in the frontend, through which users will be able to register.
Alternatively, you can add a shortcode block to the page or post instead of the User Registration block.
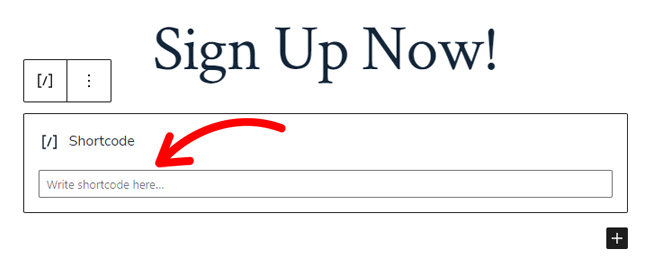
Then, copy the form shortcode from the User Registration tab and paste it into the Shortcode block.
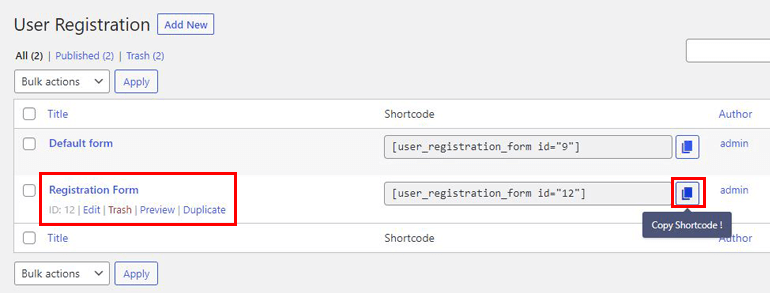
Your registration form will be visible on your website just the same.
Wrapping Up
It’s a wise idea to enable user registration on your WordPress website so that the admin doesn’t have to create new users from the dashboard.
It’s pretty simple with the default membership feature provided by WordPress. Combine this with User Registration’s custom frontend registration forms, and your users will be able to register themselves in no time.
However, that’s not all you can do with User Registration. The plugin lets you prevent core login and replace the default login form with a custom login form. Besides that, you can also enable strong passwords and turn on admin approval in registration forms.
And if you own a WooCommerce store, User Registration is fully equipped to create custom WooCommerce registration forms. So, give this plugin a try and take your website to a whole new level.
Also, visit our blog to read more articles on the User Registration plugin. And stay updated on new posts by following us on Facebook and Twitter.


![Zakra 3.0 | Zakra Pro 2.0 Release [Major Updates!]](https://i.ytimg.com/vi/g3rifl7kWvg/maxresdefault.jpg)