A small but critical step to creating a secure WordPress website is WordPress login page URL change. You must consider changing your website’s default WordPress login URL to a custom one.
If you don’t know how don’t worry. It’s pretty easy when you have plugins like User Registration and WPS Hide Login. We’ll take you through a step-by-step guide on how to change your WordPress login URL using these plugins.
Not sure what exactly the default login URL is and why you must change it? Let us start with a simple explanation below.
Table of Contents
What is the Default WordPress Login URL and Why Change It?
The default WordPress login URL is simply the designated URL for the admin login page in WordPress websites, following a standard format.
This means that you’ll find any WordPress website’s login URL if you type in this address in your browser’s search bar.
example.com/wp-admin or example.com/wp-login.php
Adding the wp-admin or wp-login pathway to the website’s main URL takes you to its WordPress login page.
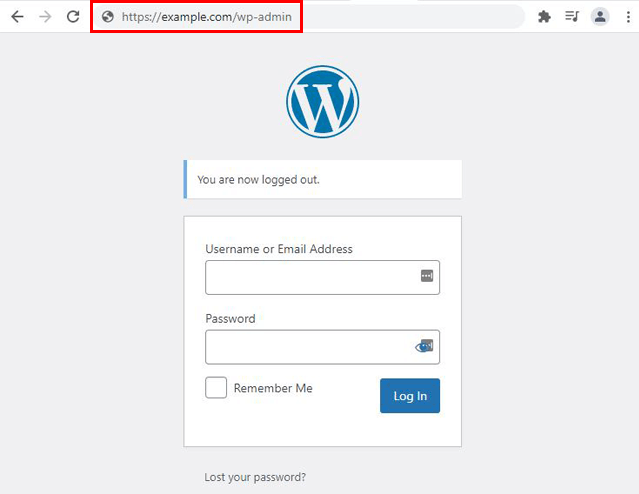
As you can see, it takes you just a few seconds to access any website’s login page through the default URL.
This begs the question – is it really safe to use the default login URL for your website? When it’s this easy for a random person to access the site login page?
Well, the good news is that you can avoid this by changing the default login URL to a custom URL. All you need to do is create a new URL and replace the default URL with the custom one.
Now, only the people who know this new URL will be able to find your site’s login page and log into the dashboard.
Although you’ll still need to implement extra login security measures, changing the default URL adds the first layer of protection against people trying to hack into your system.
The other important reason is to completely rebrand the login experience for your users. Having a custom login page for your website instead of the same old WordPress login page lets you provide a better login experience for users. And all this without having to customize the core login page through heavy coding.
That’s why it’s a wise idea to change the default URL to a custom login page URL. Let’s look at how you can do that in the next section.
How to Change Default WordPress Login URL to Custom URL?
WordPress login page URL change isn’t complicated at all, especially when you have incredible WordPress plugins at hand.
One such plugin is User Registration, which allows you to create a custom login page URL and replace the default URL.
An alternative method is to hide the default URL entirely and cover it with a new URL using the WPS Hide Login plugin. Anyone trying to access your login page through the default URL will be shown a 404 error.
We’ll go through both methods in detail so that you can implement the method that suits you best on your website. Let’s begin!
1. Create a Custom Login URL With the User Registration Plugin
We’ll first discuss creating a custom login URL with the User Registration plugin.
To provide a brief introduction, User Registration is one of the leading registration form builder plugins available in the WordPress marketplace.
It’s built with a user-friendly interface, thus, enabling users to create and customize registration forms with ease. The drag and drop builder paired with the unlimited customization options for individual fields and forms provides an intuitive form-building experience.
Not to mention the in-built login form and my account page that comes with it. Most importantly, you get a handful of important features needed to keep your WordPress login page protected.
Intrigued? If so, let’s jump into the tutorial without any delay!
I. Install the Free User Registration Plugin
First and foremost, you must install the free version of the User Registration plugin on your website.
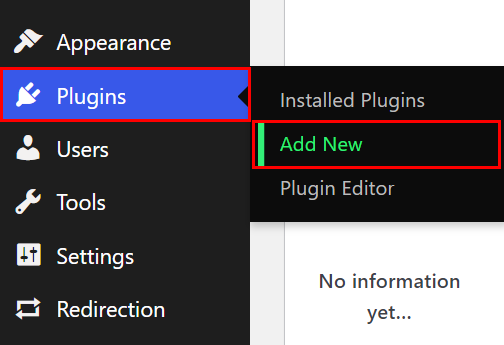
To do that, log into your WordPress website dashboard and navigate to Plugins >> Add New.
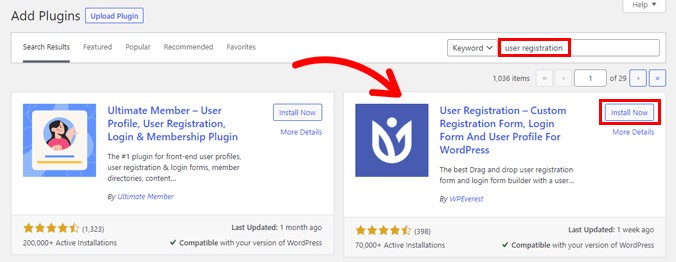
Here, search for User Registration in the search bar, and it’ll appear in the results. Simply click on the Install Now button, which initiates the installation process.
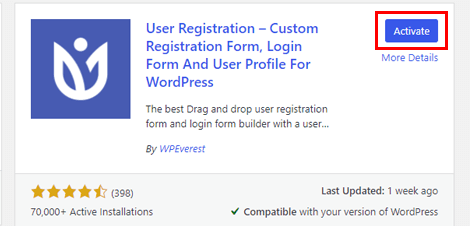
Then, press the Activate button to activate the plugin.
Immediately after, you’ll be greeted by a welcome page. From here, you can Get Started with the plugin setup or directly jump to the form builder by clicking on the Create a First Form button.

You can even skip these options with the Skip to Dashboard button. Doing this will take you to your website’s admin dashboard directly.
As you scroll down the welcome page, you can see all the extensions available in User Registration. And if you’re confused, you can directly contact User Registration’s Support as well.
For now, let’s look at the setup process. Simply press the Get Started button to start.
You’ll arrive at the Install Pages step first. The plugin automatically installs the in-built Default Registration Form on your website. Once you hit the Install & Proceed button, the Registration Page and My Account Page will be installed as well.
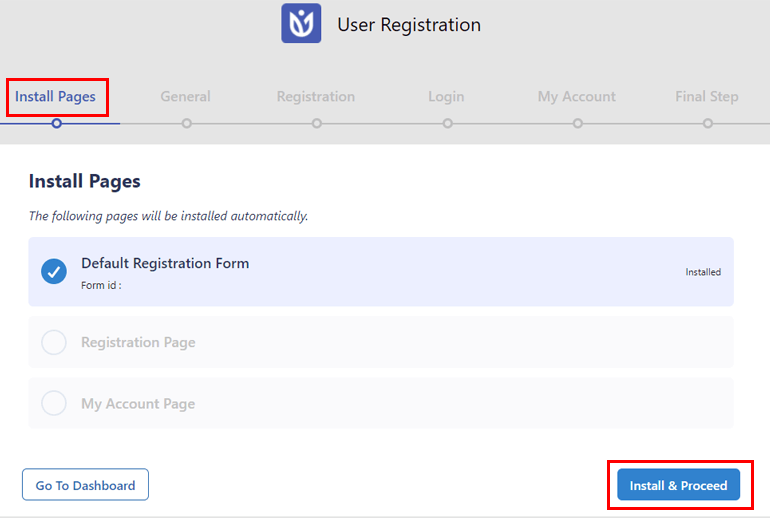
The My Account page contains the shortcode for a beautiful user profile. In contrast, the Registration page displays the default registration form the plugin comes with.
Having them on your site means you won’t have to create brand new pages and just work with the pre-built user profile and registration form if you’re short on time.
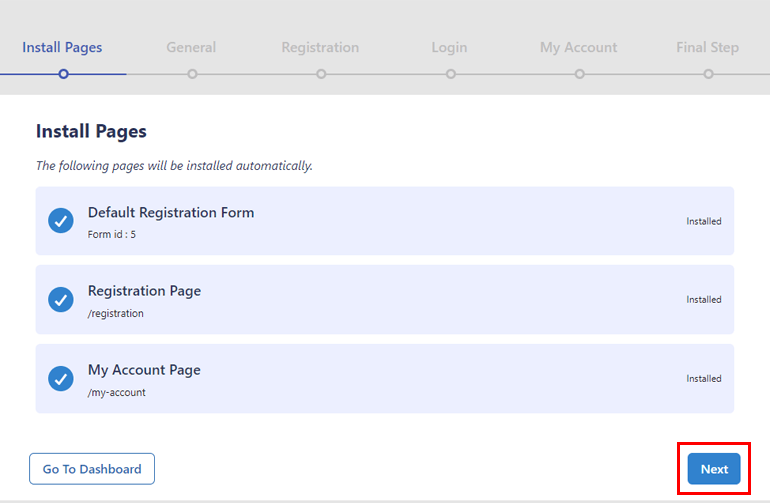
After the installation is complete, click on Next to go to the General options.
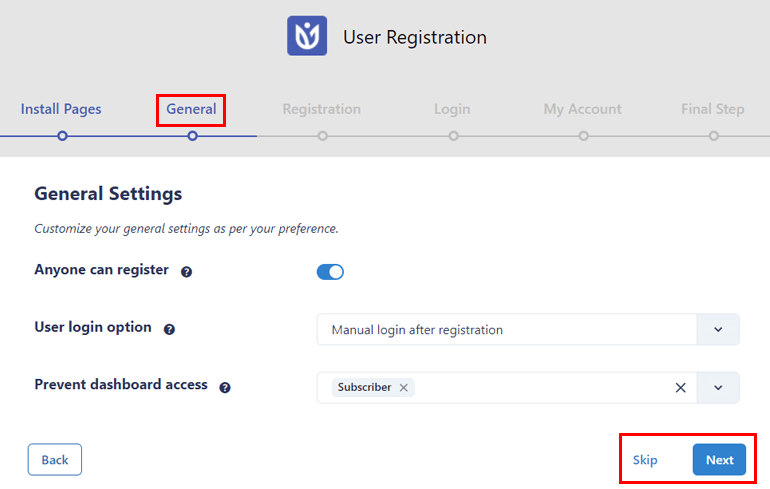
Here, the Anyone can register option is kept on by default. This ensures that the custom front-end registration forms you make with User Registration are visible to the users, enabling them to register themselves.
After that, you get to choose a User login option and Prevent dashboard access to specific user roles.
Then, press Next to move on to the Registration options. Follow the same steps again with Registration, Login, and My Account settings.
In the Final Step, you can choose to go to the dashboard, edit the default form, or create a new registration form from scratch.

Naturally, you’ll need a registration form to register your users before they can log into their accounts.
Learn how to create a registration form easily with User Registration with this detailed guide. Once that’s done, you can move on to the next step.
II. Use the Sample My Account Page or Create a New Login Page
For this step, you have two options. You can either use the sample My Account page to change your site’s login URL or create a completely new login page.
The sample My Account page will display the in-built login form for logged-out users and the user profile for logged-in users.
If you view this page in the front-end, you’ll see that its URL is example.com/my-account. You can use this URL to replace the default login URL. So, you can jump to the next step if you’re going to go this route.
However, if you want to create a new login page, we’ll show you how to do that as well.
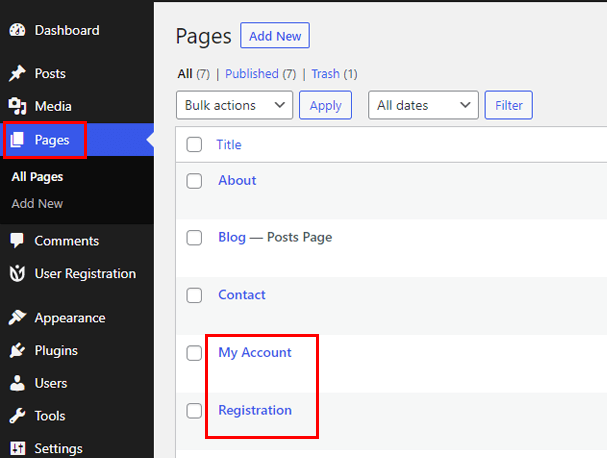
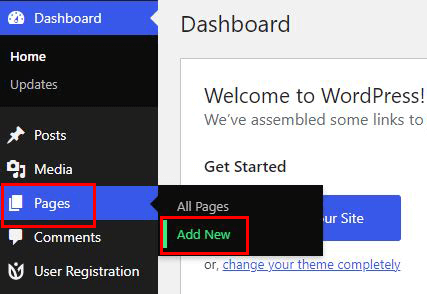
Begin by navigating to Pages >> Add New. You’ll be taken to a new page in the Gutenberg block editor, where you can edit the page to your liking.
Start by giving the page a title, let’s say, Sign Into Your Account. Then, click the + icon and add the User Registration block to the page.
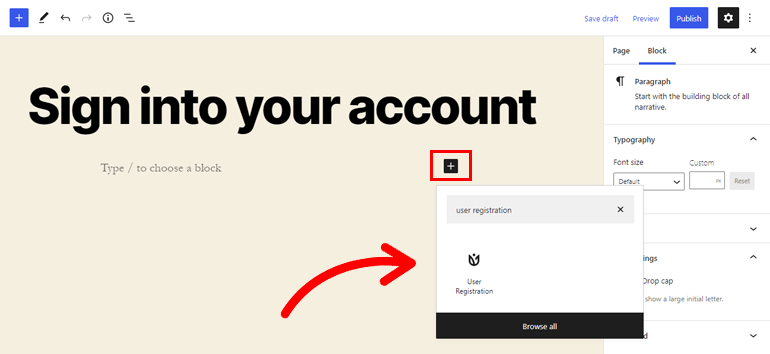
Now, the block displays two options: Registration and Login Form. Since we just need the login form now, choose Login Form.
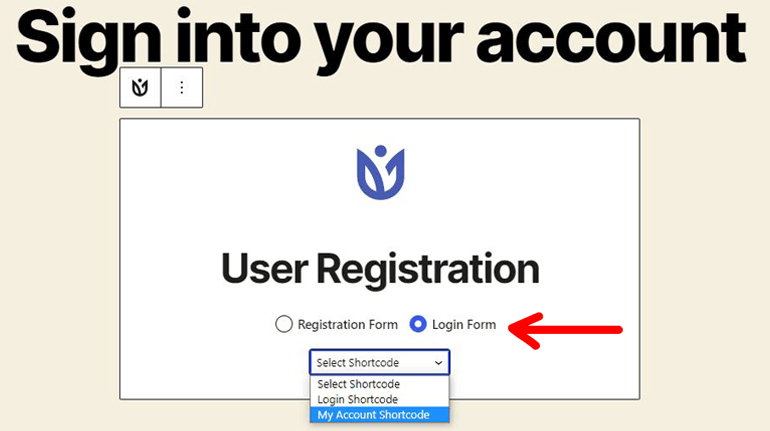
Again, you’ll get two more options: My Account Shortcode and Login Shortcode. The first shortcode displays the login form for logged-out users. Once they log in, they’ll be redirected to their user profile.
While the latter one displays only the login form for logged-out users. You must set a redirection path to another page for users to end up on after successful login.
You can choose whichever option is suitable for your website. For now, let’s go with My Account Shortcode.
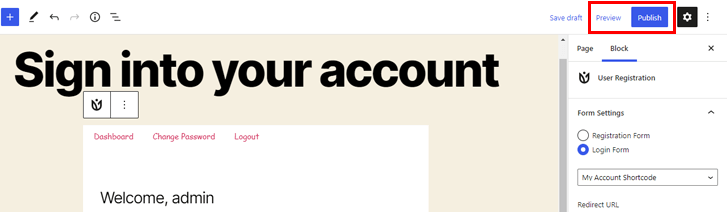
Finally, hit the Publish button, and your new login page is ready. You can click Preview to check how the page appears in the front-end.
III. Replace the Default Login URL with Custom URL
Creating a login page is not enough; your website will still display the core login page with the default WordPress login URL.
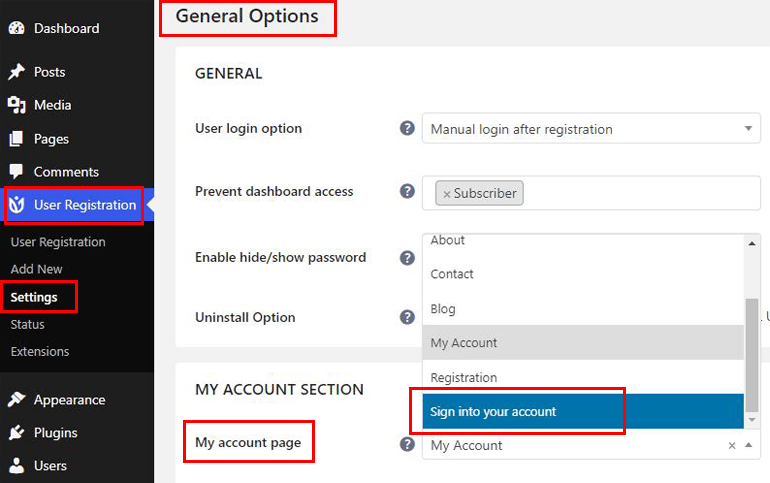
To change that, go to User Registration >> Settings. Here, open the Login Options under the General tab.

The option you’re looking for is Prevent Core Login, which is checked off by default. Enabling this feature will replace the default login page URL with your custom Login URL.
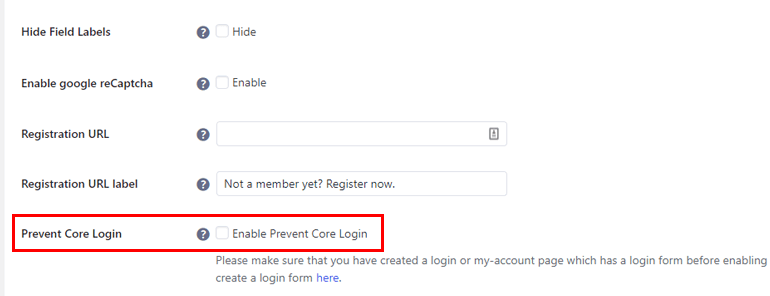
Just tick the checkbox, and you’ll be asked to choose the page to redirect the user instead of the core login page.
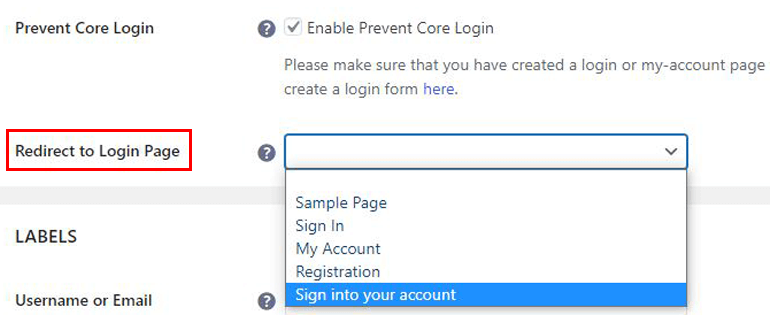
Choose the custom login page with the new URL from the dropdown and click Save Changes. Easy as that!
Now, when your users type in the default login URL, they’ll be automatically redirected to the new login URL. Since the in-built User Registration form is only accessible from the frontend, the plugin lets you restrict any access to the backend.
On the other hand, you must replace the sample My Account page with the login page you just created. All you have to do is scroll down to the My Account Section in General Options. Choose the custom login page you created from the My account page dropdown and save the changes.
However, that’s not all you can do with User Registration. There are plenty of other options categorized into General, Labels, Placeholders, and Messages sections.
General: This section lets you change the form template, choose the login option, enable ajax login, enable Google reCAPTCHA, enable lost password, and many more.
Labels: Here, you’ll be able to change the labels for Username or Email, Password, Remember me, Login, and Lost Your Password.
Placeholders: Likewise, you can change the placeholders for Username or Email Field and Password Field.
Messages: You can also customize messages for Username Required, Empty Password, Invalid/Unknown Username, Unknown Email, Pending Approval, and Denied Account.
You have total flexibility over which settings you want to customize for your login form. While you’re doing so, remember to save the changes by clicking the Save Changes button at the bottom of the page.
IV. More Login Options in User Registration Pro
All we’ve discussed until now are only features you get in the free version of User Registration. There are more advanced login options offered by User Registration Pro, a premium version that operates as a standalone plugin.
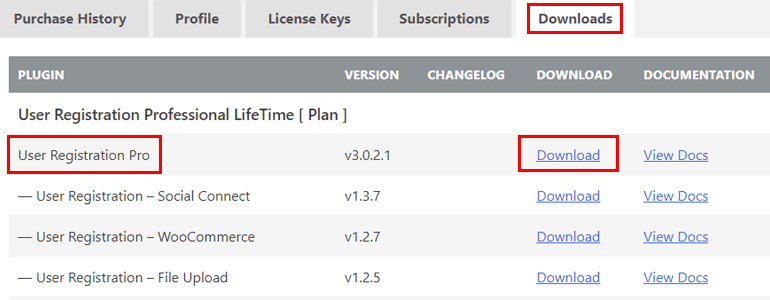
You just need to buy a premium plan from User Registration and log into your WPEverest account. From the Downloads tab, download the User Registration Pro file.
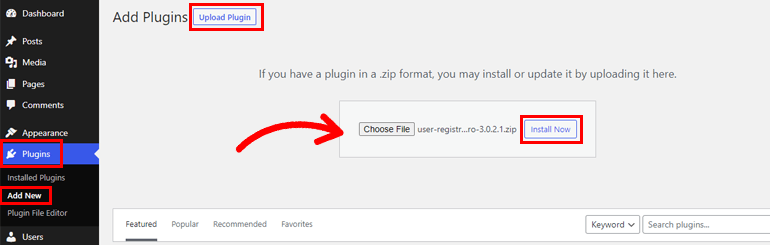
Then, open Plugins >> Add New >> Upload Plugin on your WordPress dashboard, and install the Pro file you just downloaded. Don’t forget to activate the plugin as well.
Installing the Pro plugin on your site will add 4 new options for your login form in General >> Login Options under User Registration’s Settings.
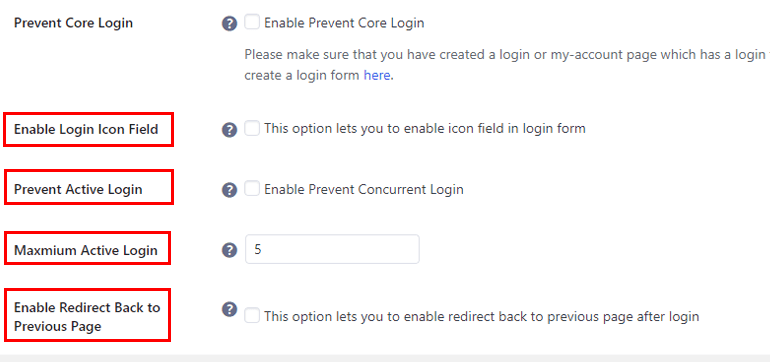
Let’s look at each of them briefly below:
Enable Login Icon Field: You can enable the login icon field for the in-built login form with this option.
Prevent Active Login: This option lets you prevent concurrent login from an individual user on multiple devices. We recommend you do this for your login page’s security.
Maximum Active Login: Once you enable the previous option, you need to set the maximum active login number. So, if you set it to 5, the user won’t be able to log into your website from more than 5 devices.
Enable Redirect Back to Previous Page: By enabling this option, you’ll be redirecting the user to the page they were on before they filled and submitted the login form.
Additionally, you get Role Based Redirection in the Extras tab of User Registration Settings. You just have to Enable Role based redirection and configure settings for Redirection After Login.
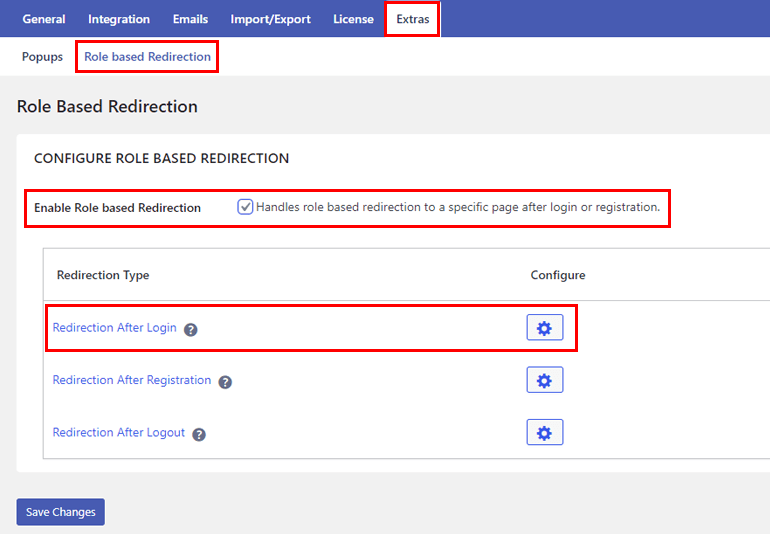
This gives you the flexibility to decide which user role gets access to which page, which in turn secures your website even more.
As you can see, you can do so much more with the premium version of User Registration. However, it’s up to you to decide whether the free version suffices your website or you need to upgrade to the premium version.
Either way, you’ll be able to change the default WordPress login URL to a custom URL easily.
With that said, let’s move on to the next method of changing the default login URL.
2. Hide the Default Login URL With Custom URL
If you’d rather just hide the default login URL, that’s also possible. There are several WordPress security plugins like WPS Hide Login to help you achieve that. All you have to do is install the plugin and hide the login URL with a new one.
So, let’s learn how to implement this method of login page protection on your site with the WPS Hide Login plugin. We’ll also talk about two other similar plugins you can use as an alternative to WPS Hide Login.
A. Hide Default Login URL with WPS Hide Login
WPS Hide Login is a lightweight and easy-to-use plugin, so hiding the default login URL is easy and quick. Just follow the steps detailed below, and you should be able to hide the default login URL without a hitch.
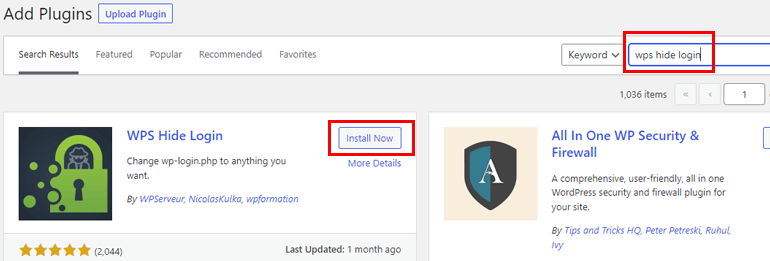
First, install the WPS Hide Login plugin on your WordPress site. The steps are the same as for User Registration installation.
Search for the plugin from Plugins >> Add New, then install and activate it once you find it in the search results.
When the plugin is activated, it automatically adds a WPS Hide Login section in Settings >> General of your dashboard.

It has two options, namely, Login url and Redirection url.
In the Login url, enter the new login URL that you want to use to hide the default login URL.
Meanwhile, the Redirection url already points to a 404 error page. So, you don’t need to edit this option unless you want to redirect to another page.
Finally, click Save Changes to apply the changes you made to your website’s login URL. Now, only users who know the new login URL find the login page and access your site.
If they enter the old URL, i.e., example.com/wp-admin, your site will display a 404 error or another page based on the WPS Hide Login settings.
B. Similar Plugins You Can Use
WPS Hide Login is just one of the many options available when it comes to hiding the login URL.
Here are two more alternatives you can try if the previous plugin isn’t exactly what you’re looking for.
All in One WP Security and Firewall
All in One WP Security and Firewall is a complete solution to any security concerns you have on your website. So, you’ll be able to hide the WordPress admin login page with a new login URL easily. At the same time, you can enforce its many login security features to protect user login from bots and hackers.
For example, you can defend your site against Brute Force Login Attacks by locking out specific IP addresses after too many login attempts. Likewise, with this plugin, you can add Google reCaptcha protection, force logout of all users, monitor all user accounts, and more.
Hence, try All in One WP Security and Firewall if you need a plugin that’ll cover login and registration security, firewall security, database security, etc. Best of all, you get all these features completely free!
Key Features:
- Prevent spam comments
- Block fake Google bots from crawling your site
- Provides login honeypot feature
- Blacklist users through their IP addresses
- Schedule automatic database backups
Price: Free
iThemes Security
iThemes Security is another WordPress plugin with plenty of security features sufficient to protect websites of any scale and niche.
With this plugin, you can enable Two-factor Authentication (2FA) and set password requirements. Moreover, you get Local Brute Force Protection as well as Network Brute Force Protection against repeat offenders.
Most importantly, it allows you to hide the admin login URL from people with ill-intent. However, this is an advanced feature available only in iThemes Security Pro. Thus, you’ll have to upgrade to a premium plan to use the hide login URL feature.
Key Features:
- Limit admin privileges to trusted devices only
- Allow passwordless logins
- Make Secure Sockets Layer (SSL) connections compulsory
- Logs file changes
- Daily scans and patch fix
Price: Free or starts at $52/year
Wrapping Up
Whether for branding or security purposes, WordPress login page URL change is always a good idea. So, you can customize the login page and forms as per your site’s needs while also securing your backend from hackers.
You can simply hide the default login URL and create a new URL with a plugin like WPS Hide Login. You may explore plugins such as All in One WP Security and Firewall and iThemes Security for more security features.
Or, you can use User Registration to create a custom login page and replace the default login URL with it. Besides that, you get more advanced login options in User Registration Pro. You can even style your login forms with its premium Style Customizer add-on.
Not to mention the ability to add extra fields to WooCommerce registration forms, register users through invitation codes, and so on.
To learn more about User Registration, go through our blog with posts exploring the many incredible features of this plugin.
Also, follow us on Twitter and Facebook to keep up with new articles.


![Zakra 3.0 | Zakra Pro 2.0 Release [Major Updates!]](https://i.ytimg.com/vi/g3rifl7kWvg/maxresdefault.jpg)