Wondering how to approve new users in WordPress after front-end user registration? Looks like you’ve come to the right place.
Setting up a front-end user registration form on your website for your users is the initial step. After the registrations start flooding in, you might desire a certain level of moderation among these new users. So as an admin, you’ll need to approve or decline each new WordPress user registration manually.
That’s why this article offers you a short guide on how to approve new users in WordPress. So, make sure you read till the end.
Table of Contents
Default WordPress User Approval and its Limitations
First and foremost, you should know the default user registration approval process in WordPress. When users fill the default registration form and submit it, they’re sent login credentials to their email address, which they must use to log in.
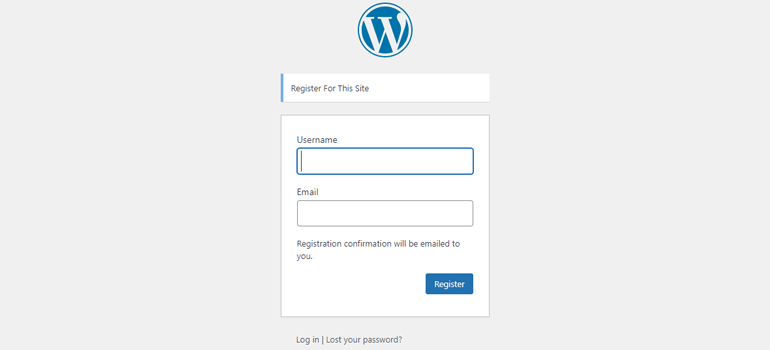
However, WordPress auto-approves new users even before login. The admin doesn’t get to moderate the registrations in any way. That means:
- You can’t filter through registrations and approve or reject users for limited membership programs.
- There’s no way to ensure that only users relevant to your niche are members of your WordPress site.
But, don’t worry. WordPress plugins that enable new user approval will help you overcome these limitations without breaking a sweat.
Best Way to Approve Users in WordPress after Front-end Registration
If the default user approval method is not for you, then admin approval WordPress plugins should be your go-to. You’ll find plugins strictly made for approving new users through the default registration forms like New User Approve and WordPress and WooCommerce Approve New User.
However, if you find WordPress’s core registration or the WooCommerce registration form basic as well, then look no further than User Registration. You’ll be able to create beautiful custom user registration forms and enable admin approval for users registering through these forms. It’s like hitting two birds with one stone.
Let us give you an overview of the admin approval feature in User Registration:
- When a user registers through a front-end form, an approval request is sent to the admin’s email address.
- The new user remains in a pending status until approved or denied by the admin.
- The admin can approve or deny the new user from the WordPress Users tab.
- The user awaiting approval receives email notifications informing them whether their registration was approved or denied. If approved, they’ll be able to log into their account.
- You can customize the front-end messages the user sees after registration as well as email templates for both admin and user.
There’s no better WordPress plugin than User Registration that we can recommend, considering that you get the admin approval feature for free.
So, we’ll be using this same plugin to answer your question about how you can approve users in WordPress in the next section.
How to Approve Users in WordPress after Front-end Registration?
We’ve prepared a short tutorial to show you how to approve users in WordPress using the User Registration plugin. So, let’s jump right into it.
1. Install and Activate the User Registration Plugin
Before anything else, you need to install the User Registration plugin in your WordPress dashboard. Well, there are two ways to do this.
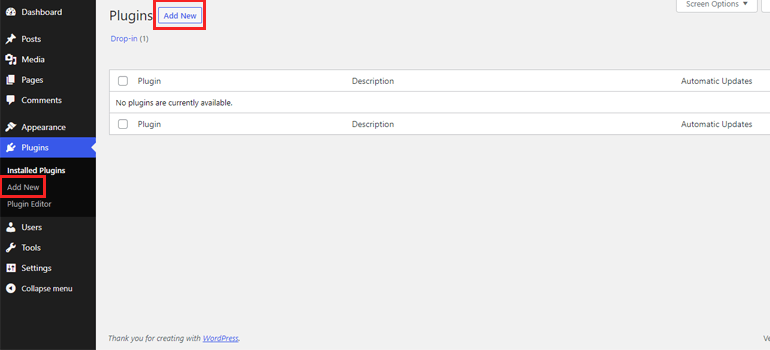
The first way is to search for the plugin from the dashboard itself. So, go to the Plugins tab and click Add New.
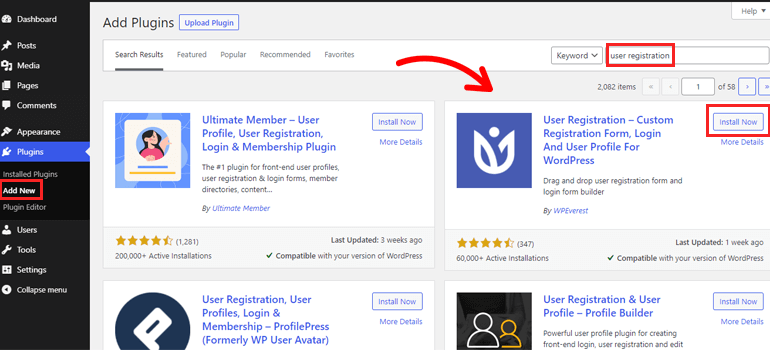
In the search bar, type in the plugin’s name. Once you see the plugin in the results, hit the Install Now button. The installation should take no more than a few seconds. Then, finish the process by choosing Activate.
Now, let’s talk about the second method. First, you’ll have to download the User Registration plugin file from WordPress.org.
Next, upload this file from Add New tab and click Install.
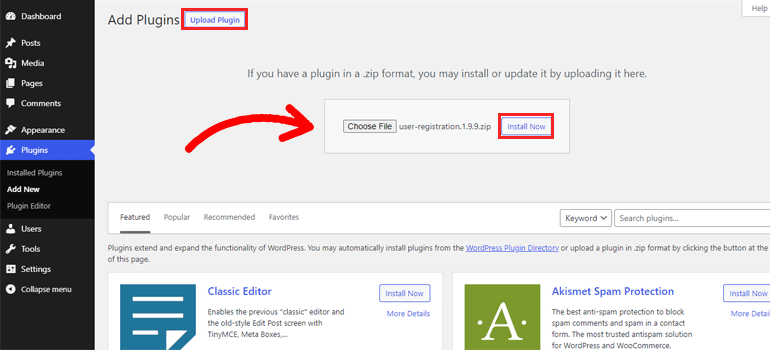
Finally, Activate the plugin, and it’s ready for use.
There’s still one more thing you need to do. User Registration comes with in-built registration and user profile page so that you don’t have to make them from scratch.
You just have to select Install User Registration Pages in the notice you see after completing the installation process.
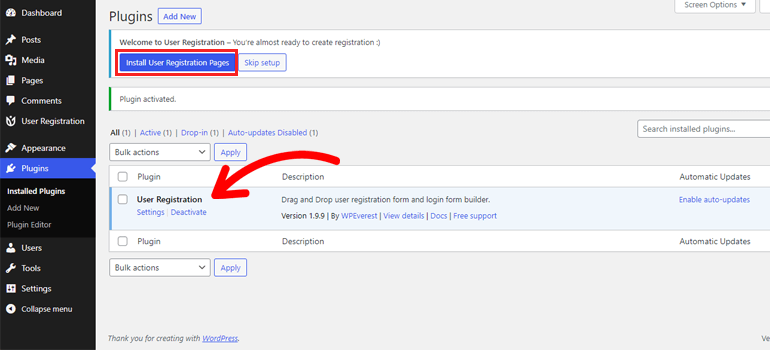
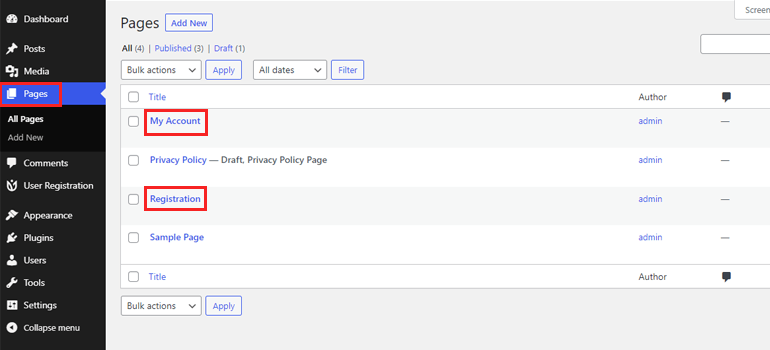
This automatically creates the My Account and Registration pages, visible in your Pages section.
2. Allow Users to Register with a Front-end Form
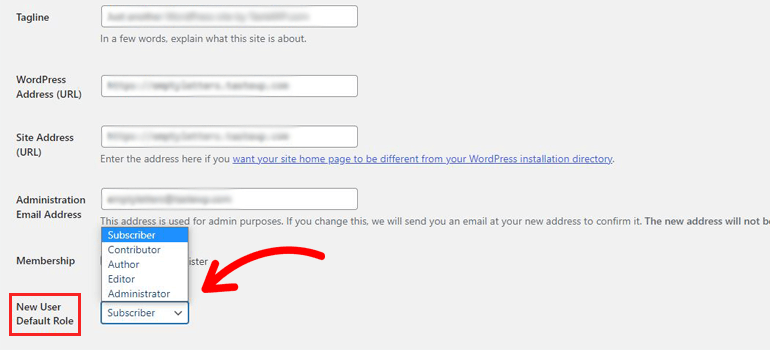
The next step is allowing your users to register with a front-end form. For that, go to the General section under Settings. The Membership option is off by default, which results in users not getting access to the registration forms on your website.

That’s why you should tick the checkbox and allow Anyone to register.
While you’re here, you can also assign WordPress’s default user roles to people who register through front-end forms.
Once you’ve made all the necessary changes, scroll to the end of the page and hit the Save Changes button.
3. Create a New Registration Form
It’s time to create your first user registration form now. You can later approve users who register on your WordPress website using this form. So, go to the User Registration tab and choose Add New.

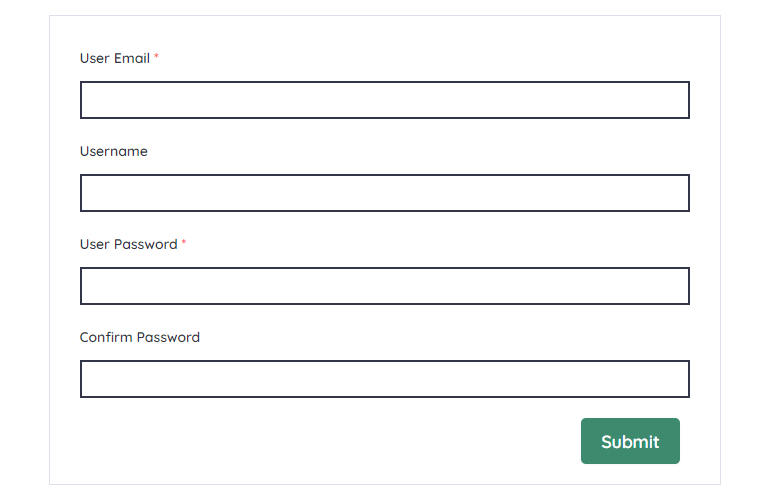
This takes you to the form builder that looks like this:
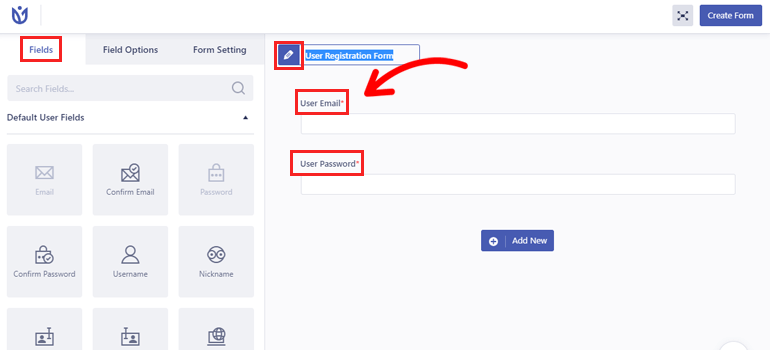
As you can see, there are two mandatory fields in the form: User Email and User Password.
There are plenty more Fields to choose from in the left panel. So, just give the form a name and start building.
Simply click Add New to add a row and drag and drop any Fields you need into the blank row.
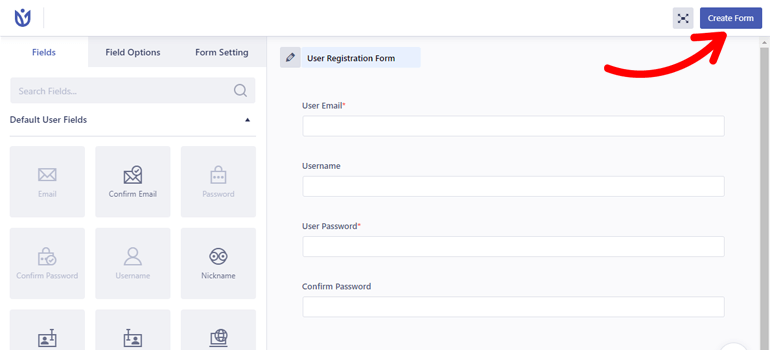
If you’re short on time, you can just use the default form the plugin comes with.
After you’ve completed building the form, click on Create Form.
The top left corner of the form builder displays the form shortcode that you can copy and paste on any page or page.
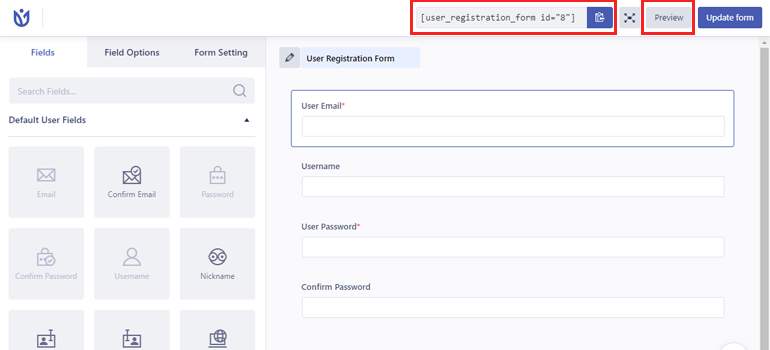
You can also check how the form looks in the front-end with the Preview option.
4. Customize the Form Fields
User Registration also allows you to customize individual form fields. All you have to do is click on the field you want to edit, and it’ll take you to its Field Options.
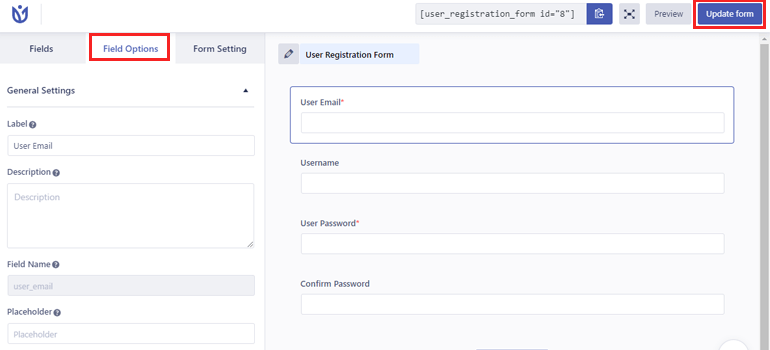
From here, you can change the field’s Label, Description, Placeholder, and more in General Settings. Similarly, Advanced Settings lets you add custom CSS classes.
Also, don’t forget to press Update Form when you’re done.
5. Set Up Admin Approval after User Registration
Here comes the crucial part of this whole guide. And that is enabling admins to approve new users in WordPress.
It’s easier than you can imagine with the Form Setting. The very first thing you’ll see here is the User login option.
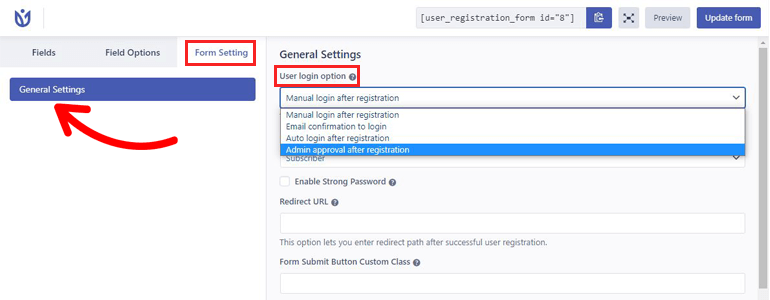
Let’s go through all four of the options to help you understand them more.
- Manual login after registration: The user has to fill the login form to log in to their account after registering with a front-end form.
- Email confirmation to login: The user receives a confirmation email in the email address they provided during registration. Only after the confirmation will they be able to log in.
- Auto login after registration: The user is automatically logged in after a successful registration. They don’t have to bother with a login form.
- Admin approval after registration: The registered users cannot log into their account until the admin of the site approves them. The site admin site users’ approval requests, which they can accept or deny.
The admin approval feature is a rather neat tool if you want to protect your forms from spam or give access to valuable clients only. You just need to select Admin approval after registration from the dropdown and save the changes.
That’s not all. The Form Setting comes with many other features like form templates, reCaptcha protection, default user roles, and more.
So, you can configure the user registration form to your heart’s content.
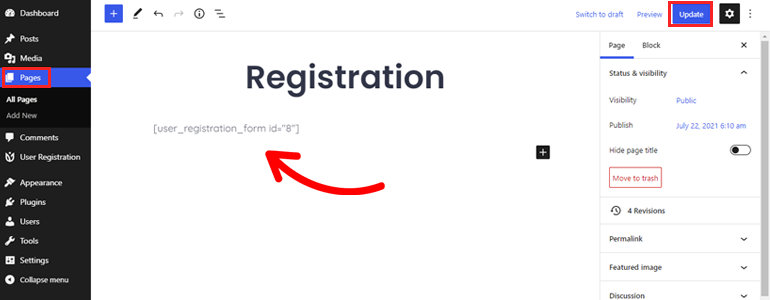
6. Publish the Form on your website
Now that the registration form is ready, you still have to display it on your WordPress website.
Just copy the form shortcode and go to the Registration page we installed earlier. Then, replace the default form shortcode with your new form shortcode and press Update.
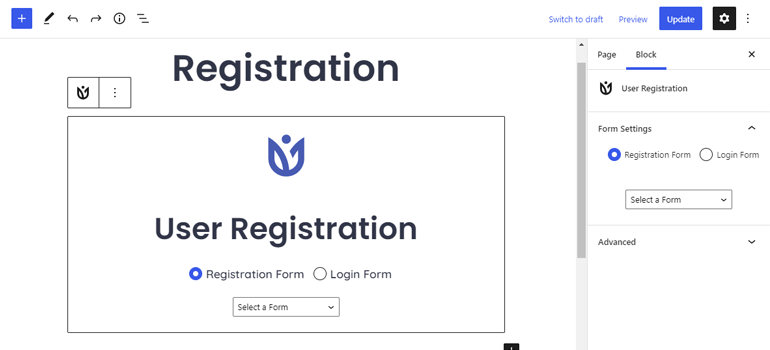
An alternative way is to use the User Registration block instead. You can select the form to display from the dropdown. As simple as that!
It’s not compulsory to use the Registration page. You can display the form on any other page or post of your choice.
However, this is still not enough. There must be a link the users can follow to access the Registration page.
Some themes automatically add top-level pages like Registration and My Account to the menu. If that’s not the case for you, don’t panic. We’ll show you how to add them to your website’s menu.
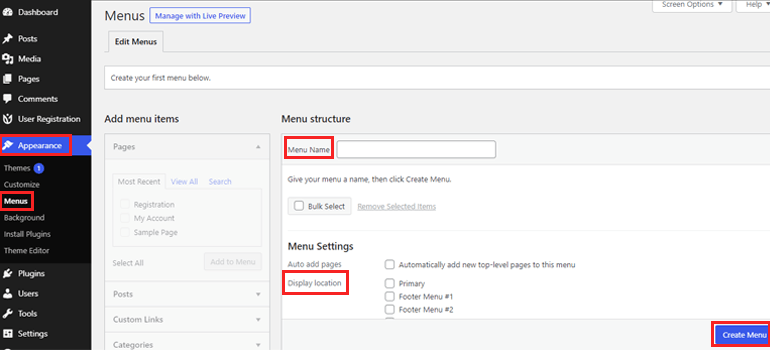
Navigate to Menus under Appearance to create a new menu. First, give the menu a name, choose a location for it, and click Create Menu. The availability of location might differ depending on the theme you’re using.
After that, select the Registration and My Account page from the Add menu items box. Then, click Add to Menu.
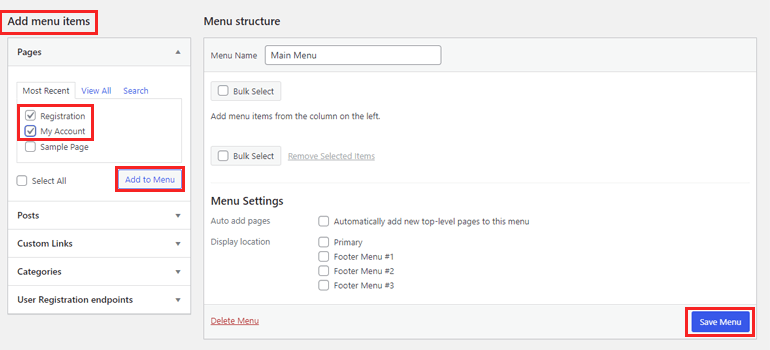
If you already have a menu, just Add menu items to it and click Save Menu.
Now your website menu will display Registration and My Account pages that your users can easily access.

Wrapping Up
That concludes our article on how to approve users in WordPress after front-end registration. By now, you should know that WordPress doesn’t let admins approve users by default. Instead, you can use a plugin like a User Registration with which you’ll be able to moderate new registrations by simply enabling admin approval in the settings.
We hope our step-by-step guide to approving users is easy to follow along and implement on your website.
Besides approving users, you’ll also need to block spam submissions on your registration forms. So, we recommend you refer to our blog for more helpful articles like this.
We’d be happy to hear your feedback in the comments below. Also, don’t forget to share this article on your social media.


![Zakra 3.0 | Zakra Pro 2.0 Release [Major Updates!]](https://i.ytimg.com/vi/g3rifl7kWvg/maxresdefault.jpg)