The easiest way to assign different WordPress user roles to your website users is to select a user role at registration. You just need a registration form and the ability to select user roles for people registering through the said form.
And it gets even easier with the incredible registration form plugin, User Registration. You’ll be able to create unlimited custom registration forms and select specific user roles for them all.
Want to know exactly how you can do this? Well, we’ve put together this comprehensive tutorial on choosing WordPress user roles during registration for you. So, read ahead to learn all about it.
Table of Contents
Why Assign User Roles with a Registration Form in WordPress?
WordPress user roles are essential in deciding which user gets access to which part of your website.
For example, you can give your website dashboard access to admins, editors, and authors. While contributors and subscribers can only access and interact with the front-end.
Now, WordPress allows you to set user roles for each user through their profile pages. However, this is a tenuous task when you have hundreds of users registered on your site.
Wouldn’t it be much easier to just assign the user roles at registration? This way, your users are automatically grouped into different user roles when they register through the front-end registration form on your site.
It’s much quicker, and you’re less likely to face errors than when giving each individual user a role one by one.
That’s why you should place a user registration form that assigns a user role to people as soon as they submit the form and register themselves.
How to Select User Role at Registration in WordPress?
As mentioned before, you’ll need a registration form with the functionality to choose the user role.
Sure, you can just make use of the default WordPress registration form and assign user roles through it. However, you’re bound to face limitations regarding customization and flexibility with the default form.
The User Registration plugin is the perfect solution for this since it lets you build a custom registration form and select user roles for it simultaneously. No need to waste your website resources on multiple plugins.
That’s why we’ll be showing you how to select a user role at registration using the User Registration plugin. So, let’s get started.
1. Install and Activate the User Registration Plugin
Before anything else, you’ll need to install the User Registration plugin on your WordPress site.
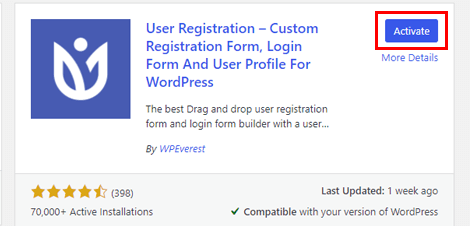
To do that, log into your WordPress dashboard and navigate to Plugins >> Add New. Type in “User Registration” into the search bar and hit enter.

When the plugin appears in the search results, click on the Install Now button. After that, complete the installation process by choosing to Activate the plugin.
Now, you’ll probably see a notice on top telling you to turn the membership option on. This is because WordPress, by default, restricts users from registering themselves through a front-end form.
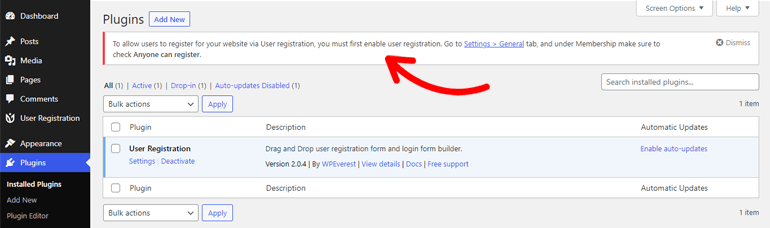
Since you’ll be using User Registration to create and publish custom front-end registration forms for your site, you must allow users to register through them. Otherwise, they won’t be able to access these forms from your website.
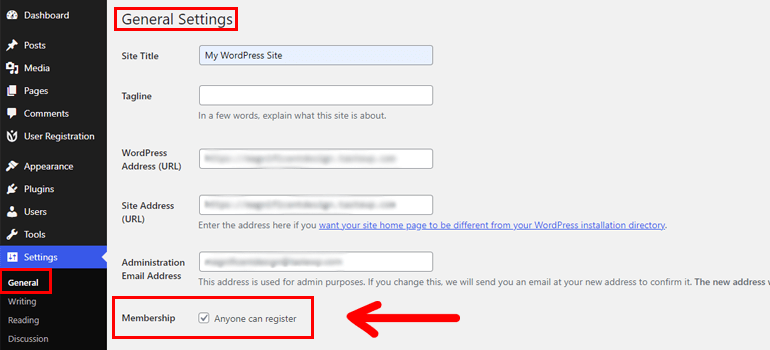
Simply go to Settings >> General and tick the checkbox for the Membership option. This allows users to register themselves through User Registration forms.
With this step done, you can now proceed to actually create a WordPress user registration form.
If you’d like to learn about the plugin installation process in depth, check out our article on how to install WordPress plugins.
2. Create a New Registration Form for Your WordPress Website
Now, you must create a custom registration form so that you can select a user role for it. For convenience, you’re free to use the pre-built default form provided by the plugin upon installation.
Otherwise, you can follow the following steps for creating a custom form.
First of all, navigate to User Registration >> Add New. This opens the beginner-friendly form builder, where you can drag the Fields from the left and drop them into the form on the right.
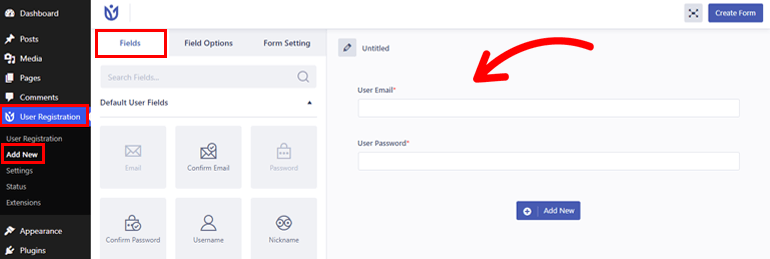
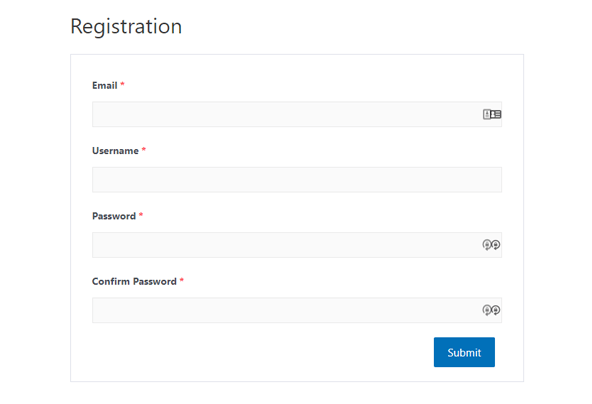
As you can see, the form on the right already comes with 2 Fields, User Email and User Password.
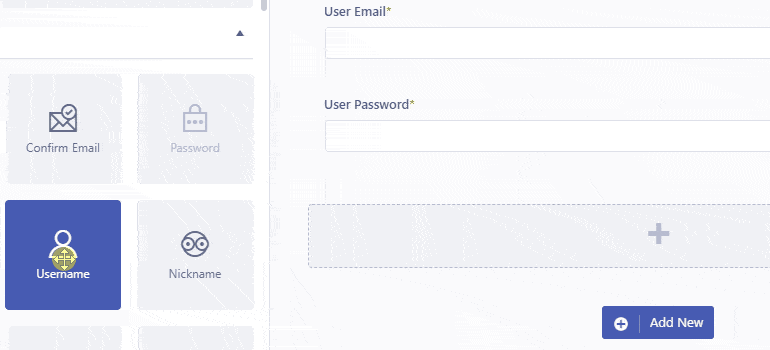
You can add any other Fields you need from Default User Fields and Extra Fields with the simple drag and drop process.
Suppose you need the WooCommerce Billing Address, WooCommerce Shipping Address, and Advanced Fields. You can use them to create a custom WooCommerce registration form. In that case, you must first purchase the premium version of this plugin.
Once you’re done, give your form a name and hit the Create Form button.
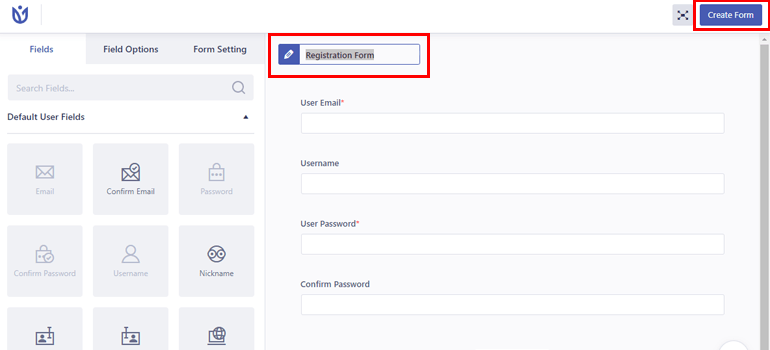
But we’re not done yet. You still need to customize the form fields as per your requirements. This is easily achievable through the Field Options.
Just click on the field you want to edit, and its Field Options tab will open on the left. From the General Settings, you’ll be able to change the field Label, Description, Placeholder, and more.
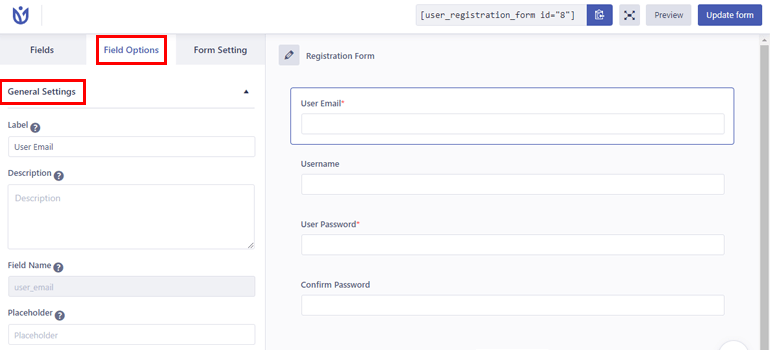
While the Advance Settings lets you add custom classes to the fields.
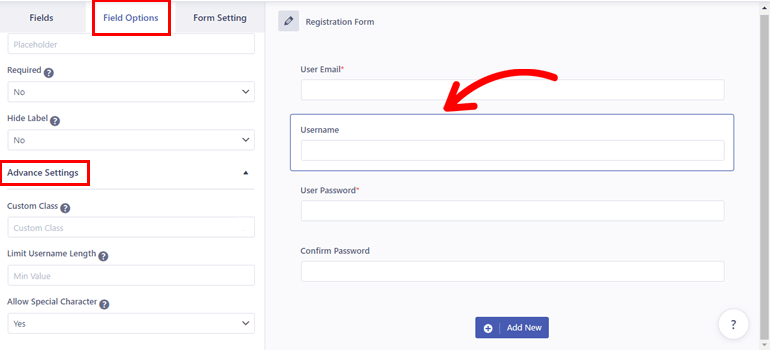
Some fields, such as Username, come with extra options like Limit Username Length and Allow Special Character in the Advance Settings.
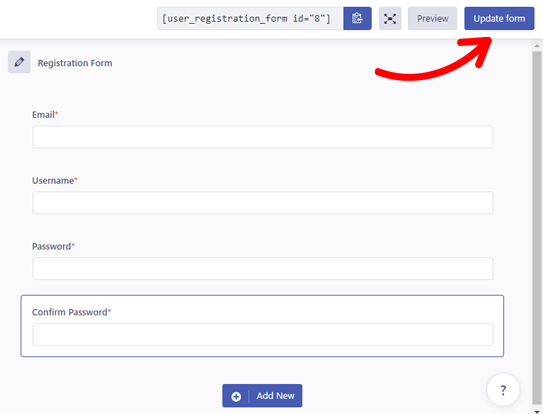
So, customize the fields to your heart’s content and click Update form when you’re done.
3. Select WordPress User Role at Registration
With the custom registration form ready, you can now proceed to the most crucial step of the tutorial. And that is selecting a WordPress user role for users who register through the custom form you just created.
For that, open Form Setting >> General Settings. Here, you can find the Default User Role option on the right side. When you select the dropdown, you’ll see all the user roles available on your website.
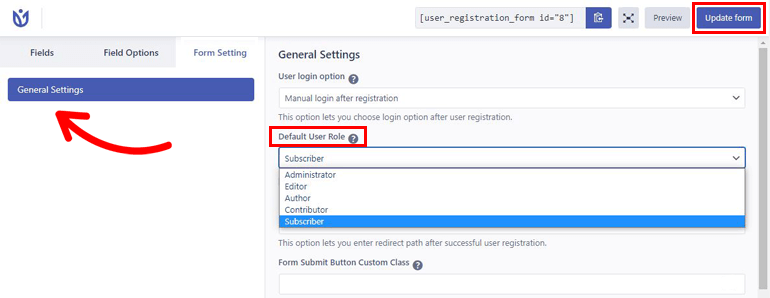
So, choose one as you see fit, say, Subscriber. Now, all the users who register through this form will be assigned the Subscriber user role automatically.
Note that you cannot select multiple user roles for a single form. However, you can build numerous forms and select unique roles for each of them.
Besides selecting a user role, you can also set a user login option, enable a strong password, enable reCaptcha, change the success message position, and so on.
Thus, the powerful customization capabilities of User Registration will help you design incredible registration forms for your site.
4. Publish the Registration Form on Your Website
Finally, you must add the registration form to your website to make it accessible to users. It’s pretty simple!
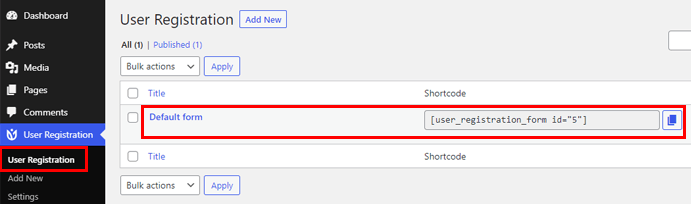
Simply copy the form shortcode from the top of the form builder.
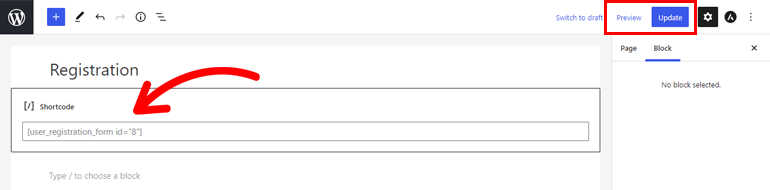
Then, open the page or post you want to display the registration form in. Now, add a shortcode block and paste the shortcode there. You can preview what the form looks like with the Preview button.
After that, hit the Update button. That’ll make the form with the ability to assign user roles go live on your site. And you’re all done!
Conclusion
Selecting a user role at registration makes the management of users on your site much easier. And you don’t have to go through many complicated steps to do that when you have a plugin like User Registration.
All you need to do is create a custom registration form and select a user role for it. With that, users who register through the form will automatically be assigned the user role you’ve chosen.
However, that’s not all you can do with User Registration. Using its premium add-ons, you’ll be able to do so much more such as create multi-part forms and add conditional logic.
To learn more, you can visit User Registration’s official documentation page.
Also, visit our blog for more articles on the User Registration plugin if you’re interested. And follow us on Twitter and Facebook to stay updated.


![Zakra 3.0 | Zakra Pro 2.0 Release [Major Updates!]](https://i.ytimg.com/vi/g3rifl7kWvg/maxresdefault.jpg)