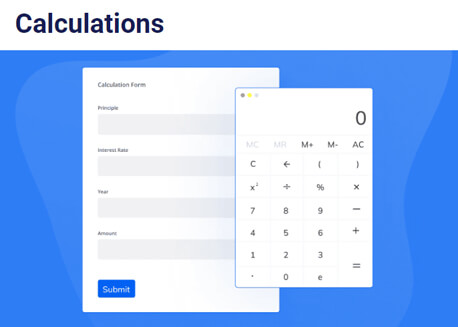
Want to learn how to create a WordPress form price calculator easily? We’ll show you how.
There were times when businesses had to manually calculate the total price of the order. This may have worked in the past, but in the present context, not so much.
With the growing e-commerce platforms and fierce competition, everything must be done promptly. Which includes the price calculation when a customer decides to order.
And a price calculator form is a great way to ensure speedy order processing. So, this article will teach you how to easily create a price calculator form.
But before that, let’s briefly overview the benefits of the price calculator WordPress forms.
Table of Contents
Benefits of Using WordPress Price Calculator in WordPress Forms
Let’s say that you have an online apparel shop. And the customers want to choose from a range of products with different price rates.
Wouldn’t it be helpful if the total price could be calculated automatically?

Hence, using a price calculator form, neither the customer nor you have to worry about manual calculations.
Moreover, you get customer satisfaction through a speedy ordering experience. And on the other side, businesses gain an advantage from automated ordering processing.
Besides, there are more advantages which we’ve listed below.
- It helps your customer know the total price of their desired product or services instantly.
- The businesses can learn the sales data such as quantity sold and sales revenue.
- It amplifies the website’s engagement and attracts traffic.
These are just a few benefits we’ve mentioned. To enjoy these benefits as a business owner, we encourage you to include a price calculator in your order forms.
So, without further ado, let’s follow the easy guide below to create a price calculator form in WordPress.
How to Make a Calculator in WordPress Forms using Everest Forms?
First, choosing the best form builder plugin that helps you create a price calculator form smoothly is a must.
This is where Everest Forms steps in. It’s a popular drag-and-drop form builder plugin that lets you build WordPress forms such as contact forms, survey forms, job application forms, etc.
Most importantly, this powerful plugin offers payment fields and a Calculations add-on to help you handle simple or complex automated price calculations.

And since it supports integration with various payment gateways, accepting payments through the form is quick and easy.
Thus, with Everest Forms, you can make any price estimation form in just a few simple steps.
Step 1: Install and Activate Everest Forms and Everest Forms Pro
The very first thing you need to do is install and activate Everest Forms and Everest Forms Pro.
You need the premium version of the plugin to unlock the Payment Fields or install the Calculations add-on.
So, pick a suitable plan from one of the pricing plans and set up the plugin on your site.
The Calculations add-on is only available in the Professional and Agency plans. So, choose the plan accordingly if you’re planning to use the add-on.
Refer to our tutorial on how to properly set up Everest Forms Pro if you need guidance.
Step 2: Create a New Price Calculator Form
After setting up the plugin successfully, it’s time to create a new price calculator form.
You can do this by using two methods: either by Using Payment Fields or Using the Calculation Add-on.
We’ll show you both of these methods in detail. So, read till the end!
Method 1: Using Payment Fields:
Everest Forms offers many pre-built templates and plenty of custom fields. Hence to create a new form, either start from scratch or use a pre-existing template.
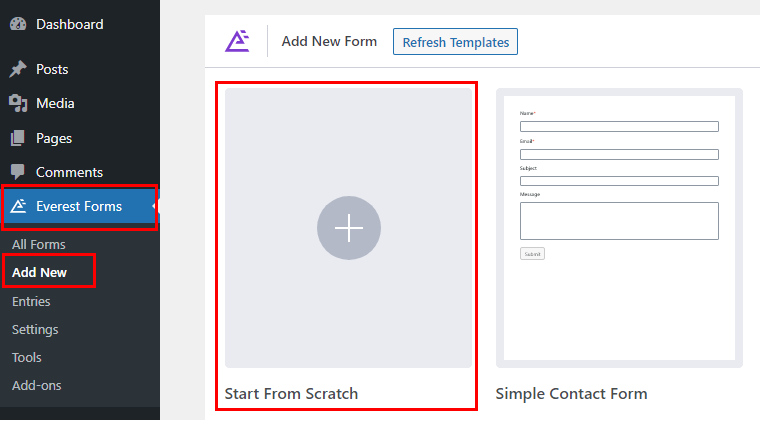
For the pre-built template, go to Everest Forms >> Add New and choose the template of your choice. If you wish to create a new form, click Start From Scratch.
In this tutorial, we’ll be creating an order form from scratch. So, give your for a name and click Continue.
A. Add Payment Fields to the Form
Once you hit Continue, a new form builder will open up.
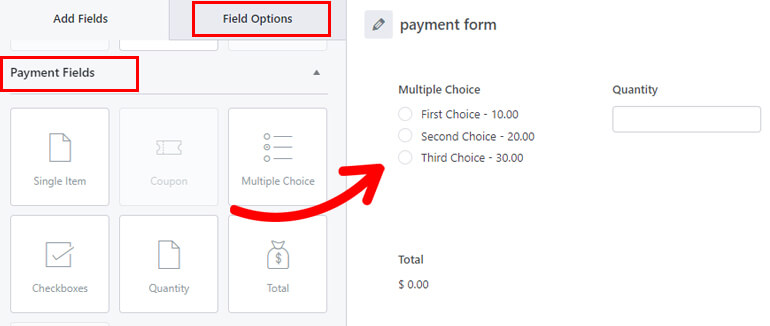
From the left side of your screen, scroll down to find Payment Fields. Simply drag-and-drop the fields you need, like Checkbox, Total, Multiple Choice, etc., in your form.
Adding the payment fields helps you collect payment-related details in your form.
The payment fields you add depends on the products you’re selling. For example, you can add the following payment fields to the form:
- Multiple Choice: Let users select one of the products you’re selling.
- Quantity: Let them decide how many items they’re buying of the product they chose.
- Total: Display the total price by calculating the price of the product chosen with the quantity.
And voila! You have a simple price calculator form ready!
You can add more fields like Checkboxes, Single Item, and other general fields as per your requirements. Finally, click the Save button.
B. Customize The Field Options
Once you’ve added all your fields, you can customize the individual field options as well.
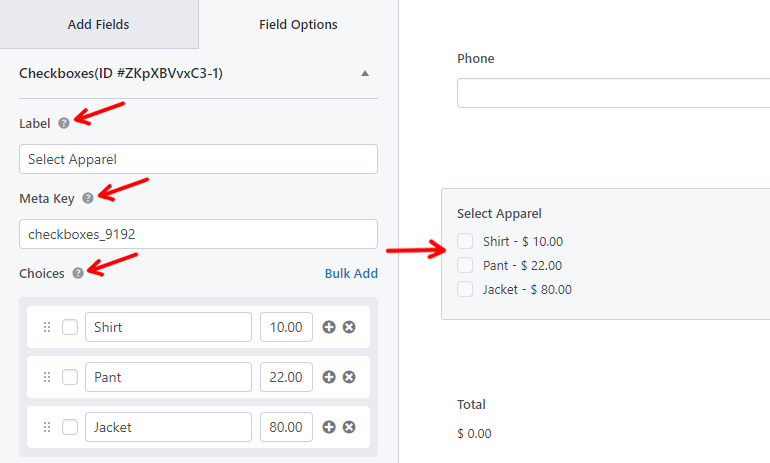
For instance, let’s take an example of the Checkbox field. This field lets your users choose single or multiple options simultaneously.
And when you click on it, you can further customize the following options:
- Label: You can specify what the options underneath are.
- Meta Key: This function helps you to retrieve saved value from the database and display it.
- Choices: You can add the choice items along with their price.
- Use Image Choices: You can check this field to add picture choices of your products.
Here, we’ve given a label and added choices along with their price for the choices.
Next, to calculate its total value, click on the Quantity field. Now, you’ll see a Calculate with this field option.
Simply choose Select Apparel from the drop-down. Doing this will multiply the price of the selected item with the quantity entered by the user.
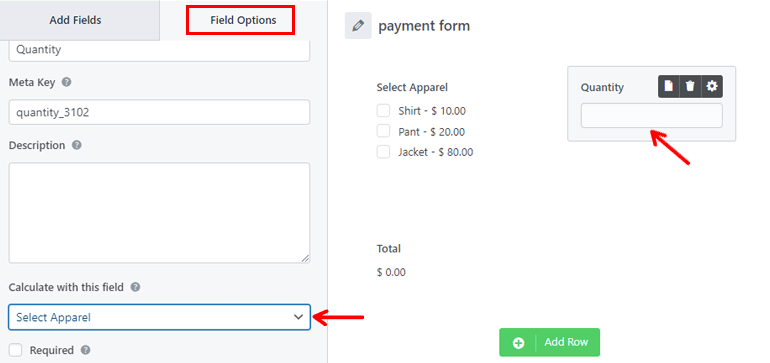
After making all the changes, remember to Save your form.
When a user selects a desired product and enters the quantity, the form automatically calculates the total amount. It then displays the final price in the Total field.

And as quickly as that, your simple price calculator form is ready!
For a more comprehensive guide, check out this article on how to create an order form with or without payment.
Method 2: Using Calculations Add-on:
Now, the next method for creating a new price calculator form with Everest Forms is by using the Calculations add-on.
You can try this method if you want to perform more complex calculations that the Total field can’t perform.
Here, we’ve broken down the process into 3 sub-steps to make it easier for you to follow.
A. Install and Activate Calculations Add-on
After installing the plugin’s premium version, you can access the Everest Forms add-ons available with your plan.
If you’ve purchased the Agency or Professional plan, you get full access to the Calculations add-on.
So, go to Everest Forms >> Add-ons and search for the Calculations add-on. Then, simply install and activate it like you did Everest Forms before.
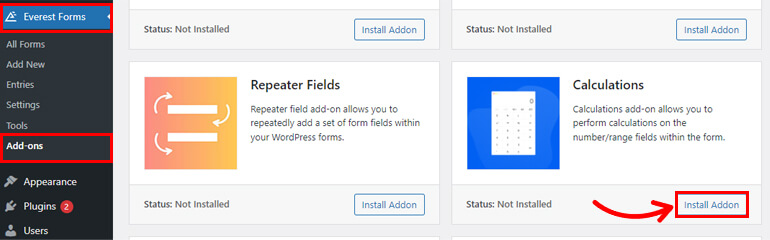
The status will change to Activated if everything goes right.
B. Add Fields to the Price Calculator Form
The form creation process is similar to the method before. Just click on start from scratch or choose your form template.
After that, drag and drop the necessary fields in your payment form. For instance, let’s add a Multiple-Choice field or a Checkbox to the form.
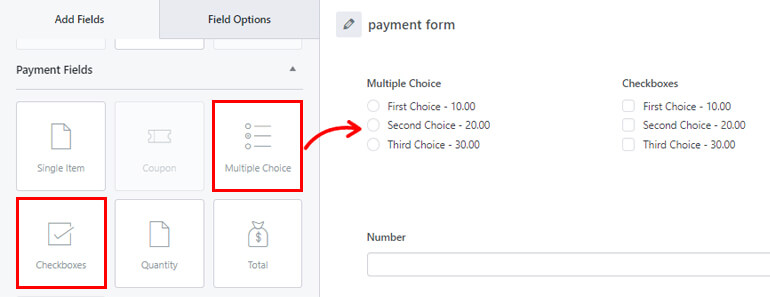
Now, instead of the Total field, we’ll add the Number field to the form. We’ll use the first two fields to calculate the total price, which will be displayed in the Number field.

After the form is complete, hit the Save button.
C. Enable Calculation for Cost Field
After adding all the required fields, you must enable calculations for the field where you want to display the total price.
Thus, click on the Number field and its Field Options will appear on the left.
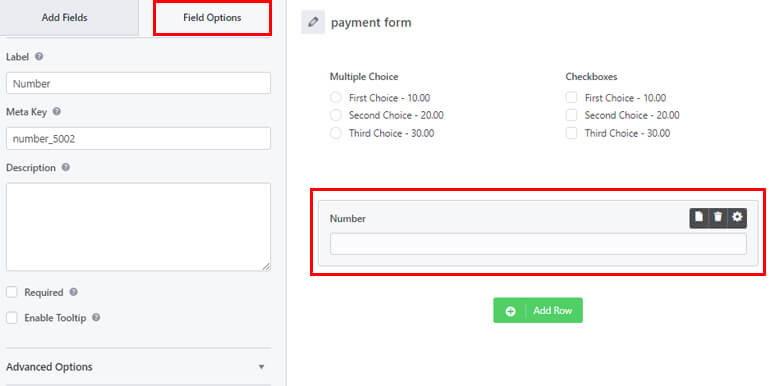
From here, you’ll get to customize the field’s Label, Meta-key, Description, and so on. You can also customize the Advanced Options. Along with that, you can enable the Conditional logic.
But most importantly, you must enable the calculation for the field. To do that, scroll down until you find the Calculations option. All you need to do is tick the checkbox.
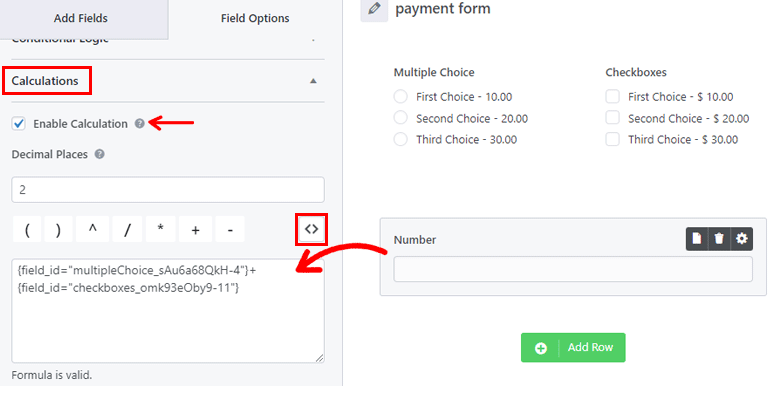
After enabling the checkbox, you’ll further see more options. Here, you can set the number of Decimal Places you want to display in the result.
You’ll also see expressions and operators you can use for the calculation just below.
Now, click on the <> icon and select the first field you want to calculate the price with. Next, add the appropriate operator and then choose the second field.
Therefore, if you want to add the value of the two fields to calculate the total price, you can use the + operator. The result will then be displayed on the Number field.
You can see whether the formula you’ve used is valid or invalid with the message below the box.
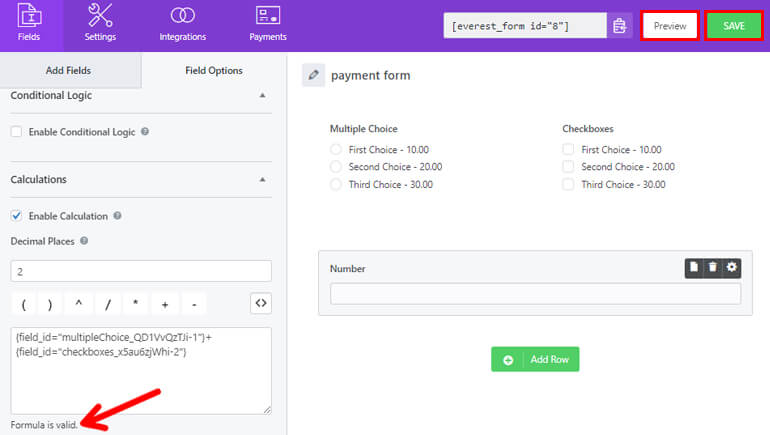
That’s it; your form will now automatically calculate the product’s total price. Hit the Save button to save the changes.
You can check if the form is working correctly with the Preview button next to the Save button.
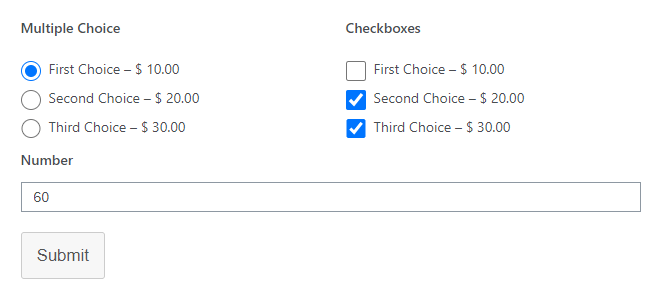
However, the example above is just a simple price calculation. The plugin lets you perform far advanced calculations with multiple fields and operators. You can even create BMI calculators, interest calculators, etc. with the add-on.
Step 3: Configure Price Calculator Form Settings
In this step, we’ll configure the form settings. You can find the Settings right next to the Fields tab. There are three options you can configure:
General
Under General settings, you can make changes as mentioned below:
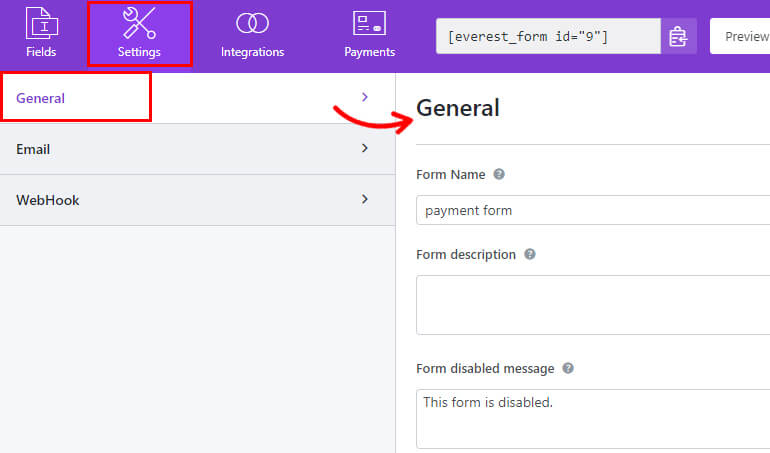
- Form Name: This field lets you edit the name of your form.
- Form Description: You can add a brief description of the motive of your form.
- Form Disable Message: Here, you can edit the message that’s displayed once you disable the form.
- Successful Form Submission Message: Edit the text you want to show your buyers after their form submissions are successful.
- Redirect To: Select whether you want your customers to be redirected to the same page, custom page, or an external URL.
- Layout Design: This field enables you to choose pre-made layouts. You can select either the Default Layout or the Classic Layout.
- Form Class: It lets you add a CSS class for your form.
- Submit Button Text: Edit the submit button text to your preference. For instance, instead of Submit, you can use phrases like Send, Apply, etc.
- Submit Button Processing Text: This lets you set button text that’s displayed while the form submission is being processed.
- Submit Button Class: With this, you can add CSS class names for the submit button.
That’s not all. You can configure more settings like conditional logic with Everest Forms. Moreover, you can also Enable anti-spam honey pot to prevent spam on your form.
This option allows you to configure form notifications. This way, you’ll be notified when your clients submit the forms.
Besides, you can even inform them if their forms have been received by the department concerned.
With Everest Forms, you can set up unlimited email notifications. Such as:
- Admin Email Notification
- User Email Notification
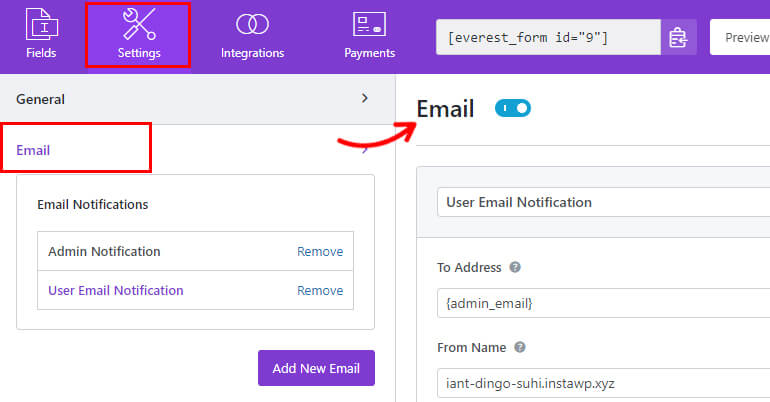
You can create as many notifications as you need with the Add New Email button.
Afterward, customize the available options like To Address, From Name, From Address, Email Subject, etc. And you’re done!
WebHook
You can send the form’s data to any external URL with the webhook feature.
To configure WebHook settings, navigate to Settings >> WebHook and click Enable WebHook.
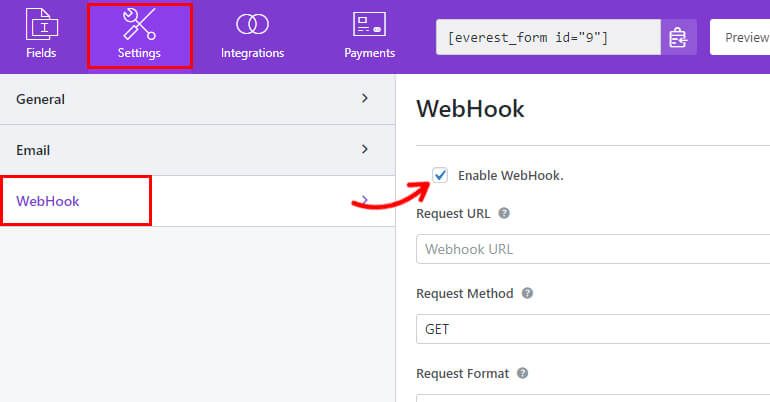
This displays all the options you need to configure for the webhook to work properly. So, set the Request URL, Request Method, Request Format, and Request Header for the form.
And after configuring all the settings according to your requirements, click the on Save button.
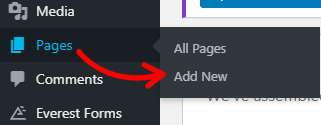
Step 4: Publish Your Form to The Website
With Everest Forms, you can easily embed your form into the website without touching a line of code.
Simply navigate to Posts/Pages >> Add New.
Then, click on the Add Block (+) button and add the Everest Forms block to the page/post.
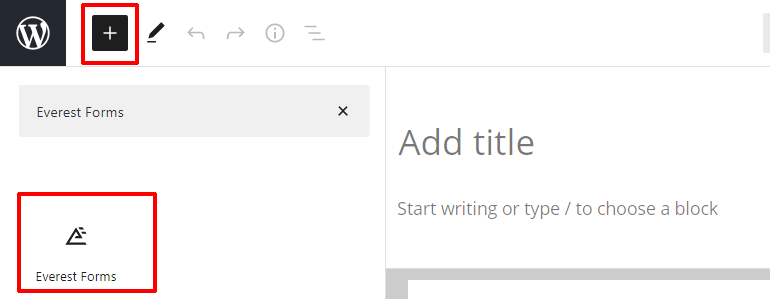
Once you’re done, select the form you created in the previous steps from the drop-down.
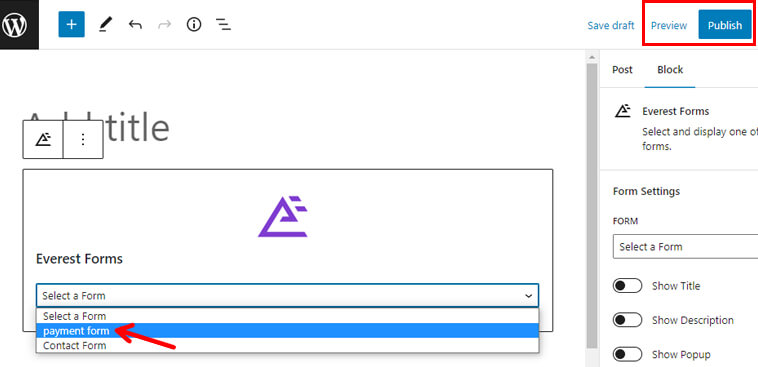
If you’d like to see how your form looks on the front end before publishing it, click the Preview button.
Finally, you can hit the Publish button if your form is ready.
And there it is, you have your price calculator form successfully created and published for your site.
Wrapping it Up!
That wraps up our guide on how to make price calculator forms in WordPress easily.
Above, we’ve mentioned the two super easy ways to create a price calculator form with Everest Forms.
- Using the Payment Fields
- Using the Calculation Add-on
You can use whichever method you see fit.
With this user-friendly plugin, you can do much more, like scheduling form submission date and time, auto-populating form fields with query strings, and more.
If you like our content, you can read more about WordPress-related stuff on our blog. And for easy video tutorials, you can subscribe to our YouTube channel.
Further, if you have any queries, contact us via Facebook and Twitter.


![Zakra 3.0 | Zakra Pro 2.0 Release [Major Updates!]](https://i.ytimg.com/vi/g3rifl7kWvg/maxresdefault.jpg)