Want to know how to manage users in WordPress? Then, this WordPress user management guide is just the thing for you.
Well-managed WordPress user accounts, as well as their roles and responsibilities, contribute to an efficient team. And it’s up to you as an administrator of your website to take on this task.
That’s why we’ve prepared this thorough guide for you to help manage users in WordPress. So, read ahead to learn more.
Table of Contents
What are WordPress Users?
A WordPress User is anyone who has a specific level of access to your WordPress website through an account. For example, a visitor with a user account on your site can comment on blog posts.
Each user belongs to a group called a User Role. The purpose of these roles is to control who gets how much access to your site.
So, when a website owner assigns a user role, the user receives a set of Permissions or Capabilities. They cannot perform any action that’s outside the scope of their user role.
You might be wondering what types of user roles you get. Well, WordPress has six default user roles.
- An Administrator manages the entire website, including themes, plugins, users, and other site-wide settings.
- An Editor manages the content part of the website, like editing and publishing any posts.
- An Author creates, edits, deletes and publishes their posts. But this privilege doesn’t extend to posts created by other authors.
- A Contributor can create, edit, and delete their own posts. However, they don’t have any publishing capabilities.
- A Subscriber is only able to read the content on your website and leave comments. They don’t have access to the WordPress dashboard.
- A Super Admin oversees the entire network consisting of multiple websites. So, they can make network-wide changes and even restrict permissions for regular admins.
For a better understanding, read through our detailed guide on WordPress user roles and permissions.
The website owner is automatically assigned the role of an admin. So, it’s your responsibility as an admin to manage the rest of the WordPress users.
With that said, here’s a short guide on how you can do that.
How to Manage Users in WordPress From Your Dashboard?
Fortunately, WordPress enables user management from the dashboard without any third-party tools. As a result, you can add, edit, and delete users on your WordPress site without any hassle at all.
1. Adding Users to a Website
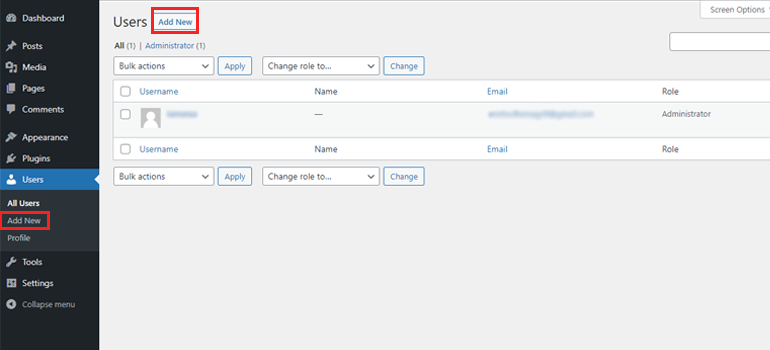
Firstly, log in to your WordPress dashboard and go to Users. You’ll see that you’re already registered as an admin for the website.
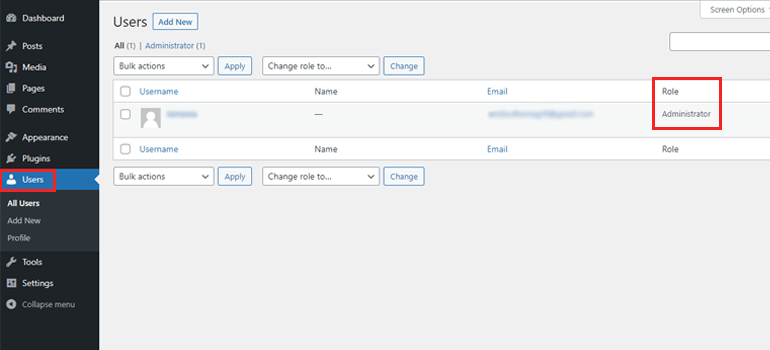
To add new users, click on the Add New button.
Now, fill in all the necessary information like Username and Email.
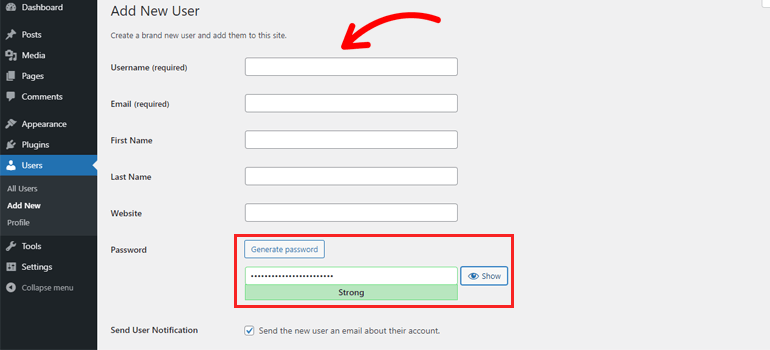
The Password can either be a custom password or one generated by WordPress. Regardless, make sure that all your users’ passwords are strong. You don’t want to compromise your site’s security because one of their accounts got targeted.
You also need a safe way to pass on login credentials to the actual user. WordPress automatically sends an email with said information to the user. You just have to tick the Send User Notification checkbox while creating the user.
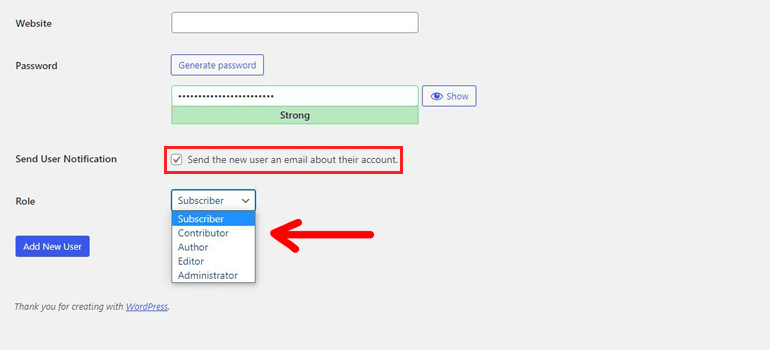
Most importantly, select a user role for the new user from the dropdown.
Once you’re done with these steps, click on Add New User. With this, you’ve successfully created a new user account on your website.

2. Editing User Information of Existing Users
Another option to manage users in WordPress is editing user information. With this, you can update the user role, name, email, password, and more.
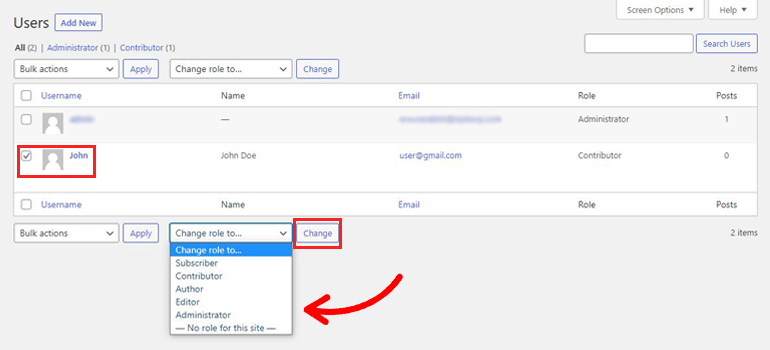
I. Changing User Roles
Suppose you need to change user roles for people on your team. Simply, go to All Users. Select the user you want to change the role for and pick a different one from the dropdown. After you’ve done that, hit the Change button.
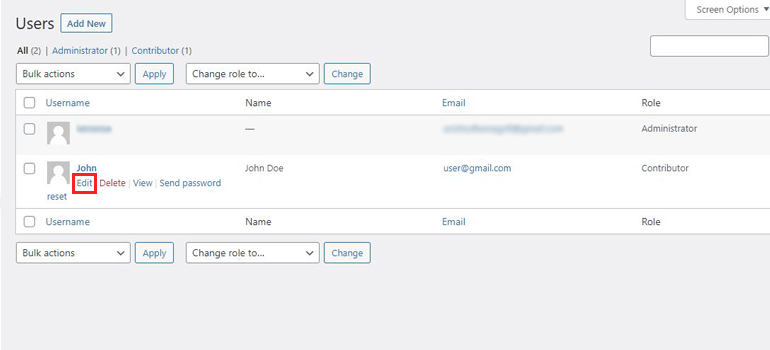
II. Changing User Information
You can do so much more than just changing user roles with WordPress. Just go to All Users and hover over the user you want to make changes to. Then, click on Edit.
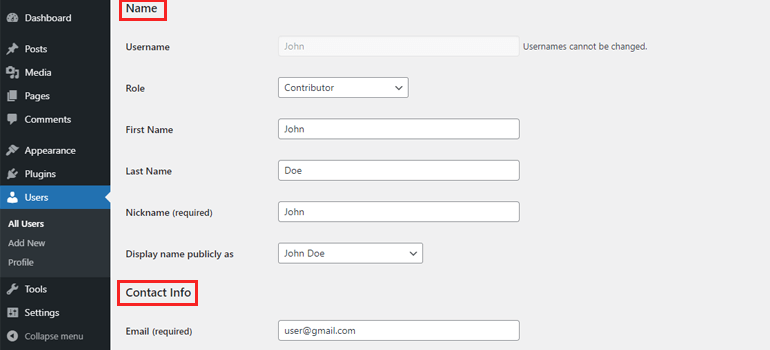
From here, you’ll be able to change their name, contact information, password as well.
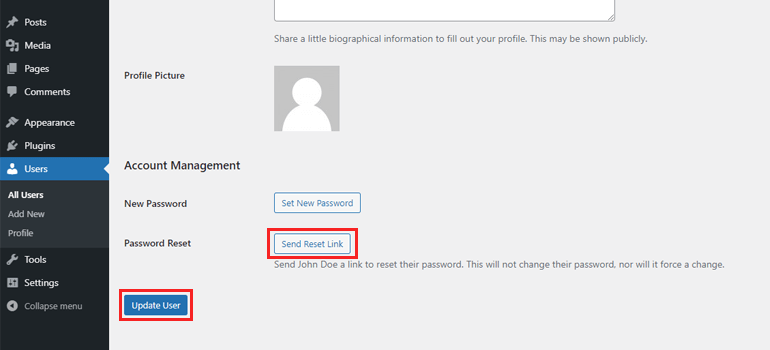
You could change the password for the user directly with the Set New Password button under Account Management.
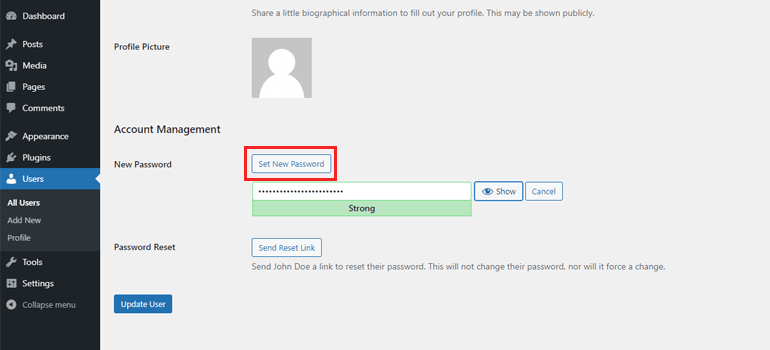
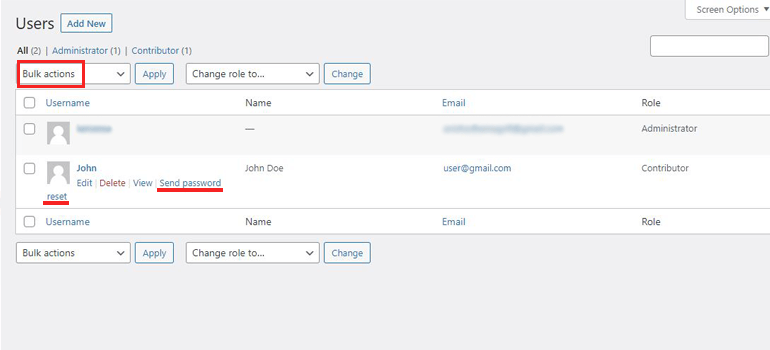
But a better way is to send a password reset link to their email. This way, they can change the password on their own. And all you have to do is press the Send Reset Link button. Then, hit Update User.
A faster method is to click the Send password reset option you see when hovering over the user. You’ll also be able to send the links in bulk to multiple users using Bulk Actions.
3. Deleting Users From a Website
To delete user accounts from your WordPress website, go to All Users. When you hover over the user you want to delete, you’ll see the Delete option. Click on it and complete the deletion.
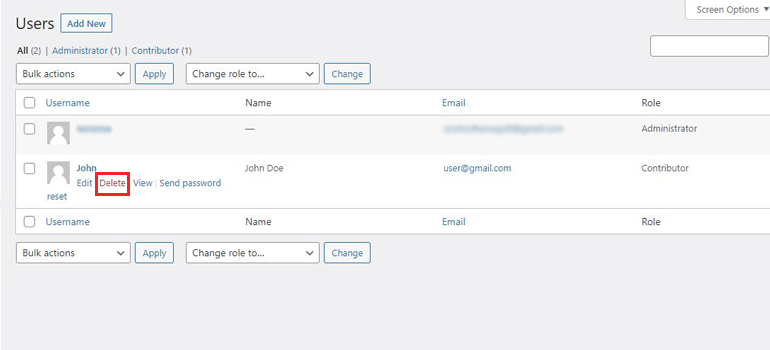
Once deleted, WordPress strips the user of any permissions or capabilities they previously had.
Allow Users to Register via a Front-end Form
Sure, you can do all this yourself on the WordPress dashboard. But, what if there’s a way for users to register themselves with a front-end form on your website? It’s a great option as it helps save time while you manage users in WordPress since you won’t have to add every single user by yourself.
And the perfect solution for this is a registration plugin like User Registration. It allows you to build a registration form that you can place anywhere on your site.
So, let’s look at how you can use this plugin as a user management tool to create a front-end registration form and assign user roles in WordPress.
1. Create a User Registration Form in WordPress
The first thing you need to do is install and activate the User Registration plugin on your dashboard.
Either search for it in the Add New section of the Plugins page or download it from here.
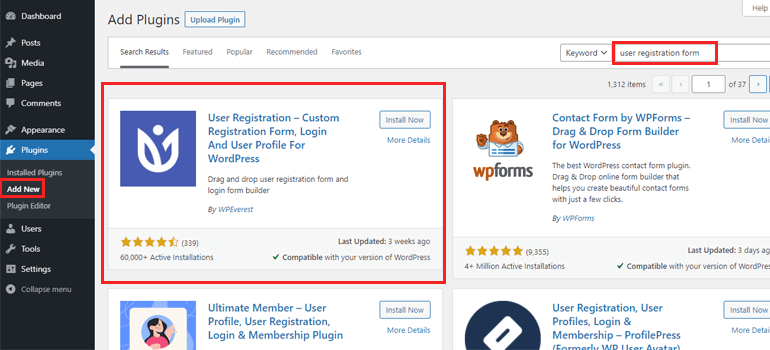
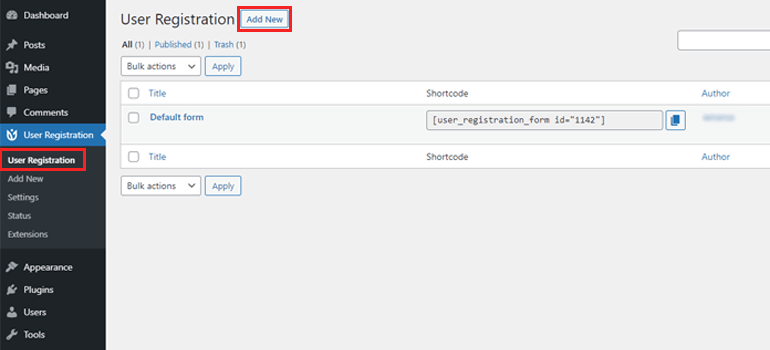
After you complete installing the plugin, go to User Registration and click on Add New.
This takes you to a form builder with all the available fields in the left panel.
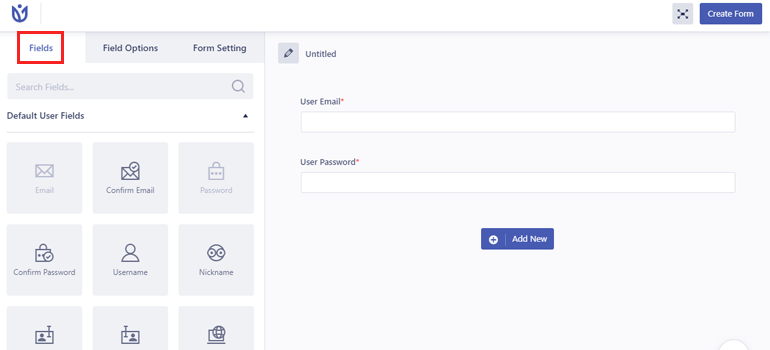
Just give your form a name and start building it.
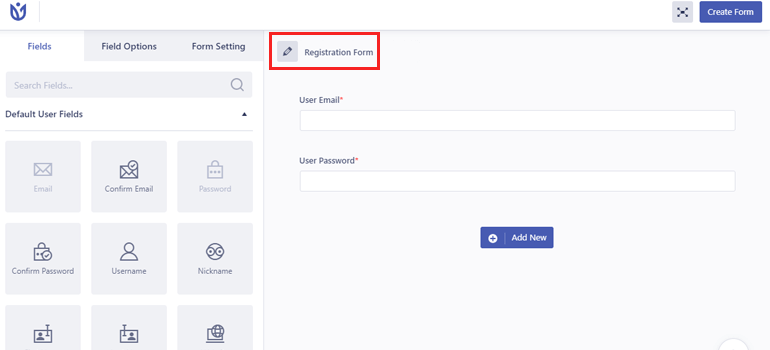
As you can see, the form already has two default fields: User Email and User Password.
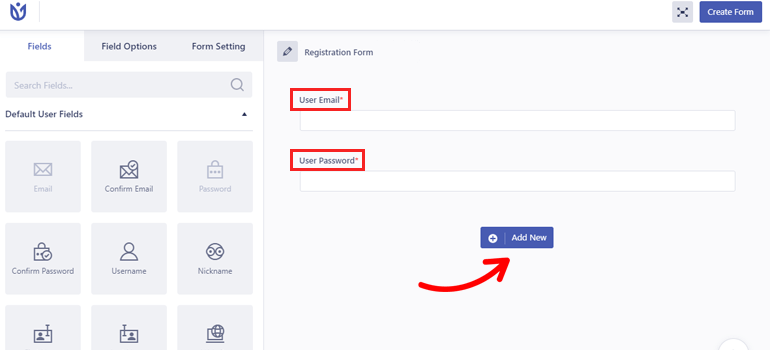
If you want more information on your users, click Add New and drag and drop the necessary fields into the blank rows on the right.
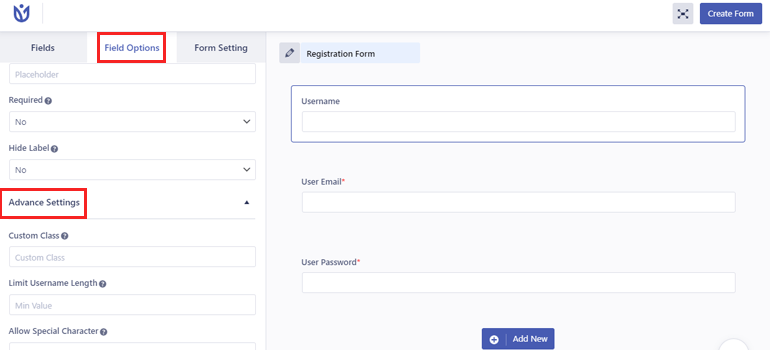
After that, you can customize these fields from the Field Options. Here, you’ll find General Settings that let you edit Label and Placeholder.
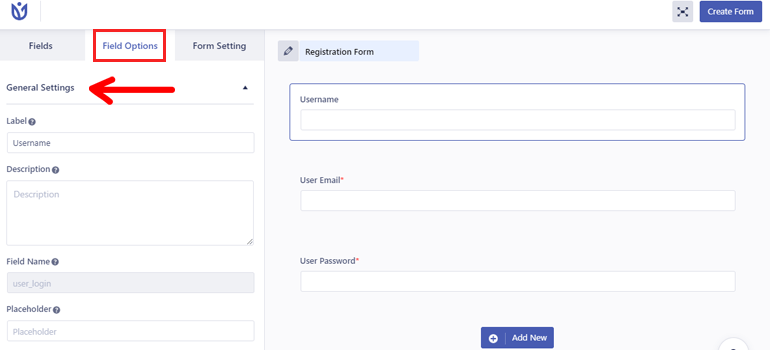
On the other hand, Advanced Settings helps you to add custom classes and more.
Repeat the customization process for every field until you build the perfect registration form for your site.
2. Specify a Role for Your Registered Users
Building a form is just the start of user management in WordPress. You still have to specify a user role for people who submit the form and register as users.
To do this, go to Form Setting. In the General Settings, the Default User Role is automatically set to Subscriber. You can leave it as it is if the form is for visitors and customers.
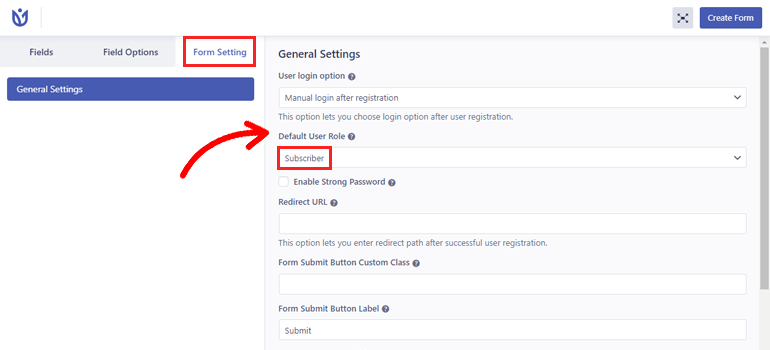
If the form is meant to register different employees, you can select the suitable user role from the dropdown.
That’s not all. User Registration comes with plenty of other options like sending email confirmation before login, enable strong passwords for users, and so much more.
Once you’re done with all these steps, select the Create Form button on the top right. Finally, your front-end registration form is ready for use!
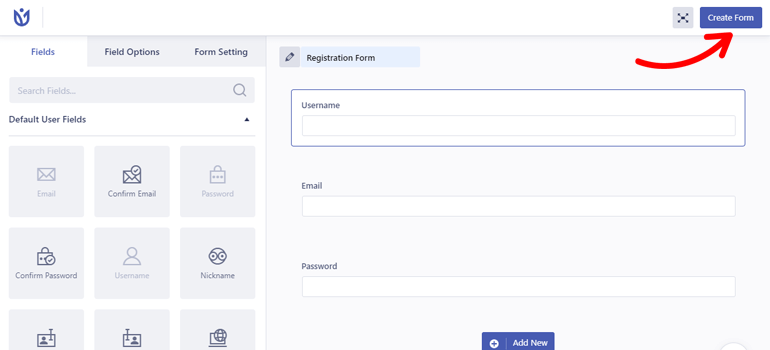
Now, all that’s left to do is copy and paste the form shortcode wherever you want the registration form to appear. Before doing so, you may want to see how it looks in the front-end. You can simply press the Preview button for that.
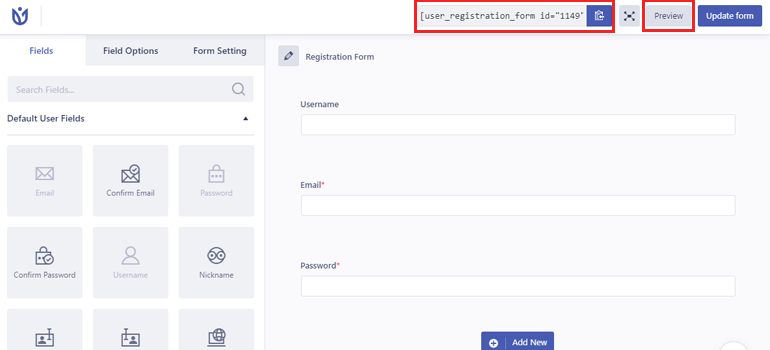
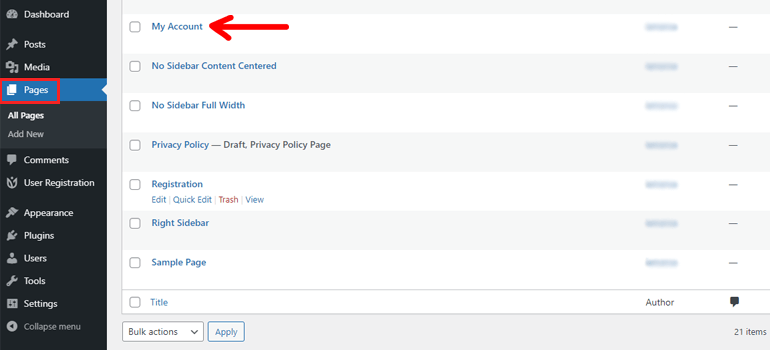
Moreover, User Registration also creates a user profile page called My Account for users automatically after they register and log in.
However, if that’s not your style, this plugin allows you to create a custom user profile page too.
Other WordPress Plugins to Manage Users in WordPress
So far, we’ve talked about managing users with WordPress’s default roles. But what if you need roles unique to your business.
For example, you might need a user who just moderates comment or a user who just works on your online shop’s products.
For such cases, having the ability to create custom user roles and customize capabilities for each user is ideal.
Although WordPress doesn’t have this feature, there are quite a few plugins that will lend you this ability.
We’ll discuss two such plugins below. Then, you can download and try anyone you think fits your requirements the best.
I. PublishPress Capabilities
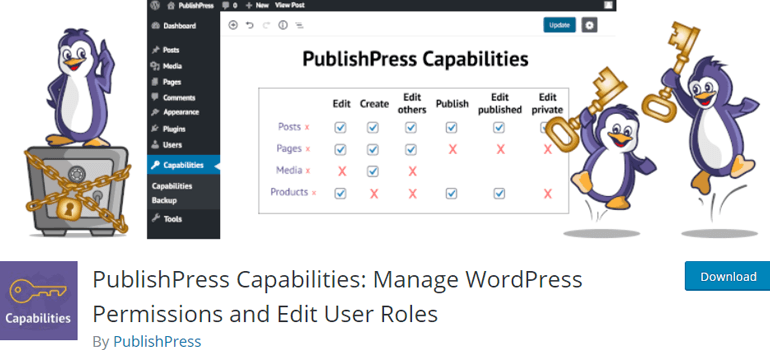
PublishPress Capabilities is one of the best WordPress user management plugins available. With this plugin installed on your website, you’ll be able to create custom user roles for your team. Not just that, you can even customize WordPress’s default user roles.
If you change your mind, this plugin lets you backup old user roles and capabilities and restore them. And if you have a multisite network, you can apply any customization across all the sites.
Key Features:
- Clone existing user roles
- WooCommerce permissions
- Works with custom post types
- Front-end menu restriction
II. User Role Editor
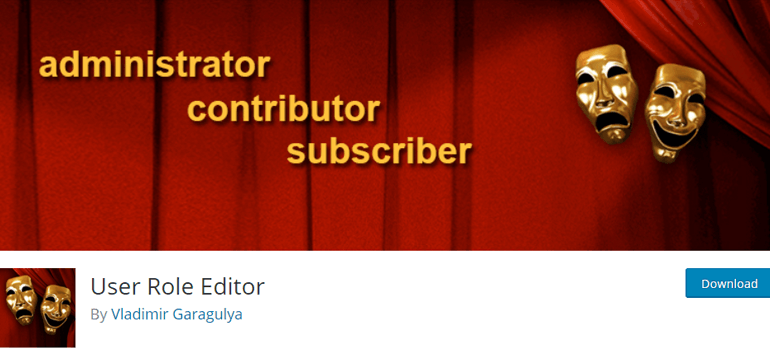
Another such plugin is User Role Editor. Apart from restricting user access to posts and pages, it helps you block or show selected items to only specific user roles. For example, you can decide which front-end menu items are viewable by visitors who aren’t logged in and those who are logged in.
Moreover, this WordPress user management plugin lets you assign multiple roles to a single user if needed. Also, you can synchronize changes made to user roles and capabilities with a single click.
Key Features:
- Import and export user roles
- Manage user access for each plugin
- Block selected menu and widgets for specific user roles
- Remove redundant capabilities
Conclusion
That wraps up our guide on how to manage users in WordPress. We’re sure you’ll have no problem following along since WordPress’s native user management tools are pretty easy to understand and implement.
However, you can benefit from plugins such as PublishPress Capabilities and User Role Editor for more powerful features.
If you’re interested, you can go through our blog for helpful articles like how to create a WordPress login and registration page.
Also, don’t forget to follow us on Twitter and Facebook for more updates.


![Zakra 3.0 | Zakra Pro 2.0 Release [Major Updates!]](https://i.ytimg.com/vi/g3rifl7kWvg/maxresdefault.jpg)