If you want to create advanced registration forms, you can use Select2 WordPress fields instead of the Select field.
Wondering how you can do that? Well, you’re in the right place!
In this article, you’ll learn what the WordPress Select2 field is, its significance, and its difference from the standard Select field.
We’ll also go through the step-by-step process of adding the field to a registration form. So, make sure to read the article till the end!
Table of Contents
What is Select2? How is it Different From Standard Select?
In simple terms, the Select2 technology gives you customizable Select fields. This means you can add features like searching, tagging, infinite scrolling, etc., to the Select field.
Now, you must be wondering how the Select2 field differs from the standard Select field. Let’s find out!
Select vs. Select2
The standard Select field presents a list of available options in a dropdown. The user can select one of these options by scrolling to find the option.

Select2 field has all the operations the standard Select field offers. Thus, it also allows users to select one of the available options.
However, Select2 offers more flexibility and customization.
It gives the user a search box where they can type in the option. The matching option is then automatically displayed to the user.
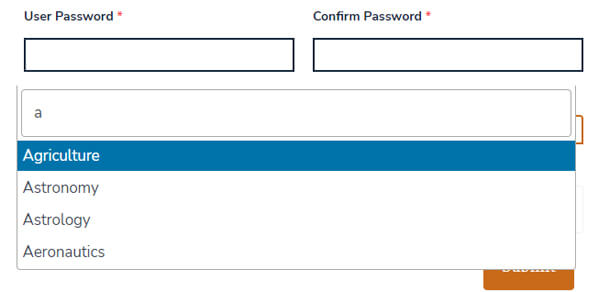
Moreover, Select2 fields also facilitate tagging and infinite scrolling, unlike the standard Select fields.
Select2 vs. Multi Select2
The Select2 technology supports both single-value and multi-value select boxes. The single-value select box is simply known as the Select2 field.
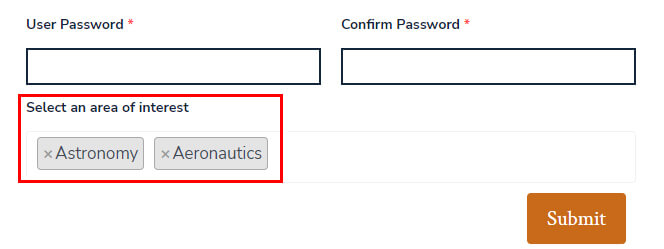
On the other hand, the multi-value select box is referred to as the Multi Select2 field or Pillbox.
They’re pretty similar in how they work; they both support customizable select boxes.
The only major difference is that Multi Select2 lets users choose multiple options from the available options. All the options the user selects appear inside the box, like pillboxes, hence the name.
This feature is not present in the regular Select2 field.
Why Add a Select2 WordPress Field in a Registration Form?
The introduction to Select2 fields helped you understand this technology better.
But what value does it add to a registration form? Why not just use the standard Select field for registration?
Well, let’s look at a few reasons why you should add a Select2 WordPress field to a registration form:
- The Select2 field helps users easily find the right option with the search box.
- The users don’t need to scroll the entire list to find the choice they’re looking for.
- You can let users search and choose multiple choices.
- The field supports infinite scrolling, so the options keep loading when the user scrolls down.
- Select2 fields make the process of registration quick and easy for users.
- The excellent user experience encourages users to complete and submit registration forms.
That’s why we suggest you add a Select2 field to registration forms instead of the standard Select field.
And what is the best way to add Select2 fields to a custom form? Let’s explore that in the next section.
Best Way to Add Select2 Fields in a Registration Form
WordPress doesn’t let you add Select2 fields to the default registration form without extensive coding.
But why rely on coding when you can use Select2 fields in a much easier way?
The User Registration plugin helps you insert and customize Select2 and Multi Select2 fields in registration forms without coding.

All you need is its Advanced Fields extension. That’s why it’s the best way to add Select2 fields to registration forms.
Besides, User Registration is a registration form plugin.
Hence, you can create unlimited custom registration forms with Select2 fields for your site. And the drag-and-drop builder interface makes the process super quick!
Moreover, User Registration is the perfect addition to WooCommerce websites. This incredible WordPress plugin helps you create custom WooCommerce registration forms and sync them with the checkout page.
These are just a few highlights of the User Registration plugin. If you want to learn more about this plugin, please visit the official page.
For now, let’s proceed with the step-by-step guide, where we’ll use User Registration to demonstrate the process.
How to Add a Select2 Field in a WordPress Registration Form?
Here’s a complete guide to adding WordPress Select2 fields in a registration form.
Implement all the steps carefully, and you should have a custom registration form with the Select2 field ready in no time!
Step 1: Set Up User Registration Pro
Installing and activating User Registration Pro on your website is the first step. It’s the premium version of the free User Registration plugin.
To get the pro plugin, purchase any of the three pricing plans from User Registration’s official site.
Then, set up User Registration Pro on your website. If you need help doing so, follow our guide on how to install User Registration properly.
Once you’ve set the plugin up successfully, you can move on to the next step.
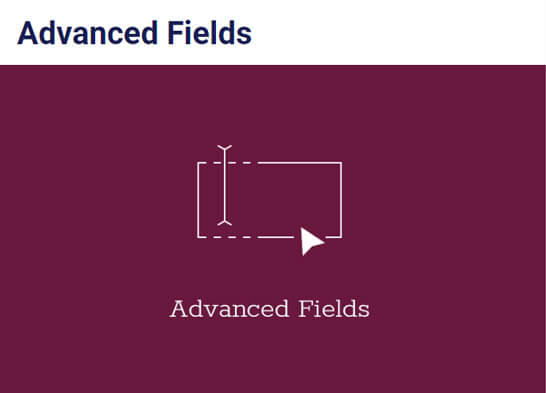
Step 2: Install and Activate the Advanced Fields Add-on
User Registration Pro gives you access to the Advanced Fields add-on.
As the name suggests, it adds several advanced fields to the form builder, including the Select2 and Multi Select2 fields.
So, to use them, you must install and activate the Advanced Fields add-on.
You can do this easily from the User Registration >> Extensions page on your WordPress dashboard.
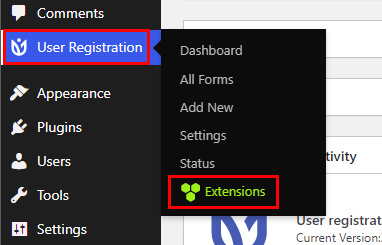
Here, search for the add-on and click on its Install Addon button. When the installation is complete, hit the Activate button.

Now, you’re ready to use the Select2 WordPress fields in your registration form.
Step 3: Create a New Registration Form with Select2 Fields
In the third step, let’s create a new registration form where you can add the Select2 fields.
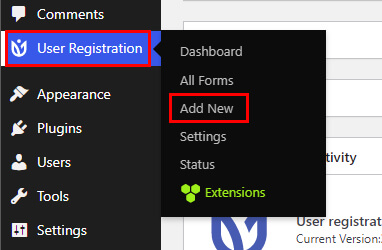
Begin by navigating to User Registration >> Add New.
As you can see, you can choose a pre-designed template for a quick start.
User Registration offers various templates such as Student Registration Form, Ad Submission Form, and more.
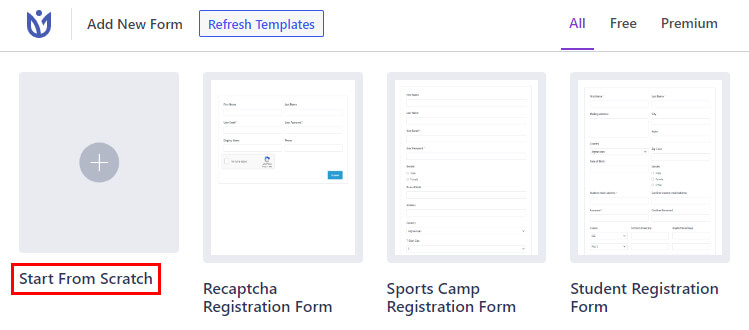
Otherwise, you can start building the registration form from scratch. Click Start From Scratch and name the form.
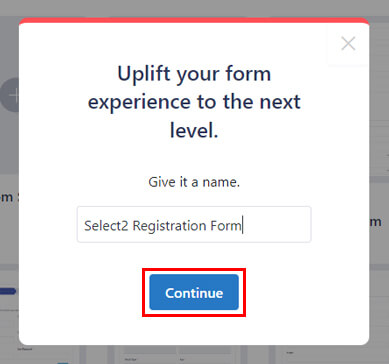
Once you press Continue, you’ll be taken to the drag-and-drop form builder.
The form has four default fields: Username, User Email, User Password, and Confirm Password.
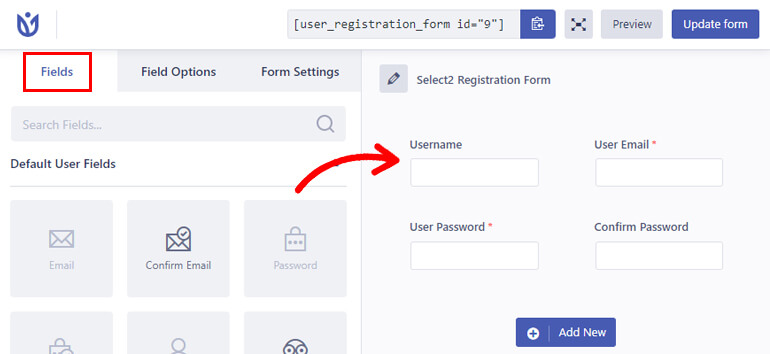
You can drag the rest of the fields you need from the left to the form on the right. You can also rearrange the placement of the fields by simply dragging them around.
Most importantly, make sure you also add the Select2 fields to the form.

User Registration comes with two types of Select2 fields: Select2 and Multi Select2. You can add either of these fields to the form per your requirements.
When you’re done, press the Update form button at the top.
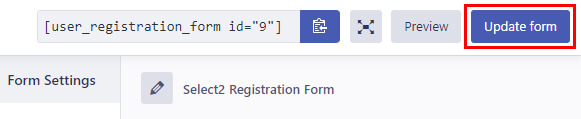
Therefore, you’ve created a new registration form with the Select2 WordPress field.
Step 4: Customize Select2 and Multi Select2 Fields
The best thing about User Registration is that you can customize all the fields you add to the form.
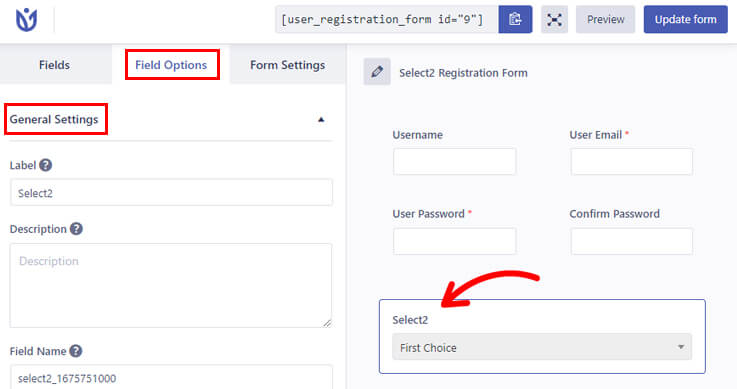
All you have to do is click on the field you want to edit, and its Field Options will open on the left.
So, click on the Select2 field you’ve added. From its Field Options, you can edit the following settings:
General Settings
From this section, you’re able to edit the field label, description, etc. You can also make the field required, hide its label, or enable the tooltip.
Besides, the Options section helps you add, edit, and remove options. Click on + to add an option and – to remove it. You can change the choice names by editing the text box.
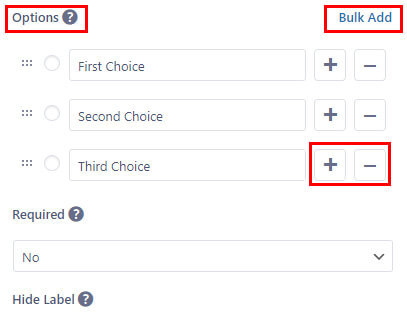
Moreover, you can rearrange the options by dragging them up or down. And if you have a long list of options, the plugin lets you Bulk Add them.
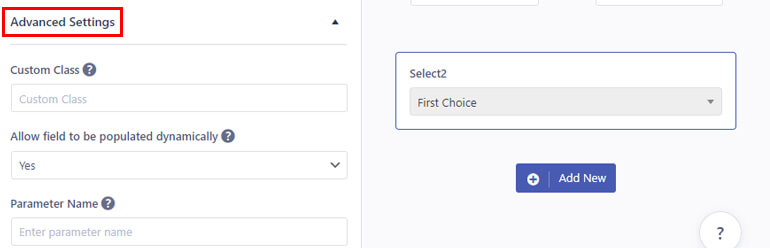
Advanced Settings
The Advanced Settings let you add custom CSS classes for the field. You can also allow the field to be populated dynamically by providing a parameter name.
It’s important to note that the field options vary for each form field.
For instance, the Multi Select2 field has similar General Settings. However, the Advanced Settings offers two new options:
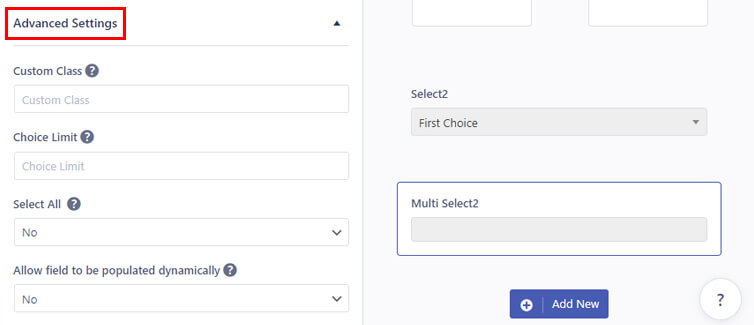
- Choice Limit: Set the maximum number of choices a user can select.
- Select All: Enable users to select all the choices available in the list.
So, customize each field accordingly and hit the Update form button.
Step 5: Configure the Registration Form Settings
Your registration form is not complete until you’ve configured its form settings.
To do that, go to the Form Settings tab in the builder. Here, you can configure two types of settings: General and Extras.
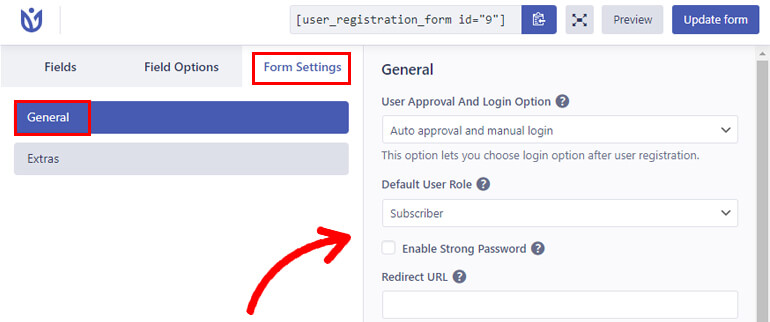
The General section allows you to choose a User Approval And Login Option, Default User Role, Form Template, etc.
You can also enable strong passwords and CAPTCHA support. Aside from that, you can set Redirect URL, Submit Button Text, Form Class, and more.
The Extras settings let you Enable Keyboard Friendly Form, Activate Spam Protection by Honeypot, Enable Whitelist/Blacklist Domain, etc.
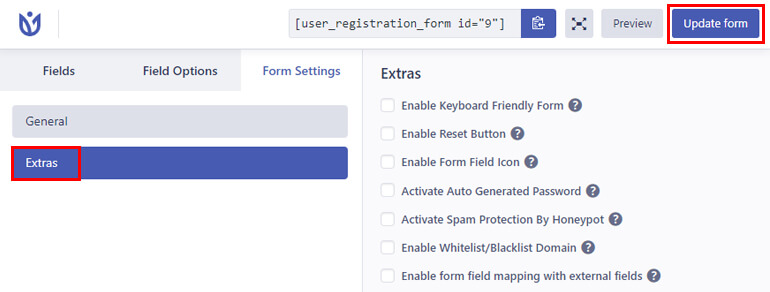
When you’re done with the configuration, press the Update form button.
Step 6: Display the Custom Registration Form on Your Site
Finally, your registration form with the Select2 field is ready to be published on your site.
To do this, open the existing page or post where you want to display the custom form.
Doing this takes you to the Gutenberg editor. Here, click on the block inserter and add the User Registration block to the page.
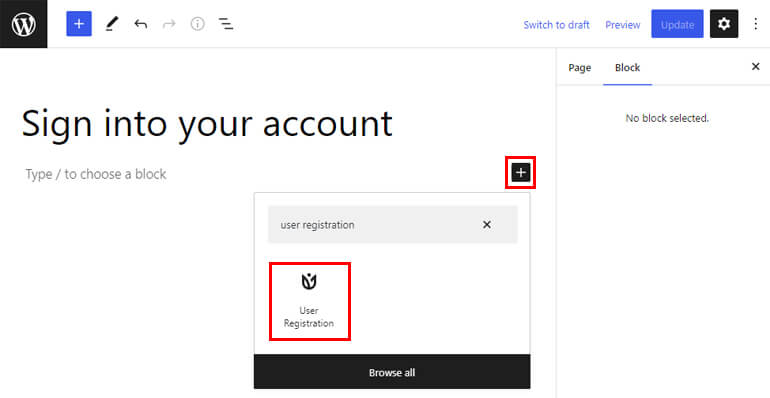
Then, select the Registration Form radio button and choose the form you created previously from the dropdown.
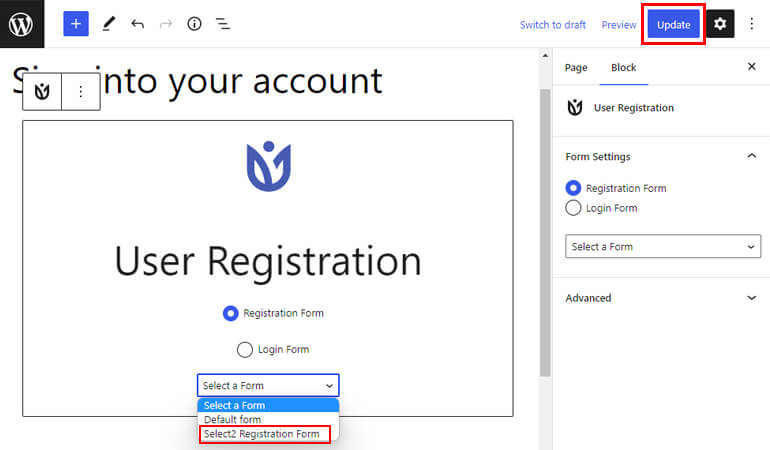
Finally, hit the Update button at the top to make the form live on your site.
If you’re creating a new page or post, follow the same steps as above. Then, hit the Publish button at the end.
Congratulations! Now, your website has a custom registration form with the Select2 WordPress field.
Wrapping Up!
That concludes our article on how to add Select2 WordPress fields in a registration form.
To summarize, you can add Select2 fields instead of the standard Select fields to create more advanced registration forms.
And the User Registration plugin helps you do that without hassle. All you need to do is add the Select2 and Multi Select2 fields to your form and customize them.
Besides that, User Registration is equally helpful in preventing spam registration, changing the default login URL to a custom URL, and more.
Learn more about this powerful plugin through our blog. You can also check out the video tutorials on our YouTube channel.
Also, follow us on Twitter and Facebook to stay updated on new articles.


![Zakra 3.0 | Zakra Pro 2.0 Release [Major Updates!]](https://i.ytimg.com/vi/g3rifl7kWvg/maxresdefault.jpg)