If you need a personalized form for your users, learning how to add a WordPress repeater field to the form is a must.
Having a repeater field means the users can create as many subfields as they wish for and enter all the necessary data. And in turn, you get customized data from each of your users, enabling you to analyze them better.
A plugin like Everest Forms will help you add a repeater field in WordPress forms without any hassle. And, we’ll show you how in the step-by-step tutorial below.
But before that, let’s understand the key reasons why you should consider using repeatable fields in your forms.
Table of Contents
Why Do You Need a Repeatable Field in Your Forms?
Forms can get lengthy and complex very quickly when you try to extract detailed information from your users.
Suppose you need to know the complete educational background of your users. In such a case, displaying fields for each possible qualification and degree they might have will clutter your form.
Wouldn’t it be much better to use a WordPress repeater field, where the user can create as many fields as they need and enter their educational details? This provides a personalized form experience for the users while you receive all the required information.
So, using such WordPress form repeatable fields, you can:
- Reduce form abandonment rate caused by long and complex forms.
- Receive accurate information from your users.
That’s why you should add a WordPress repeater field wherever necessary in your forms.
With that being said, let’s go through our guide on how you can create a repeater field in WordPress.
How to Add Repeater Fields in Your WordPress Forms?
We recommend using Everest Forms to add a repeater field in WordPress forms, just like we have in this tutorial.
It’s one of the most popular form builder plugins in WordPress, garnering over 100,000+ active installations. And it’s all thanks to its user-friendly drag and drop form builder and customization options.
Not to mention the advanced features bundled into premium add-ons that can be used to extend the plugin’s functionality. Hence, WordPress form repeatable fields are just one of its many excellent features.
Adding repeater fields in your WordPress forms is pretty easy when you have a plugin like Everest Forms at hand. You just need to follow the steps explained below accurately.
Let’s begin!
1. Install and Activate Everest Forms Free Plugin
The first thing you must do is, install and activate the free version of Everest Forms.
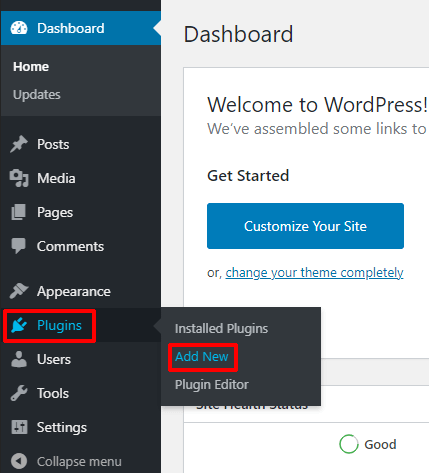
To do that, log into your WordPress website dashboard and open Plugins >> Add New.
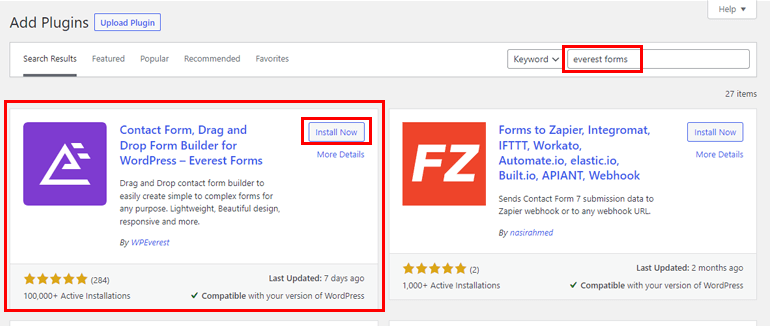
Type in “Everest Forms” in the search bar, and the plugin will appear in the search results. Press the Install Now button to initiate the installation process.
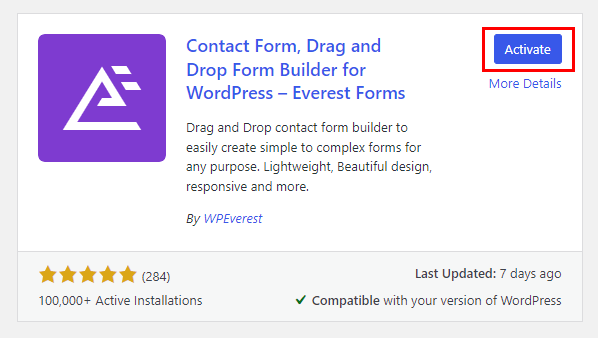
Then, click the Activate button to complete the installation. Now, you have the free version of the Everest Forms plugin on your site.
2. Download and Install Premium Repeater Field Add-on
The free Everest Forms plugin is more than enough to create simple contact and other kinds of forms. However, to specifically make a form with a WordPress repeater field, you’ll need the premium version of Everest Forms. It comes with the Repeater Field add-on, which lets you add as many repeater fields as you want in your form.
That’s why you must first buy a Professional or Agency plan for Everest Forms to use this add-on. Just head on over to the official pricing page and buy any of the two plans suitable for you.
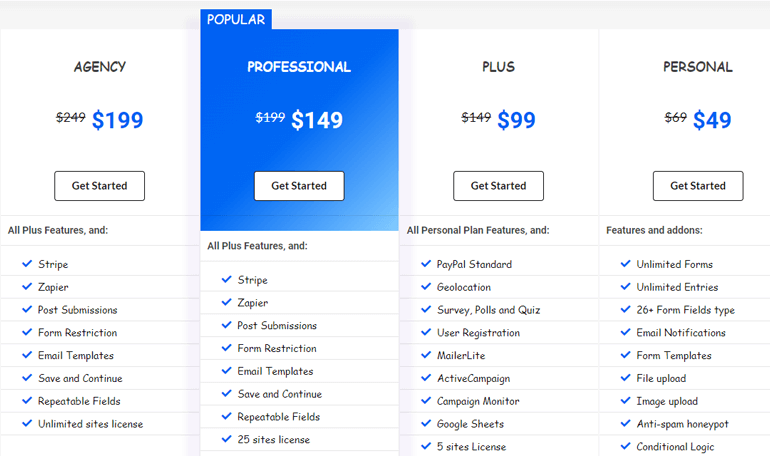
Then, create your account and log into it. You’ll be taken to your account dashboard, where all the add-ons available under your plan are listed in the Downloads section.
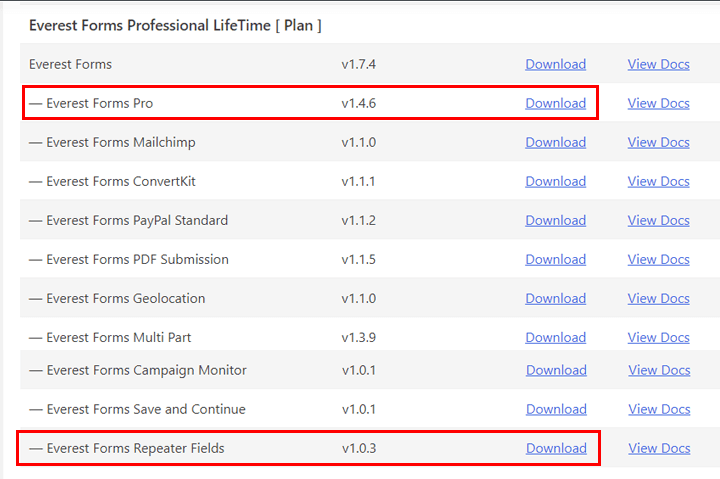
The ones you need are just the Everest Forms Pro and Repeater Field add-ons. Simply download both, and they’ll be saved as ZIP files on your device.
Now, go back to the WordPress dashboard and open Plugins >> Add New.
You can now upload the files to install them one by one. Make sure you install the Pro add-on before installing the Repeater Field add-on. Otherwise, you may encounter major errors.
So, click the Upload Plugin button and choose the Everest Forms Pro file first.
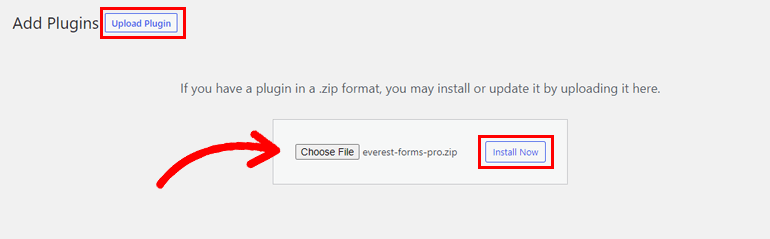
Then, press Install Now and Activate Plugin to complete the installation.
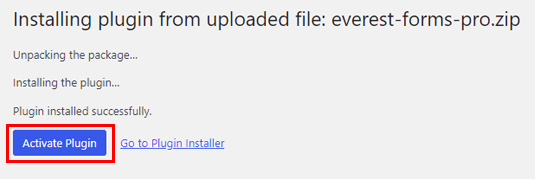
Repeat the same process with the Repeater Field add-on.
Now, the Installed Plugins page will have these 3 plugins: Everest Forms, Everest Forms (Pro), and Everest Forms Repeater Field.
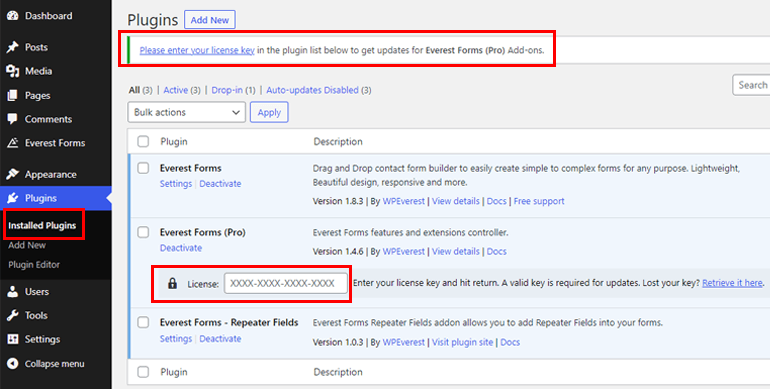
You can see a notice at the top of this page telling you to enter the license key for Everest Forms (Pro) add-on. You’ll find this key under the License Keys tab of your account dashboard.
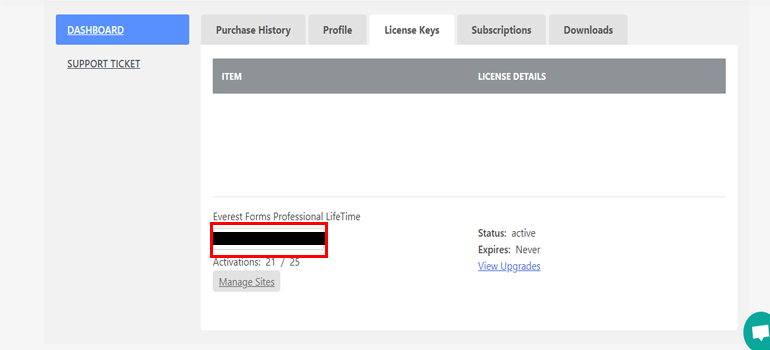
Simply copy the key, paste it in the field under Everest Forms (Pro), and hit enter.
With that, you’re ready to start building a form with repeatable fields.
3. Create a New Form with Repeater Field
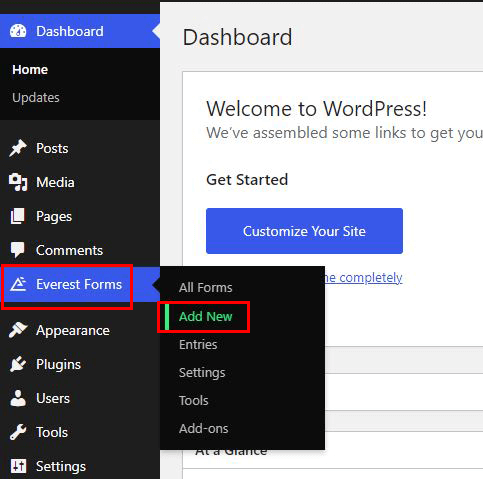
Begin by navigating to Everest Forms >> Add New. This page gives you the option to create an entirely new form or customize pre-made templates.
Everest Forms comes with multiple starter templates for different kinds of forms. If you’re short on time, you can build simple contact forms, leave request forms, medical appointment forms, job application forms, etc., with these templates.

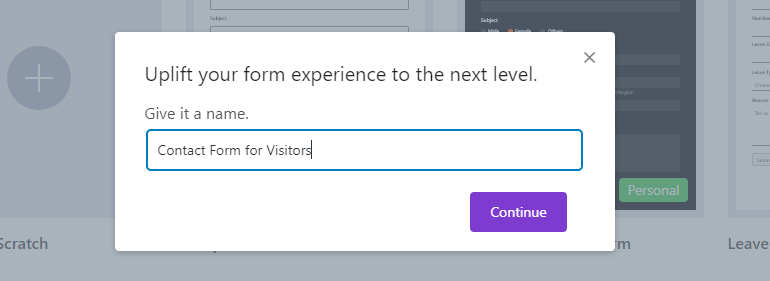
But in this tutorial, we’ll show you how to create a new form from scratch and add a WordPress repeater field to it. So, click the Start From Scratch option.
Then, give your form a simple and logical name. For example, you can title it as ‘Contact Form for Visitors.’
After you hit the button, you’ll be taken to the form builder which looks like this.
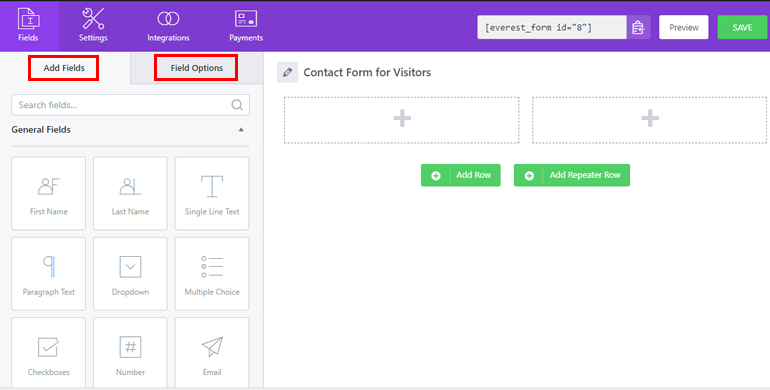
On the left are all the form fields available for use and their field options. On the right is where you build the form by adding rows and placing fields in them. All you have to do is drag the fields from the left into the row on the right.
When you need to add another row, click Add Row. This creates a new row for regular fields, not repeatable fields.
For the latter, you need to press the Add Repeater Row button.
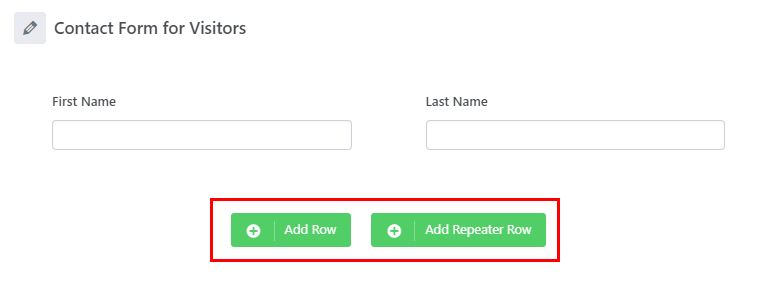
This creates a repeater row where you can add fields like you usually do. The only difference is that this field row will now appear repeatable on your form.
Continue adding the necessary fields until the form is complete, and click on Save when you’re done. You can view what the form looks like in the frontend with the Preview feature.

4. Customize and Configure Form Settings
Next up, you need to customize all the fields you’ve added to your form. To do that, click on the field you want to edit, and its Field Options will appear on the left.
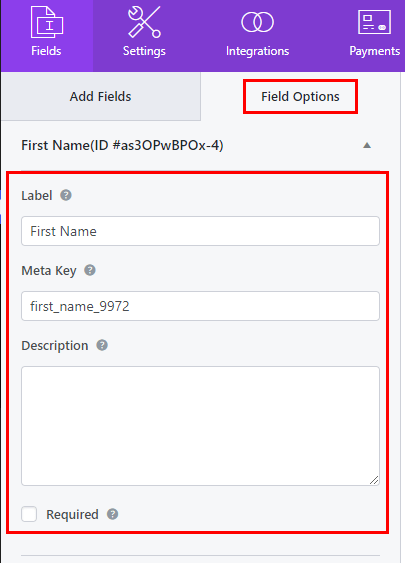
You’re able to edit the Label, Meta Key, and Description from here. You can also make a field Required for users to submit the form. Besides these key options, the plugin also comes with specific customization options for different fields.
Moreover, Everest Forms provides Advanced Options like Placeholder Text, Default Value, CSS Classes, Enable Autopopulate, and more.
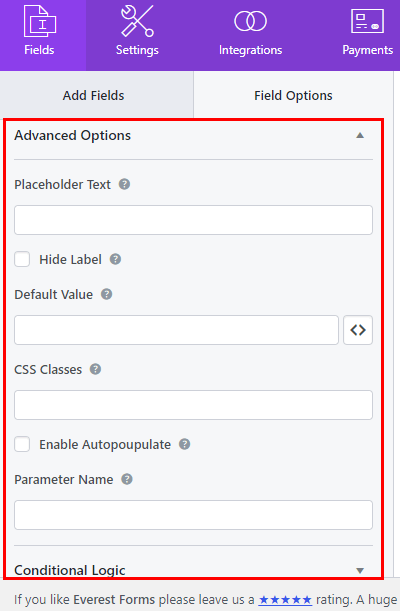
Likewise, you get to Enable Conditional Logic on fields for a personalized form filling experience.
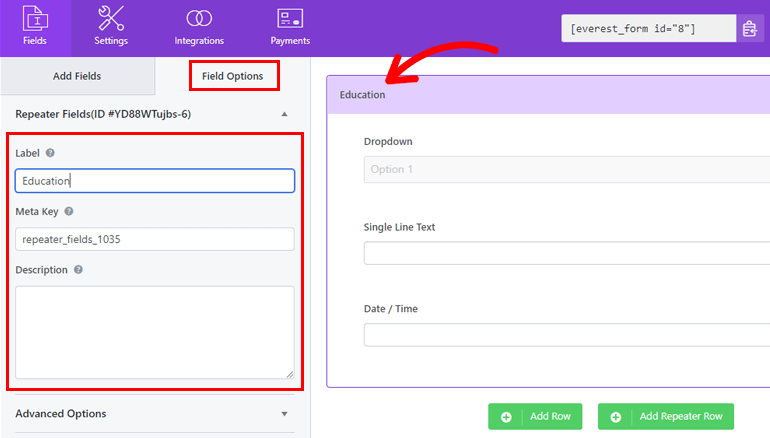
You must also edit the repeater row by clicking on Repeater Fields before customizing the fields inside it.
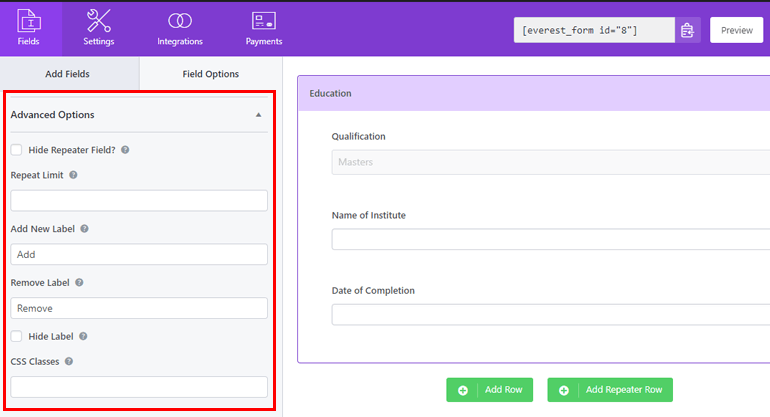
Apart from the general options, you get the following Advanced Options for the Repeater Row:
- Hide Repeater Field: Hide or show the repeater field in frontend view.
- Repeat Limit: Set a repeat limit for the repeater field. Leaving Repeat Limit empty means letting users add repeater fields an infinite number of times.
- Add New Label: Change label for the Add button.
- Remove Label: Change label for the Remove button.
- Hide Label: Allows hiding the form field label.
- CSS classes: Use custom CSS classes for the repeater fields.
That’s not all. There are more configuration options in the Settings tab of the form builder.
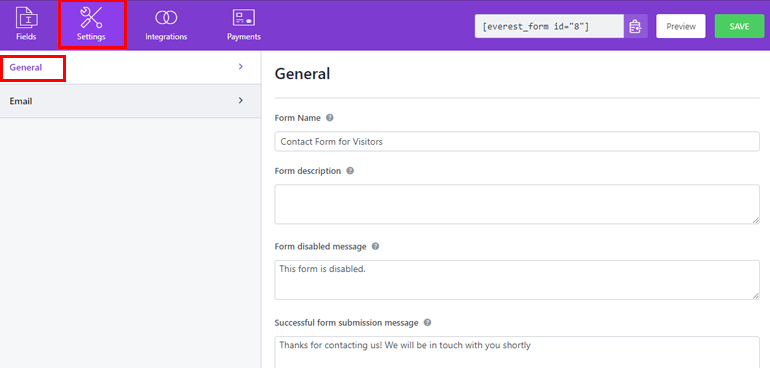
In the General section, you can change the Form Name, Form Description, Layout Design, Submit button text, Form disabled message, and so much more. Better yet, you get to enable anti-spam, disable storing entries, allow ajax form submission, etc., for the form.
You also get to create and edit email templates from the Email section for both admins and users. You can even apply conditional logic for when you want to send or not send the email in question.

After you’ve completed making the required changes, don’t forget to hit the Save button.

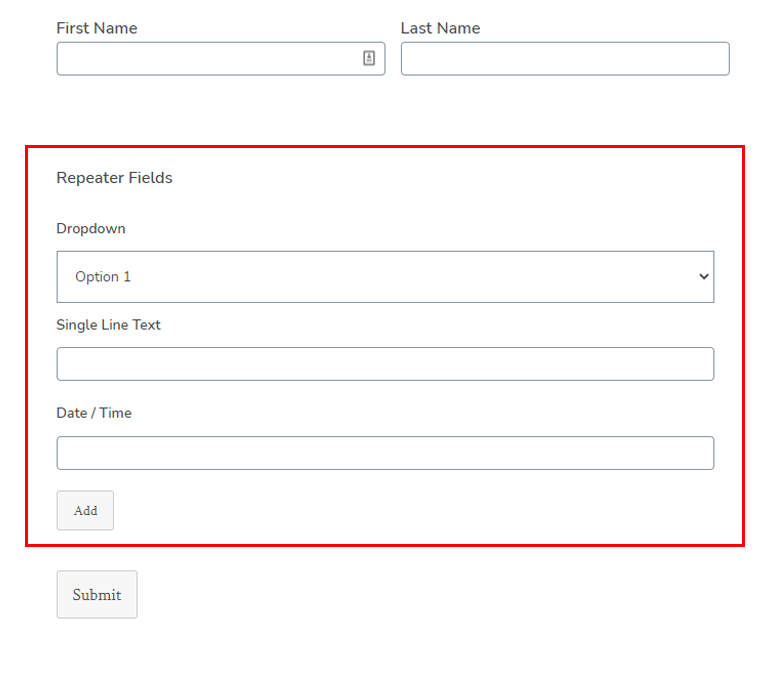
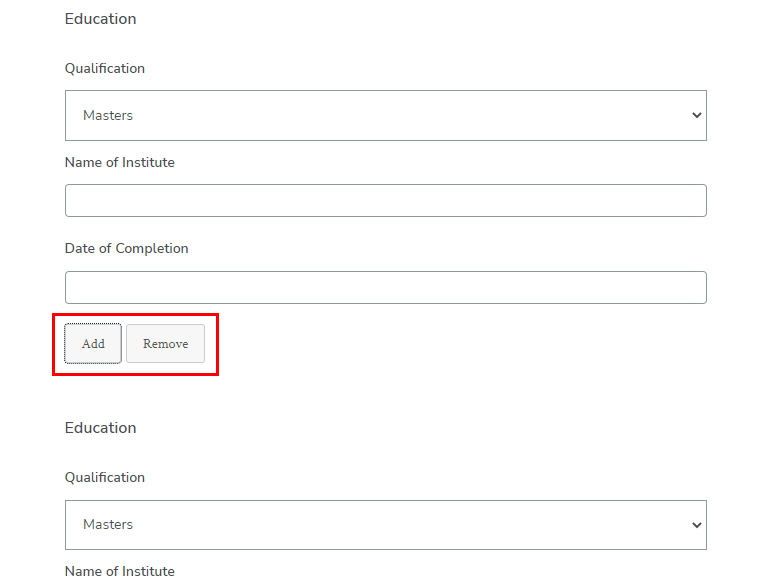
Now in the frontend, a user filling up the form will be able to provide their complete information through the WordPress repeater field. They just need to click the Add button, and a new set of the same fields appear in the form. They can also Remove the row they don’t need.
5. Place the Form on Your WordPress Website
The custom contact form with repeatable fields is now ready to be placed on your WordPress website.
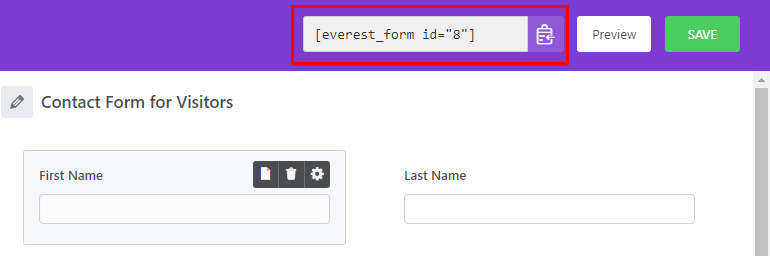
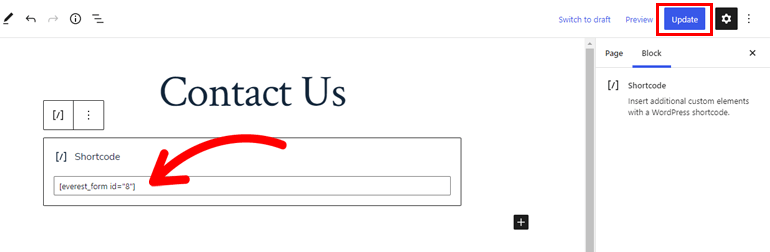
You can do this in two easy ways. Just copy the form shortcode from the top of the form builder and open the page or post you want to display the form in.
Then, click the + icon and add the Shortcode block.
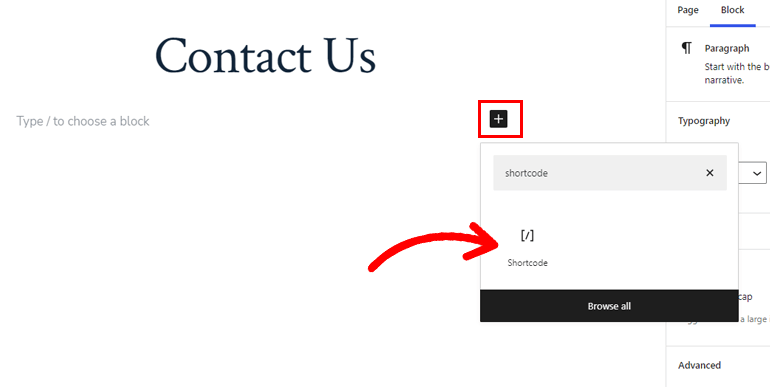
Paste the shortcode you copied here and click Update.
Alternatively, you can search for the Everest Forms block and choose the form from the dropdown.
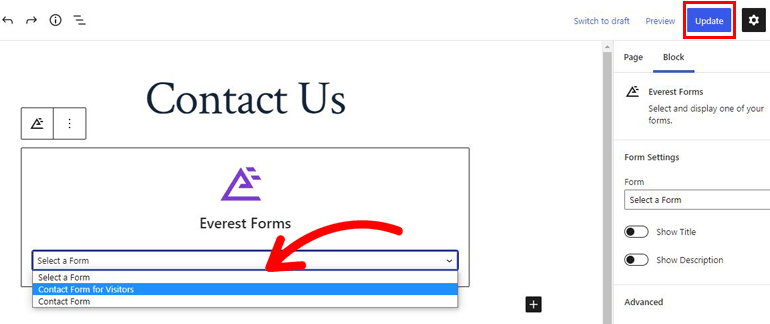
Finally, click Update, and you’re done! Your form with the WordPress repeater field is now live on your website.
Wrapping Up
Repeatable fields are a pretty handy feature to have when you need customized data on your users. And the Everest Forms plugin makes it easier than ever to create custom forms with repeater fields to place on your site.
All you need is its Repeater Field add-on and this comprehensive tutorial.
However, this was just a sneak peek into the vast possibilities that come with Everest Forms. For instance, you can send contact form data to Google Sheets, create survey forms, and even change the color of the submit button.
Learn more about Everest Forms on our blog full of WordPress content. Also, follow us on Facebook and Twitter to stay updated.


![Zakra 3.0 | Zakra Pro 2.0 Release [Major Updates!]](https://i.ytimg.com/vi/g3rifl7kWvg/maxresdefault.jpg)