Do you want to install a WordPress plugin? But don’t have any idea about how to add a new plugin in WordPress?
No need to worry! We’re here to help you.
A plugin is simply a WordPress extension that modifies or adds features and functionalities to your website. In other words, the plugin adds a set of functions to your website and further strengthens your website.
As a beginner, you might see installing a plugin for your website as a big deal. But there isn’t anything so difficult about it.
In this article, we’ll explain the step by step process of how to upload a plugin to the WordPress website. Make sure that you read the full article for complete information.
Let’s get started.
Table of Contents
Things to Consider Before Installing a Plugin
Before starting our stepwise guide for installing a plugin. Let’s discuss some essentials that you need to consider before installing plugin to your site.
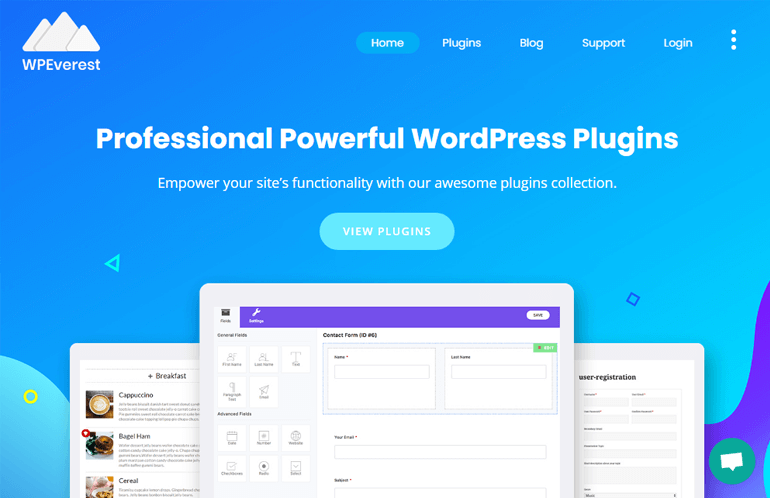
There are oceans of options to choose the plugin for your website today. You can visit the WordPress plugin repository for free plugins. Or you can visit sites like WPEverest.com, CodeCanyon, iThemes, etc. for the premium or paid plugins.
But, not all the available plugins need to be of good quality and well coded. Some plugins may not be well coded and may harm your site in many ways. For example, a bad quality plugin can slow down or even crash your whole site. Besides, it may expose your site to security vulnerabilities and malicious codes.
So, it’s a good idea to choose the best WordPress plugin before you install it on your site. One must always consider the following things before installing a plugin for the website:
- Understand the need of the website and choose the plugin accordingly. For instance, if you want to create a contact form for your site then you may choose the Everest Forms plugin for your site.
- Search for those plugins that have good ratings, reviews, and active installations.
- Check if the plugin supports your version of WordPress.
- Check how responsive are developers for user support.
- Most importantly, always choose a plugin from reputed and reliable sources.
How to Install a New Plugin in WordPress?
After choosing the right WordPress plugin for your website, you are now all set to install it on your website.
In this section, we’ll be discussing how to install a WordPress plugin to WordPress in a stepwise manner. The process of installation of free and premium /paid plugin slightly differs. Besides, there is an additional method for uploading the plugin for your website manually using an FTP client.
- How to Install a Free WordPress Plugin?
- How to Install a Premium WordPress Plugin?
- How to Install a WordPress Plugin Manually via FTP?
Without further ado. Let’s dive into the details on how to add a new plugin in WordPress by different methods.
A. How to Install a Free WordPress Plugin?
To download free plugins for your website, you can proceed stepwise as explained below:
Step 1. Log into the WordPress Dashboard and Navigate to Plugins Menu
Firstly, you need to log into your WordPress dashboard area. After logging in you’ll be able to see the sidebar menu at your left-hand side displaying several menus. For example Posts, Media, Pages, and so on. There you can see the “Plugins” menu just after the “Appearance”.
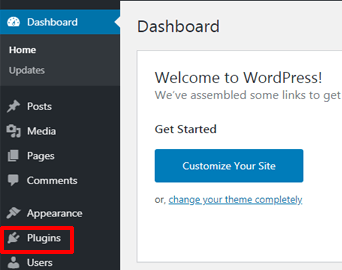
Click on the “Plugins” menu and it’ll direct you to the plugins page. On top of the page, you’ll find the “Add New” button. Simply hit the “Add New” button.

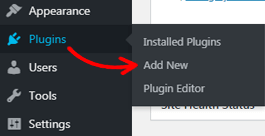
Alternatively, you can hover your cursor to the “Plugins” menu. And it’ll instantly show you with three options including the “Add New” button. So you can just click onto that button (Plugins >> Add New).
Step 2. Search for the WordPress Plugin
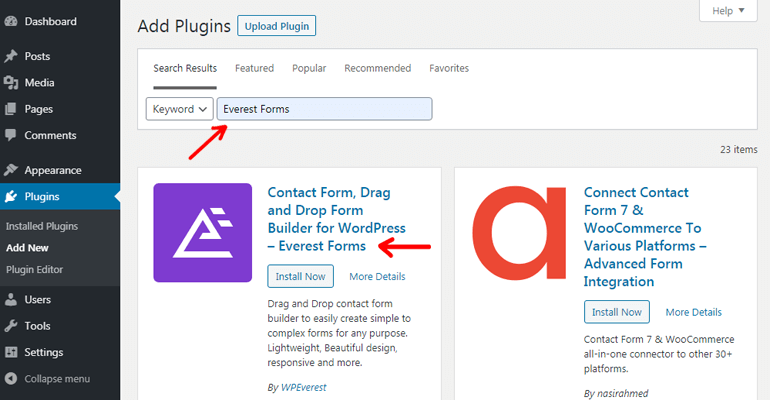
After clicking the “Add New” button by either of the methods mentioned above, you’ll be directed to the add plugins page where you’ll find the “Search plugins” button towards the top.
In the search box, you can type the name of the plugin you want to add to your website. For instance, here we’ll be searching for the “Everest Forms” plugin.
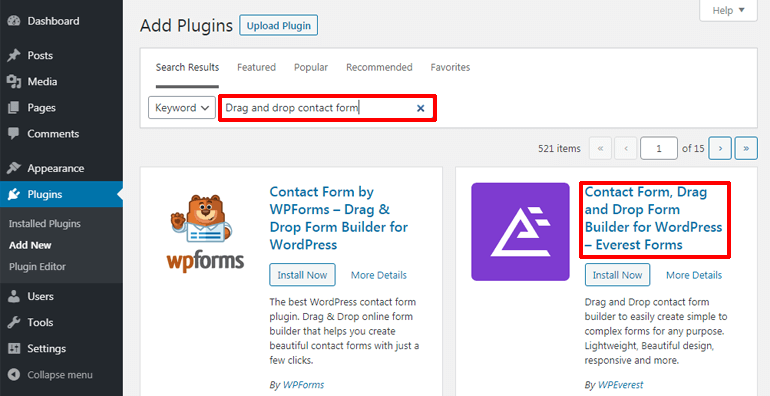
You can also search for the plugin by typing the relevant functionality of the plugin. And it’ll display a related list of plugins for you. But remember here we can only search for the free plugins that are available on the official WordPress plugin directory.
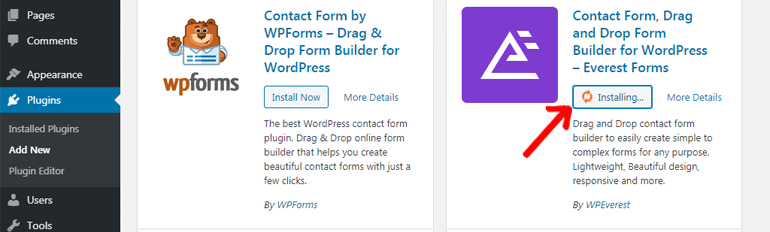
Step 3. Install and Activate the Plugin
After searching for the required plugin, you can now install the plugin for your site. Just hit the “Install Now” button and WordPress installs a plugin for you in a matter of seconds.
Thereafter, you need to perform the final step of activating your plugin. You can do that by clicking the “Activate” button which you’ll see soon after completion of the installation of your plugin.
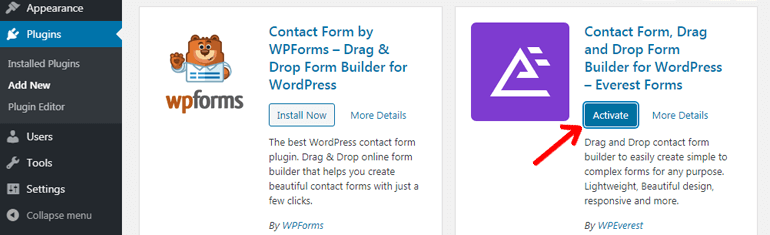
After the activation step, your free plugin is now ready to be used for creating a fully functional website.
B. How to Install a Premium WordPress Plugin?
Installing a premium plugin is slightly different from installing a free plugin. Because you need to visit the plugin market store and download the plugin before you can install it.
Step 1. Purchase the Premium Plugin
You can purchase the premium plugins for your website from reputed and trusted sources like WPEverest.com, CodeCanyon, iThemes, and so on.
After purchasing the plugin, you’ll have the installable plugin in the form of a zip archive to upload it later.
Here let’s take the example of “Everest Forms Pro”. If you download Everest Forms Pro from WPEverest.com, then it’ll be downloaded as everest-forms-pro.zip. You can now proceed stepwise as mentioned below.

Step 2. Log into Your Dashboard
Firstly, log into your WordPress admin area. You’ll see different menus on the left-hand side of your sidebar including the “Plugins” menu.
Press the “Plugins” menu and you’ll be navigated to the plugins page. There on the top of the page, you’ll see the “Add New” button. Hit on that “Add New” button.
As mentioned earlier, you can also navigate to the “Plugins” menu and it’ll show you with three options including the “Add New” button. You can simply press the “Add New” button from there.
Step 3. Upload the Premium Plugin, Install, and Activate
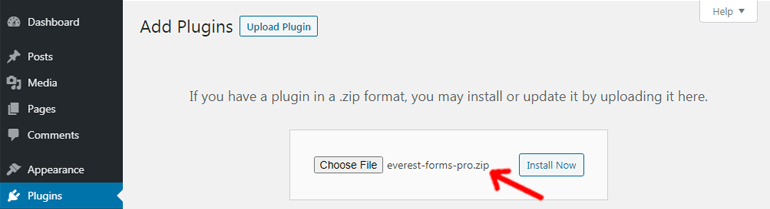
Clicking on the “Add New” button will direct you to the add plugins page where you’ll see the “Upload Plugin” button.
Here, in this case, you’ll have to upload a plugin instead of searching for the plugin from the search box. Since premium plugins aren’t available in WordPress.org.
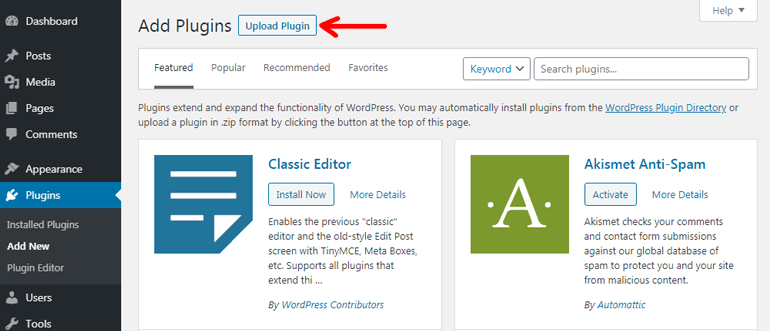
Press the “Upload Plugin” button. Thereafter, you can choose a file that you had previously downloaded as a zip file on your computer.
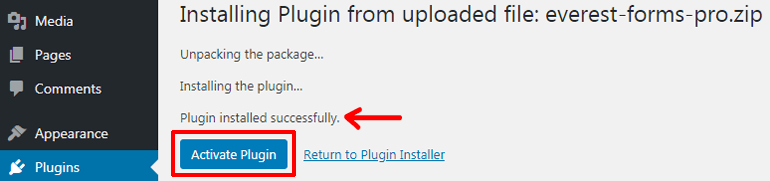
Click on the “Choose File” to select the required zip file. After choosing the file, you can press the “Install Now” button. Then WordPress installs a plugin for you in no time.
Finally, press the “Activate Plugin” button to activate the plugin, and your premium plugin is ready to be used for your website.
C. How to Install a WordPress Plugin Manually via FTP?
Besides installing a plugin from the WordPress dashboard, you can also upload the plugin by alternative method i.e. manually via FTP. FTP stands for File Transfer Protocol. It’s used for transferring the files between a computer and a server over the internet.
This method is a little complicated compared to the installation process from the dashboard. But this method can be useful when the WordPress plugin directory is inaccessible to you on your dashboard due to some reasons.
Having said that, if you want to know how to upload plugins to WordPress manually via FTP? Here’s the process in detail.
Step 1. Download the WordPress Plugin File on Your Computer
Firstly, you must choose a plugin and download the plugin file on your local computer. For a free plugin, you can download it from the WordPress.org plugin repository. Whereas you can download paid plugins after purchasing them from plugin stores like WPEverest.com or CodeCanyon.
For example, we’ll show you how to download a plugin from WordPress.org and install that on your site via the FTP method.
Visit WordPress.org and go to the plugins page. Search for the required plugin by name or relevant function and download it. You can download the plugin by simply clicking the “Download” button.
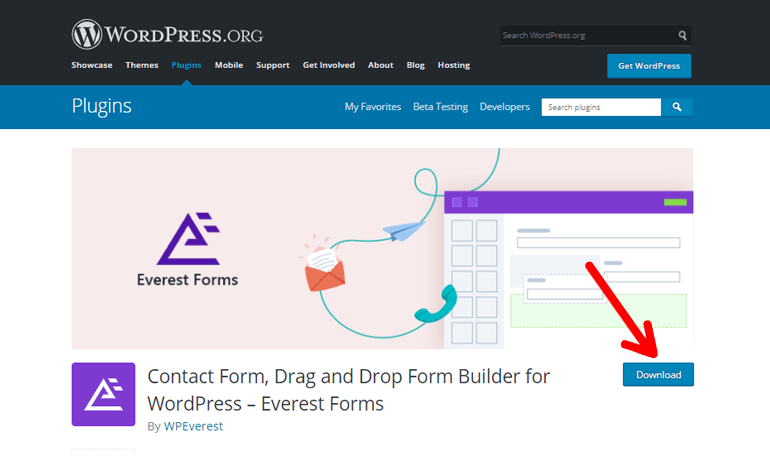
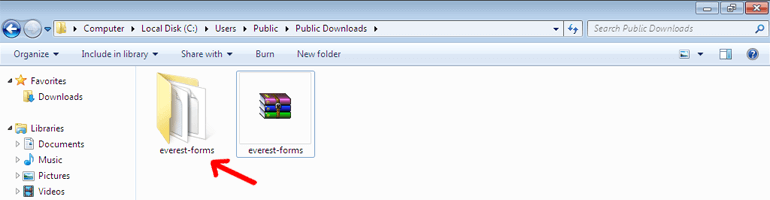
And your plugin will be downloaded as a zip archive on your computer. For instance, if you download the Everest Forms plugin then it will be downloaded as everest-forms.zip.
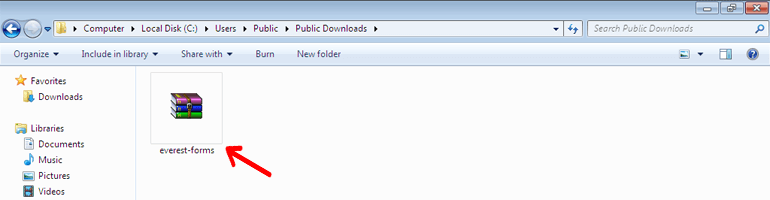
Unzip or extract the downloaded zip file on your computer by right-clicking on to your mouse. Then the file will be extracted with the same name (for example, here “everest-forms” ). Remember, here you’ll be uploading this extracted plugin folder later and not the zip archive.
Step 2. Install a FTP Client
Next, you should connect to your hosting server via an FTP client. FTP client is a piece of software developed to transfer the files between a computer and a server over the internet.
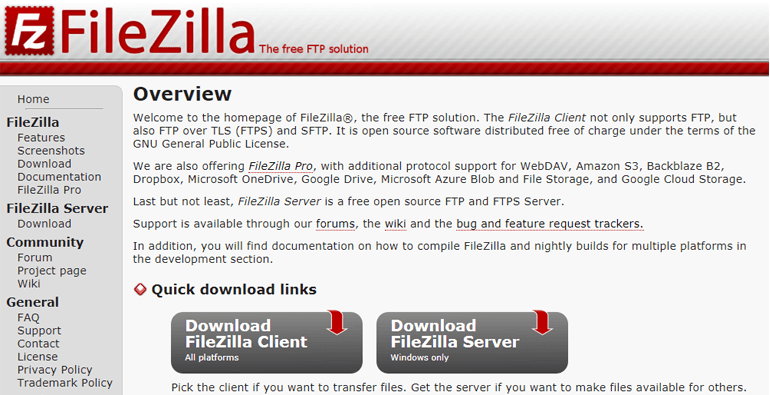
You need to install an FTP client on your computer before you proceed. A good example of an FTP client is FileZilla which is both popular and free.
Besides, FTP client you’ll need a few FTP details like host, username, password, and port. You can ask your hosting provider for help if you encounter any problem with the details during the process. Then, you can connect your server with an FTP client.

Step 3. Connect FTP Client to Your Server and Upload the Plugin
After the successful connection of your website’s server using FTP client on your computer. You’ll see two sites, that says “Local site” and “Remote site” . Local site denotes to your computer whereas remote site denotes your server.
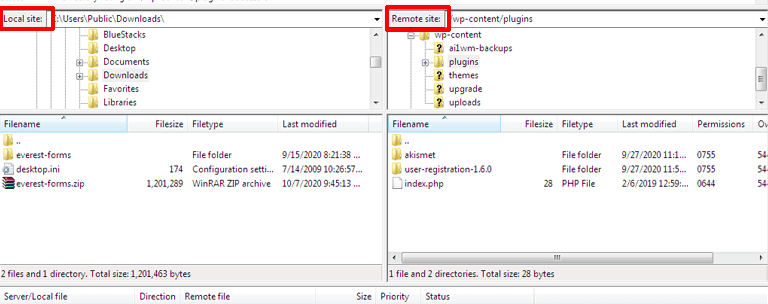
Navigate to the wp-content directory located within the WordPress installation folder of your remote site. Further, within wp-content, you’ll find plugins and themes directory. Go to the plugins directory.
Then upload the plugin folder (here “everest-forms” ) that you extracted earlier to the /wp-content/plugins directory on to your server. You can simply drag and drop the plugin folder from your local site to a remote site and it’ll be uploaded automatically.
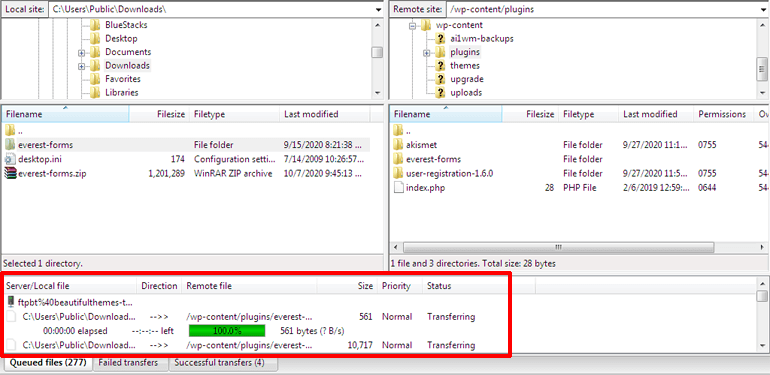
Alternatively, you can right click your plugin folder and it’ll show you with the upload option. You can click the upload button and your plugin folder will be uploaded.
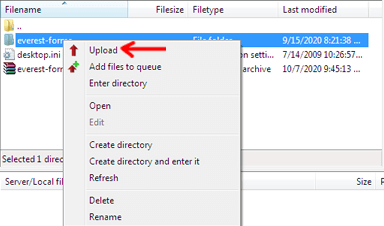
This plugin folder carries all the necessary plugin files required for WordPress plugins to be fully functional.
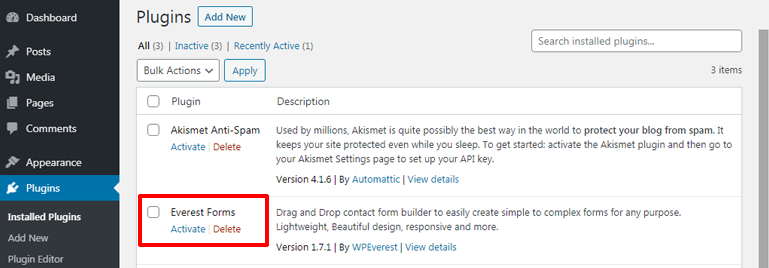
Once these steps are completed, you can now go to your WordPress dashboard area. And navigate to the “Plugins” menu on the sidebar of your left-hand side. On the plugins page, you can see your plugin is installed on your site.
Similar to the installation process of the free and premium plugins, the last thing you need to do is? Exactly, activating the plugin by hitting the “Activate” button and that’s it. Your plugin is now functional and ready to be used for your site.
Keeping Your WordPress Plugins Up-To-Date
If you’re thinking that you’re done with your job after plugin installation to a WordPress site. Then you may be a little wrong out there. Like any other system software and applications. You must ensure that your plugin is updated at times.
The main purpose of updating your plugin is to ensure maintenance and security. Besides, updates add extra functionality or make improvements to your plugin.
Also, you must update your plugin from time to time to make sure that your WordPress site is safe, secured, and compatible with your plugin. It’s because your WordPress plugin has a direct impact on your WordPress site to be precise.
Now that you’ve known that it’s important to update your plugin besides installing it. Let’s learn about different methods of updating your WordPress plugins.
Method 1. Updating WordPress Plugins from the Dashboard
For the plugin updates, you’ll get the notifications from your dashboard itself. You’ll see the notification for your plugin updates under the “Plugins” menu if the updates are available.
If there is any notification for your plugin updates, then you can click on the “Plugin” menu. Next, it’ll show you the plugins for which the updates are available. Go on and click the “update now” button for the individual plugin.
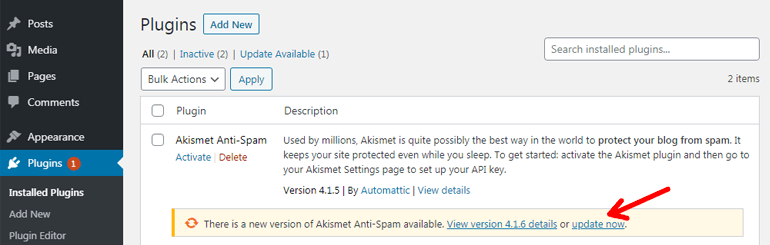
You may also click the “Bulk Actions >> Update >> Apply” button if updates for many plugins are available and you want to update them at once. After that, your plugin will be updated automatically by WordPress itself.

Method 2. Enable ‘Auto-Update’ Option for WordPress Plugins
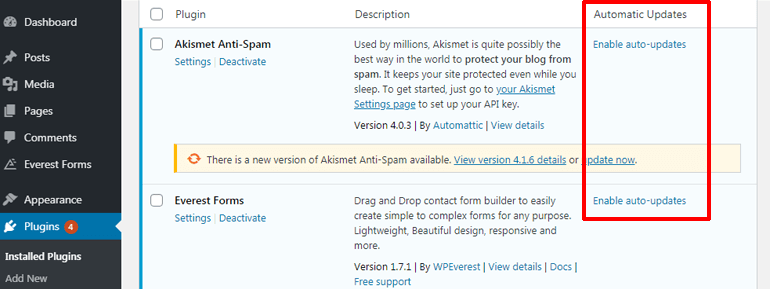
WordPress has always been a flexible platform offering wide functionalities. To add more, WordPress now offers the magnificent feature of the auto-update for WordPress plugins as well. This auto-update feature in WordPress is available for version 5.5 or higher.
In case your WordPress version is lower than 5.5, then you won’t find auto-update options for plugins. We recommend you to always use the latest version of WordPress, theme, and plugins as they offer better features and safe from vulnerabilities.
In order to auto-update your plugins, simply login to your WordPress dashboard area and navigate to the plugins page. Finally, you can see the ‘enable auto-updates’ option for the individual plugins. Simply click on that link.
With an advantage comes the risk. Sometimes auto-updating of the plugins and themes may crash your site without your knowledge for hours or even days. If you find it too risky, then you might not want to enable auto-update.
But there’s a solution to every problem. If you find it risky, then you can enable this feature of auto-update for only those plugins that are well maintained.
FAQs
1. What are Pre-installed Plugins?
WordPress comes with the plugins like Hello Dolly and Akismet that you don’t need to manually install to your site. These plugins are called as Pre-installed plugins.
A pre-installed plugin like Hello Dolly isn’t so useful for your site. It just displays some text at the top of the admin screen on every page. So, you can simply deactivate it because it doesn’t have any other useful functionality for your site.
On the other hand, Akismet Anti-spam is a very useful plugin for your site. Though you don’t need to install this plugin, you need to activate it manually. After activating it, this plugin automatically removes the spams from your comments.
2. Can you install WordPress Plugins in WordPress.com?
With WordPress.com, you cannot install the WordPress plugins unless you buy their business plan that costs $25/mo. Users who are on free, personal, or premium plans don’t have access to the plugin installation.
Only those users, using a self-hosted version i.e. WordPress.org can enjoy the WordPress plugins on their website.
Wrapping Up
Adding the plugins to your website adds more functionality to your website. The installation process of the plugin is as simple and easy as installing any other applications to your computer. Besides, installing the plugin you should also remember to keep your plugin up-to-date.
You can install Everest Forms plugins for creating any kind of form for your site. You may also try User Registration for easy creation of registration forms and login forms.
This was our step by step guide for adding a new plugin to WordPress. We hope after reading this article, your query about how to upload plugin to WordPress has been solved.
If you like to read more of our articles. Then you can also read our tutorials on How to Block WordPress Form Spam and How to Easily Create a WordPress Popup Form.
If you found this article helpful please do share it on your social media account. Also, if you’ve got any comments and suggestions for us, feel free to write in the comment section below.


![Zakra 3.0 | Zakra Pro 2.0 Release [Major Updates!]](https://i.ytimg.com/vi/g3rifl7kWvg/maxresdefault.jpg)