Are you planning to add extra fields in WooCommerce registration forms on your site but don’t know how? Well, what if we told you that adding custom user registration fields for WooCommerce is easier than you imagine with the User Registration plugin.
If you’re familiar with the default registration form in WooCommerce, it’s not surprising that you’d want more fields on it. A username, email, and password field just won’t cut it for most site owners.
That’s why we’ve put together this comprehensive guide on how to add extra fields in WooCommerce registration forms with User Registration. So, stick with us till the end for the full tutorial!
Table of Contents
Why Add Custom Fields to WooCommerce User Registration Forms?
Now, if you’re still wondering what the point of adding custom fields to a WooCommerce registration form is, let us explain in brief.
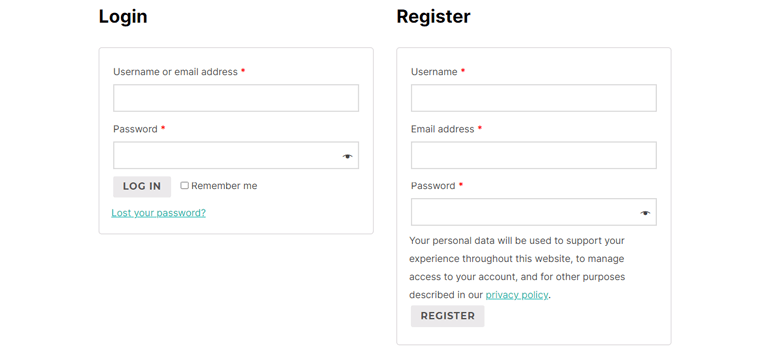
As we mentioned before, the default WooCommerce registration form only has 3 fields: Username, Email Address, and Password. That’s not enough to collect substantial information on your users.
So, strategically placing required form fields means you can get an insight into who your users are, where they are from, and such other essential data.
Understanding your target audience, in turn, makes way for successful marketing campaigns.
Another major reason is that you can place shipping and billing address fields in the registration form. So, users who register through this form won’t have to go through the trouble of filling in their details again on the checkout page.
It’s better not to create unnecessary barriers during checkout that might deter users from actually completing the purchase.
So, in short, a WooCommerce registration form with custom fields will provide you with extra info on your audience, aid marketing campaigns, and help in boosting conversions.
Best Way to Add Extra Fields in WooCommerce Registration Forms
You now know the significance of adding extra fields to the WooCommerce registration forms. Well, how do you add them then?
Let us remind you that the WooCommerce native settings don’t allow you to add any other field besides the existing 3 forms fields.
The best solution, in this case, is the User Registration plugin. It’s a free WordPress registration form plugin with an intuitive drag and drop builder. It lets you create custom registration forms in no time, be it simple or detailed, multi-step forms.
Given its user-friendly interface, even beginners with zero coding knowledge should have no problem using this plugin.
On top of that, User Registration offers a premium version with plenty of add-ons to help you extend the plugin’s functionalities.
But that’s just scratching the surface. Here are a few key features you’ll find in User Registration:
- Email notifications for admins and registered users
- Easily import and export forms
- Beautiful user profile page
- In-built login form
- Google reCaptcha to block spam
- Prevent core login
- Conditional logic for interactive forms (Premium)
- Enable multiple file upload (Premium)
With all these amazing features, there’s no doubt that User Registration is one of the best options for you. That’s why we’ll be using this plugin to show you how to add additional fields in a WooCommerce customer registration form. So, let’s get started right away.
How to Add Extra Fields in WooCommerce Registration Form?
For the following tutorial to be implementable, you must already have a WooCommerce website. If not, we recommend creating an eCommerce site first with the WooCommerce plugin.
With that task done, you can move on to the steps below:
1. Install and Activate User Registration Plugin
The very first thing you need to do is install and activate the User Registration plugin. For that, log into your WordPress dashboard and open Plugins. Then, click the Add New button and type in User Registration in the search bar.
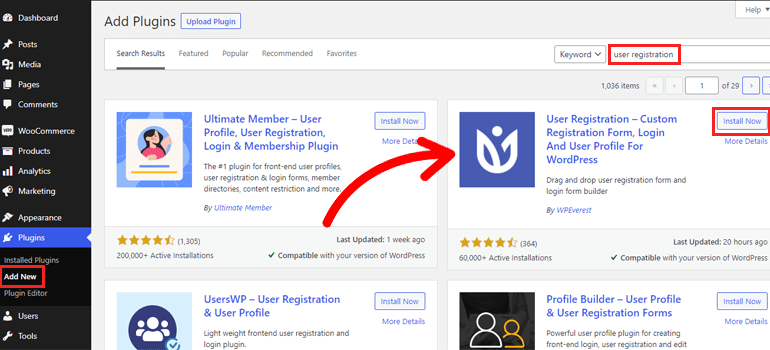
Once the plugin shows up in the search results, press Install Now and then Activate it.
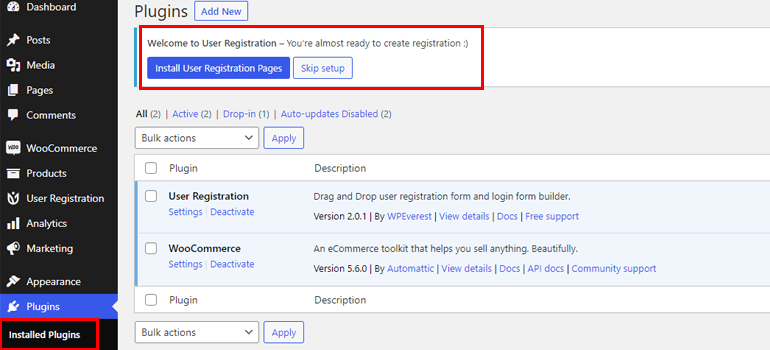
As soon as the installation process is complete, you’ll see a welcome message asking you to Install User Registration Pages. Choosing this option will add the sample My Account and Registration pages to your site.
My Account offers a beautiful ready-to-use user profile with an in-built login form.
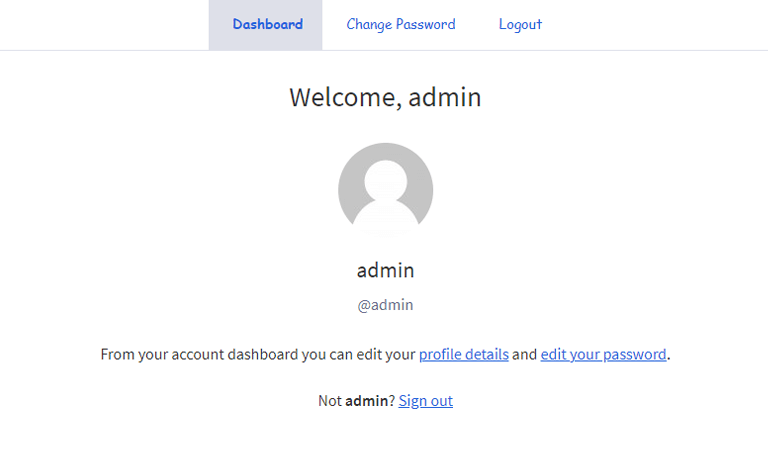
While the Registration page displays the default registration form that comes with the plugin.
Another thing you absolutely mustn’t forget is enabling the Membership option from Settings > > General.

This feature is turned off by default to prevent front-end user registration. So, you must turn it on to allow users to register through a front-end form, whether it be the core WordPress registration form or User Registration’s custom forms.
Simply tick the checkbox next to Anyone can register and click Save Changes.
2. Download and Install the Premium User Registration WooCommerce Add-on
Along with the free User Registration plugin, you also need to download and install its WooCommerce add-on. This is a premium add-on that’s only available to premium users.
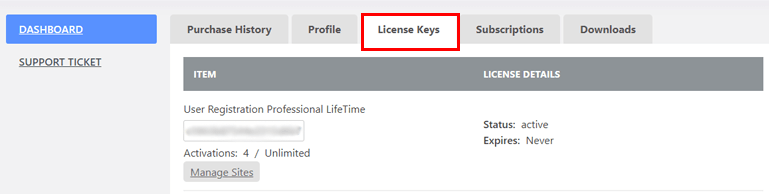
So, head on over to User Registration’s official website and choose a premium plan that’s suitable for you. After you’ve completed the purchase, log into your account.
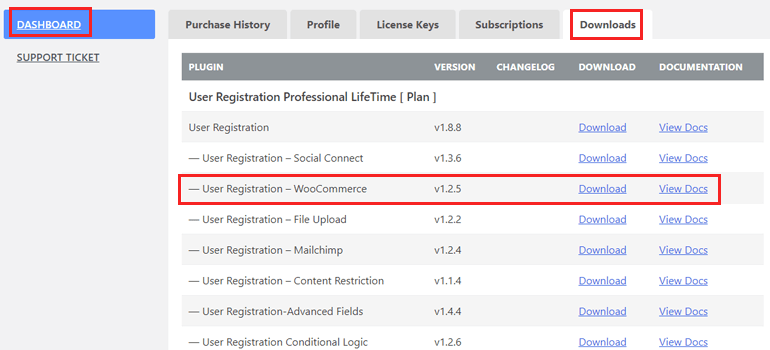
Now, go to the Downloads section and download the WooCommerce add-on. It’ll be saved as a ZIP file on your device.
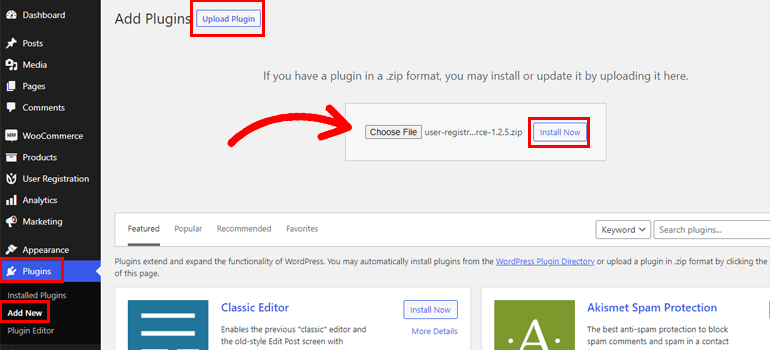
Then, return to your WordPress dashboard and open Add New under the Plugins tab. Here, click on Upload Plugin and choose the ZIP file you just downloaded. All that’s left to do is install and activate it.
You’ll now see a message under the free User Registration plugin asking for a license key on the Installed Plugins page.
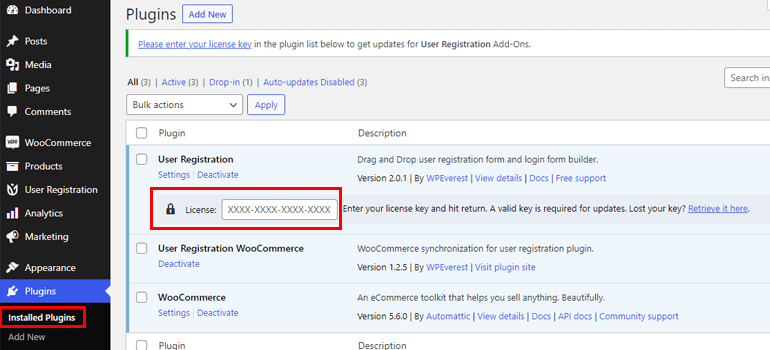
Just copy your license key from your account dashboard, paste it here, and hit enter.
And with that, you’re ready for the next step.
3. Create a New Custom WooCommerce Registration Form
It’s now time to create a custom WooCommerce registration form with User Registration. Why not just work with the default registration form in WooCommerce?
Well, that’s because User Registration can only add extra fields to its custom forms, not the default form in WooCommerce.
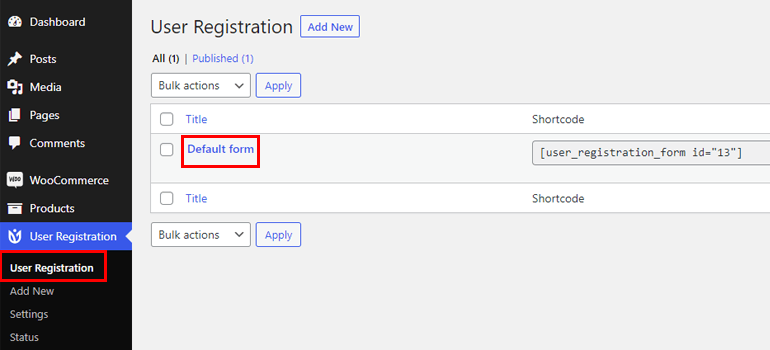
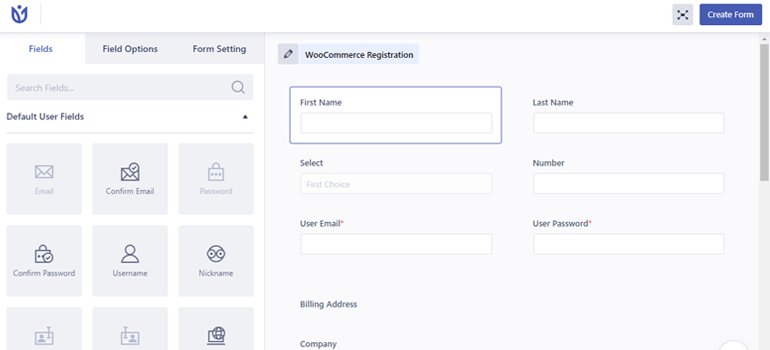
To create said custom registration form, click on Add New under the User Registration tab in your WordPress dashboard. This opens up the User Registration form builder with all the available Fields on the left.
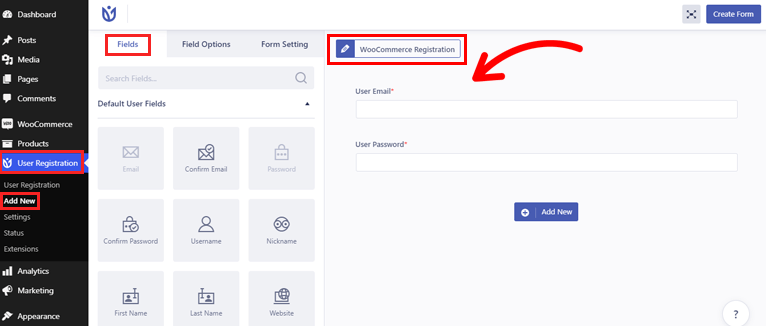
You’re free to use any field you need among the Default User Fields, Extra Fields, WooCommerce Shipping Address, and WooCommerce Billing Address.
On the right is the form that comes with two default fields: User Email and User Password.
To begin with, give the form a name first like ‘WooCommerce Registration’. After that, you can add the extra fields you need to it and make a custom WooCommerce registration form.
But how do you do that? Let’s discuss it in detail in the following section.
4. Add Extra Fields in WooCommerce Registration Form
As we pointed out earlier, the User Registration form builder has a drag and drop interface. So, all you have to do to add an extra field is, drag the field and drop it into the form.
You can also move the position of the fields by simply dragging them upwards or downwards.
In the same manner, add the Fields you need for the registration form and arrange them as needed.
For instance, you can use the Confirm Email and Confirm Password fields to avoid errors due to typos.
There’s also the Country field that lets you know where your users predominantly reside. Or, the Checkbox, Radio, and Number fields you can use to know your audience’s gender, age, and more.
Most importantly, you get 13 WooCommerce Billing Address fields and 10 WooCommerce Shipping Address fields.
To name some, First Name, Last Name, Address 1, Address 2, Postcode/ Zip, Email, Phone, and Company. This lets you know exactly who should be billed, where the products are to be shipped, and so on.
Besides that, using these address fields in a WooCommerce registration form ensures that your potential customers won’t have to fill their information in during the checkout process.
And the best thing is, all User Registration fields are easily customizable through their Field Options. You can edit a field’s Placeholder, Label, and Description from the General Settings.
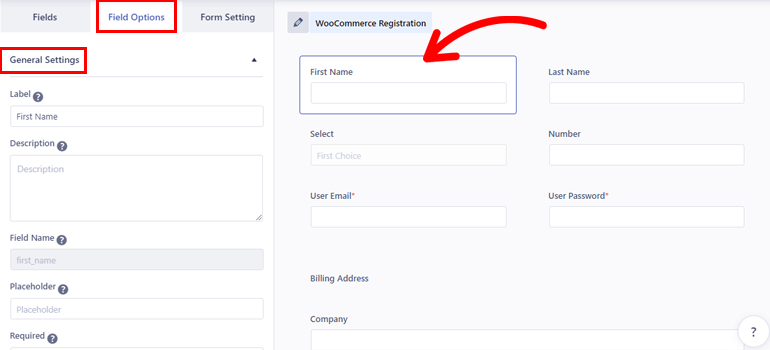
While Advanced Settings lets you add custom classes to the fields.

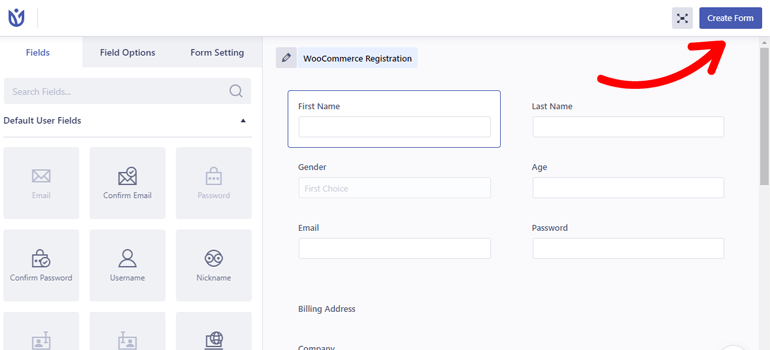
Once you’ve completed adding all the necessary fields and customizing them, press Create Form.
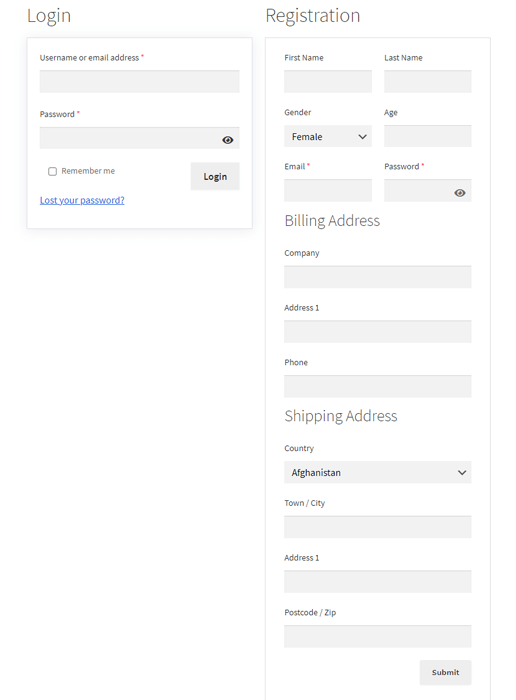
You can now check what the form looks like on your website with the Preview button and make further changes if necessary.
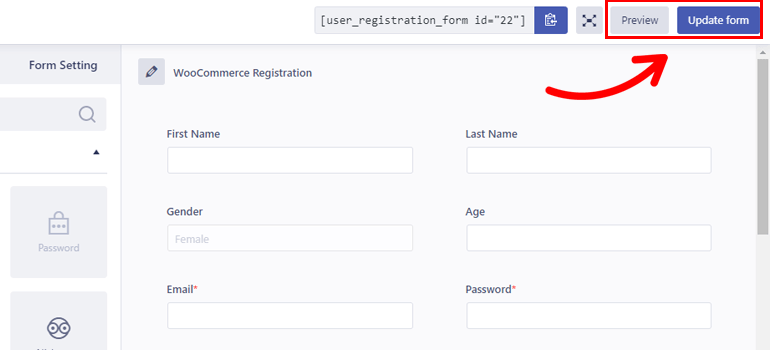
Just don’t forget to click Update form to save the new changes.
5. Configure the Registration Form Settings
Next up, you’ll need to configure the settings for this brand new WooCommerce registration before it goes live on your website.
For that, open Form Setting in the form builder.
First of all, you can choose a User login option among automatic login, manual login, admin approval after registration, or email confirmation before login.
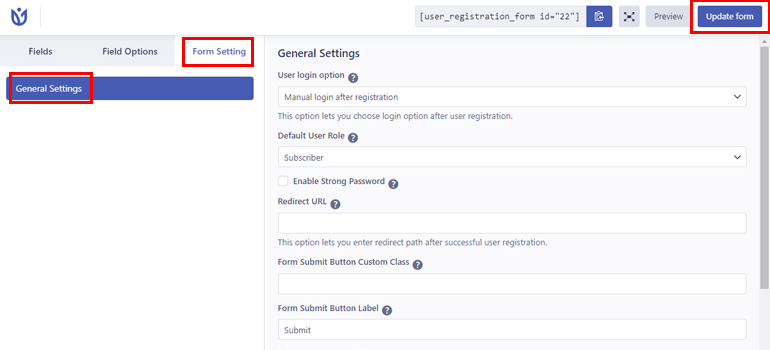
Similarly, you can assign a default WordPress user role to people who register using this particular registration form.
Moreover, Enable Strong Password and Enable reCaptcha Support are extremely helpful in enforcing security during user registration.
Other settings like Redirect URL, Form Template, and Success message position are just as important.
So, configure these form settings as you see fit and press Update form after you’re done.
6. Replace Default WooCommerce Registration Form with the Custom Form
Just creating a custom form is not enough. You must also replace the default WooCommerce registration form with it. Otherwise, your website will continue to display the default form instead of the new custom one you just made with User Registration.
So, navigate to Settings under the WooCommerce tab. There’s an option called Account Creation in the Accounts & Privacy section. Then, tick the checkbox for Allow customers to create an account on the “My Account” page option.
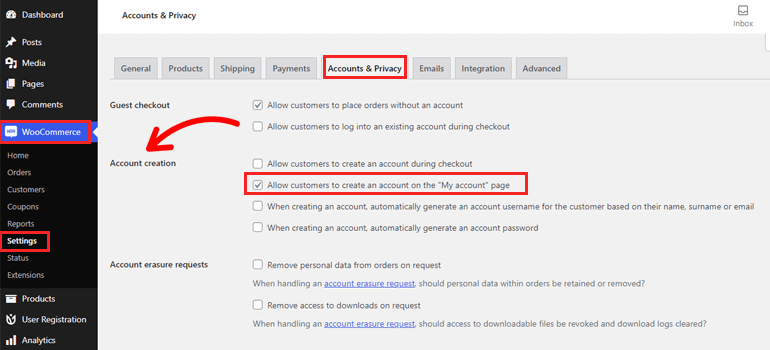
This is equivalent to turning on the Membership option for User Registration’s front-end forms in the first step. Basically, you’re allowing your customers to register through front-end WooCommerce registration forms.
Now, open the WooCommerce tab in User Registration’s Settings. Here, simply choose the custom WooCommerce form you just created (in our case ‘WooCommerce Registration’) from the dropdown. Then, select the Replace registration page option and Save Changes.
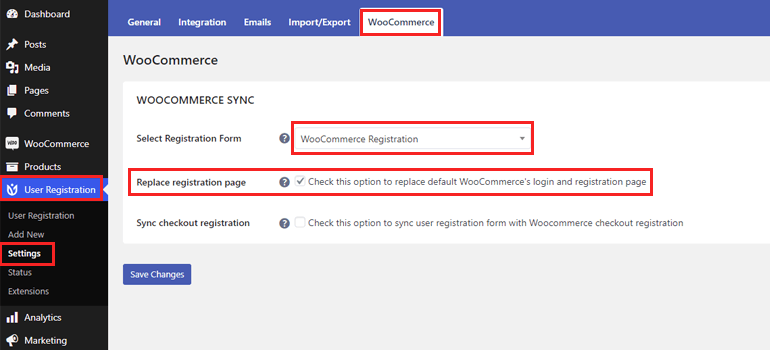
This’ll replace the default login and registration form with User Registration’s in-built login form and the custom registration form.
And with that, you’re done!
Wrapping Up
If you want a detailed registration form for your WooCommerce site, you’ll face some limitations with the default registration form. Fortunately, the User Registration plugin is the only tool you’ll ever need to overcome them.
You’ll be able to easily create custom user registration forms with extra form fields, including WooCommerce shipping and billing address fields. Not to mention all the customization and configuration options you get with this plugin.
For instance, you can also approve users through front-end WooCommerce registration forms.
Having said that, it’s time to wrap up this article. You can always visit our blog if you’re interested in reading up on similar WordPress-related articles.
Also, follow us on Twitter and Facebook to receive instant updates on new articles and announcements.


![Zakra 3.0 | Zakra Pro 2.0 Release [Major Updates!]](https://i.ytimg.com/vi/g3rifl7kWvg/maxresdefault.jpg)