Are you curious to know how you can create a call back request form in WordPress? If your answer is yes, then this tutorial is for you.
Adding a WordPress call back request form allows your customers to leave their phone number along with a convenient time for you to call them back. As a result, you get more opportunities to convert your visitors to potential customers. Of course, this helps you to grow your online business and take it to the next level.
Hence, this article aims at walking you through a step-by-step tutorial on how you can create and add a call back request form to your WordPress site.
Let’s start by briefly discussing why it’s essential to create a call back request form in WordPress.
Table of Contents
Why Create a WordPress Request a Call Back Form?
Good communication and relation with customers is key to the success of any online business website. And there’s no doubt that most customers find phone calls as the most reliable and effective means of communication compared to emails or live chat options.
Though the addition of a simple Call button on your site can allow users to contact you quickly, it may bring about some issues as follows:
- Not all online businesses offer 24X7 call services. Thus, you might not be able to take a call during odd hours, leaving a wrong impression on customers.
- Support staff may fail to manage the calls or may not always be available to take calls.
- Some of your customers might not want to initiate a call.
Nevertheless, you cannot afford to lose your potential customers due to these reasons. Hence, a convenient and easy solution to the problem is a call back request form.
Adding a request a call back form to your WordPress has several benefits as given below:
- A call back request form can convince your visitors to provide their phone numbers without any pressure on them.
- It helps you ensure that you don’t lose any leads.
- Your support staff can manage the appointments in a well-organized manner.
- It improves the quality of customer support, enhances conversion rates, and generates more leads.
- You can also grow your email list by collecting email addresses from your customers.
How to Create Request a Call Back Form in WordPress?
Now, it’s time to learn how to easily create and add a WordPress request call back form to your site. Here we go.
Step 1: Choose Request a Call Back WordPress Plugin
Before you can start your journey of creating a call Back request form, you need to choose the best request for a call back WordPress plugin. Well, there are quite a few plugins that can help you with this. However, we’ll be using the Everest Forms plugin for our tutorial.
Like its name, Everest Forms is a powerful drag and drop form builder plugin for WordPress that takes your form-building experience to the peak.
This plugin empowers you to build any kind of form imaginable without any coding skills. And creating a call back request form is not an exception. You can also build contact forms, job application forms, sign-up forms, pop-up forms, and more with ease.
It also comes with beautifully designed pre-built templates to eliminate the need to create forms from scratch. Besides, it features a clean and user-friendly interface. Thus, even a beginner to WordPress can create professional-looking forms effortlessly in no time.
Step 2: Install and Activate Everest Forms Plugin
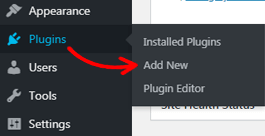
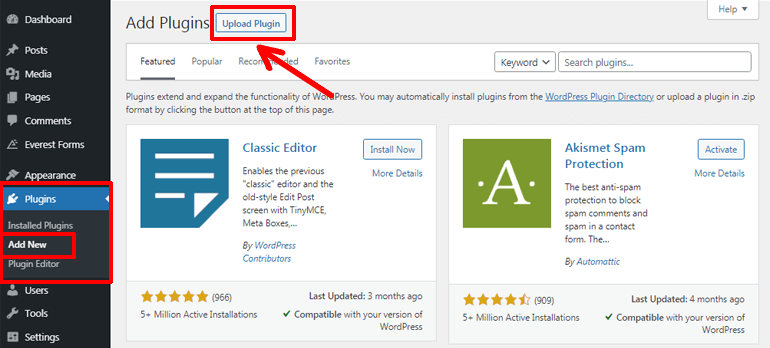
To install and activate Everest Forms Plugin to your site, log into your WordPress dashboard at first. From there, navigate to Plugins>>Add New.
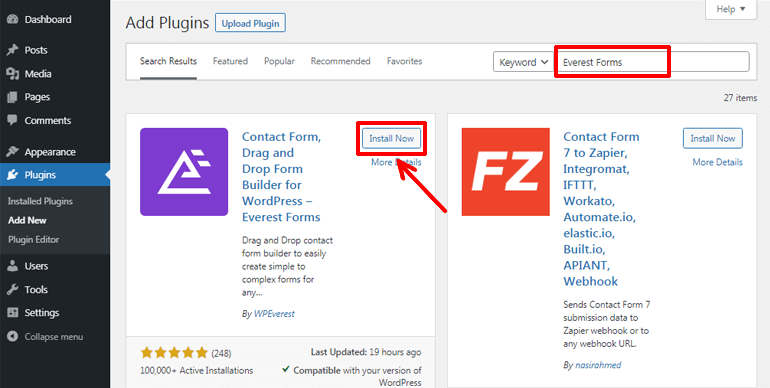
Now, type in Everest Forms in the search bar; once the plugin is displayed, simply hit the Install Now button.
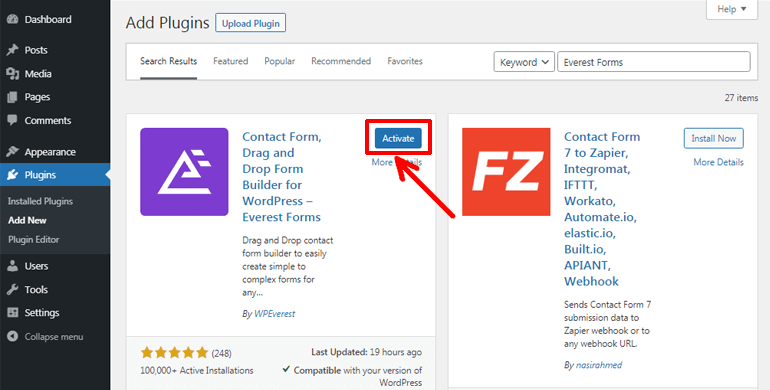
Finally, don’t forget to click on the Activate button to activate the plugin on your site.
A free version of the Everest Forms plugin provides all the simple form fields required for creating a beautiful call back request form. However, if you want to enjoy more advanced form field options and features for your forms and want access to several pre-built form templates, you can purchase its pro-version.
For this, you can go to WPEverest.com and choose a suitable Everest Forms plan. After purchasing the premium plugin, it’ll be available to you as a zip archive.
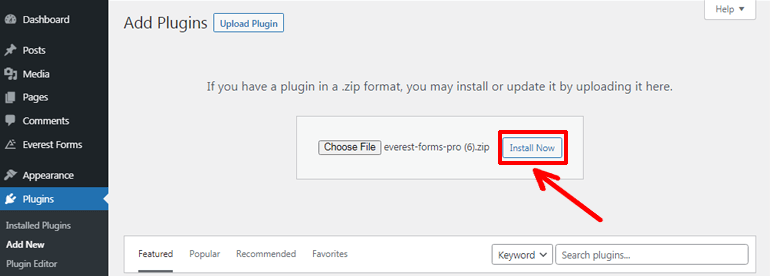
Once again, from your dashboard, go to Plugins>>Add New as before. Then, click on the Upload Plugin button.
After that, choose the zip file that you’ve downloaded earlier and hit the Install Now button. Then, click on the Activate button to activate the plugin on your site.
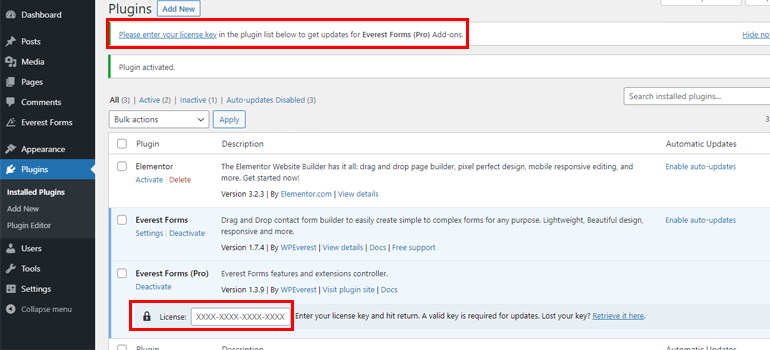
Again, you need to enter the license key that you’ll receive while purchasing the premium plugin. Now, you should be able to use the Everest Forms pro on your site.
For more detailed information, make sure you check our article on how to install a WordPress plugin.
Step 3: Create a Request a Call Back Form
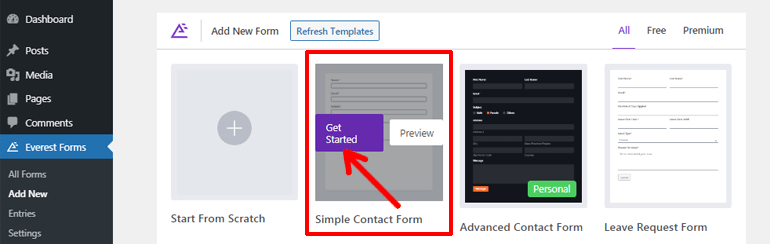
To start creating a call back request form, go to Everest Forms>> Add New. You’ll be directed to the Add New Form page. Here, you’ll see several pre-built form templates as well as the option to create a form from scratch.

So, let’s see how you can create a request call back form using a pre-built template and from scratch in detail.
I. Creating Request a Call Back Form Using Pre-built Template
Here, we’ll be using a Simple Contact Form template because it has many common form fields that we’ll need. We’ll make slight tweaks to this template and make a call back request form ready in no time. Are you ready? Let’s start.
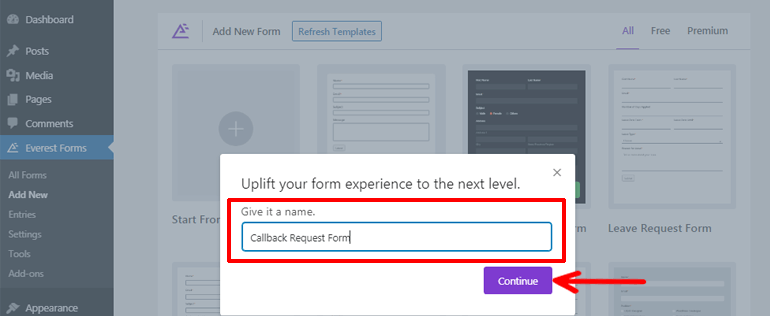
Firstly, click on the Get Started button of the Simple Contact Form template.
Then, provide a name to your form and hit on the Continue button. Here, we’ll name it the Callback Request Form.
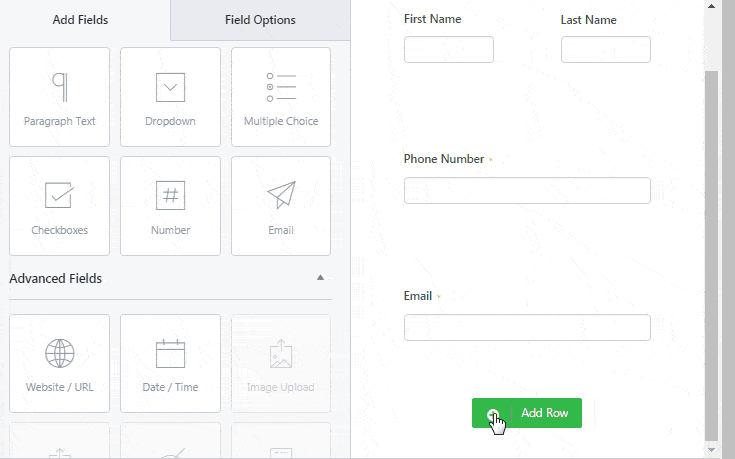
When the form opens up, you’ll see that the following form fields are available:
- Name
- Subject
- Message
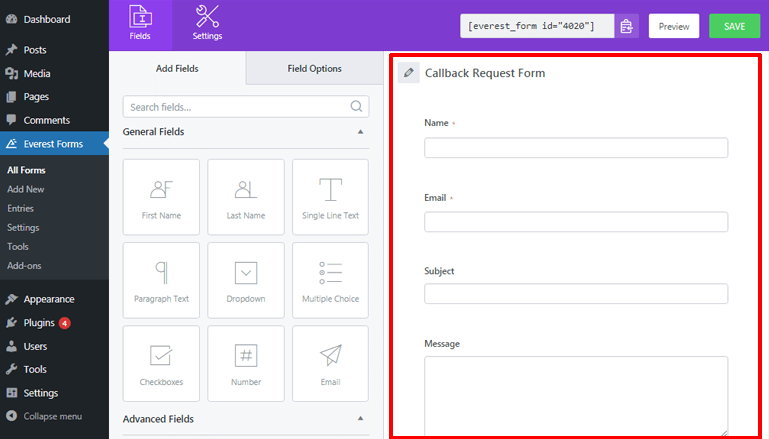
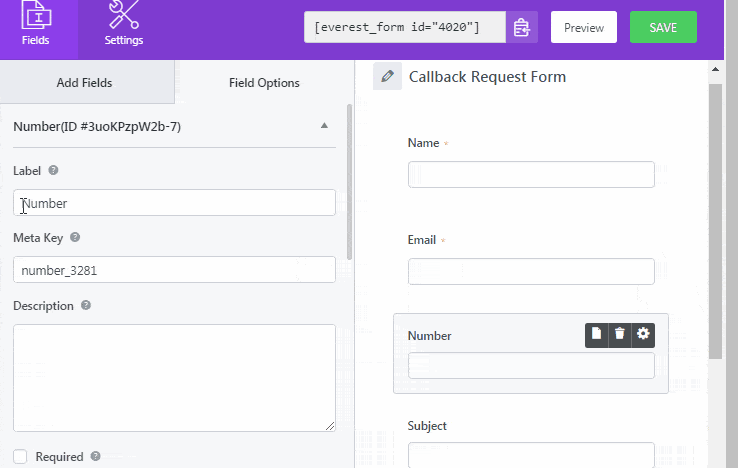
Now, to create a complete WordPress call back request form, you may also want to add other additional form fields. For instance, you may want to add a Number field to enable your users to input their phone no., date/time to input the suitable date/time for a call, etc. You may also add other form fields to your form as per your requirements.
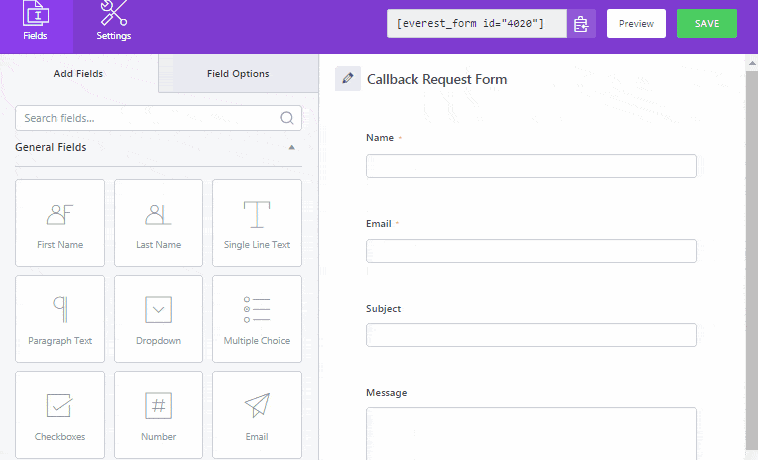
For this, you can simply drag the required form field from the left-hand side and drop it to the right-hand side. Not to mention, you can also drag and drop form fields to rearrange them according to your need or delete the field with a click.
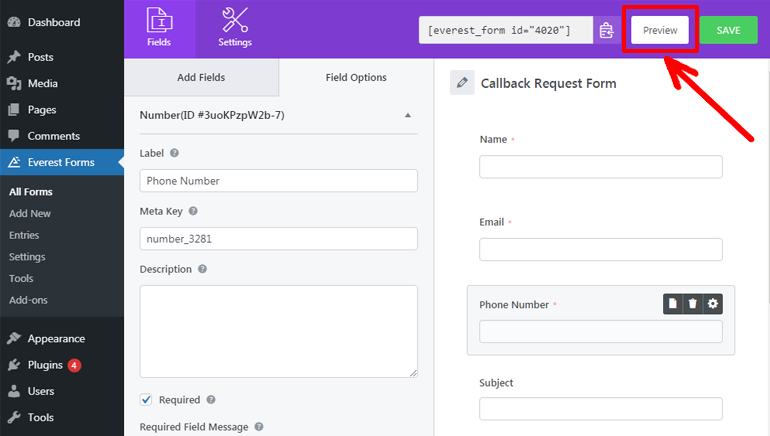
Again, you can go to the Field Options to easily customize your form fields. It enables you to edit the label, description, make the fields required, etc. And, it also provides advanced options to enter placeholder text, CSS classes, conditional logic, and so on.
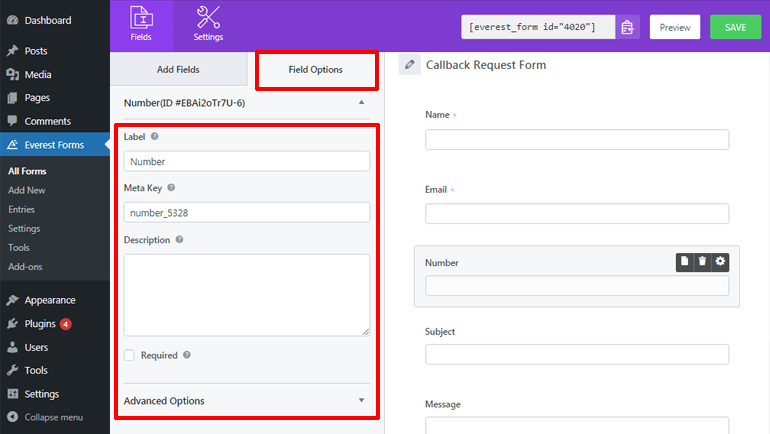
Further, you can see all the changes you make to your form fields in real-time. Isn’t that great?
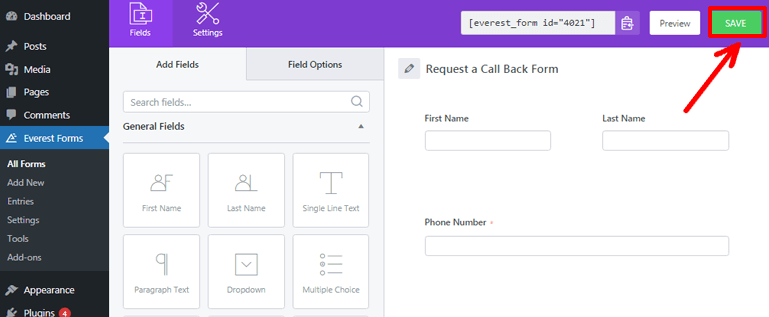
Once you’re done, you can hit the SAVE button at the top. Also, if you ever want to know how your form looks like from the frontend, you can always click on the Preview button at the top.
II. Creating Request a Call Back Form From Scratch
Creating a form from scratch may take you a little bit of extra effort and time; however, you get complete freedom to customize your form to your liking.
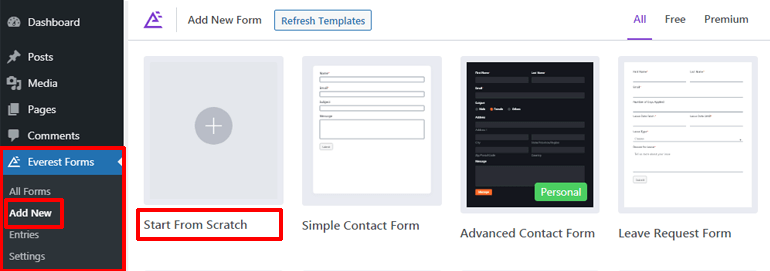
To start making a form from scratch, navigate to Everest Forms>>Add New. Then, click on the Start From Scratch option.
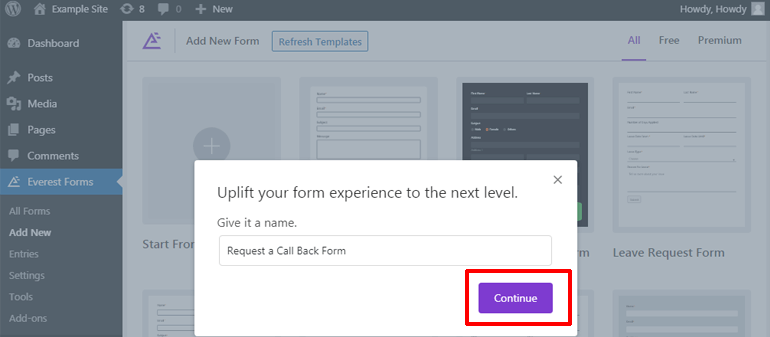
Now, provide a name to your form and click on the Continue button to start your form-building journey.
Each request a callback form requires simple form fields as follows:
- Name
- Phone number
- Date/Time
However, you may also add other form fields as per your desire or necessity. You can easily drag these form fields from the left corner and drop them to the blank space of your right-hand side as mentioned before.
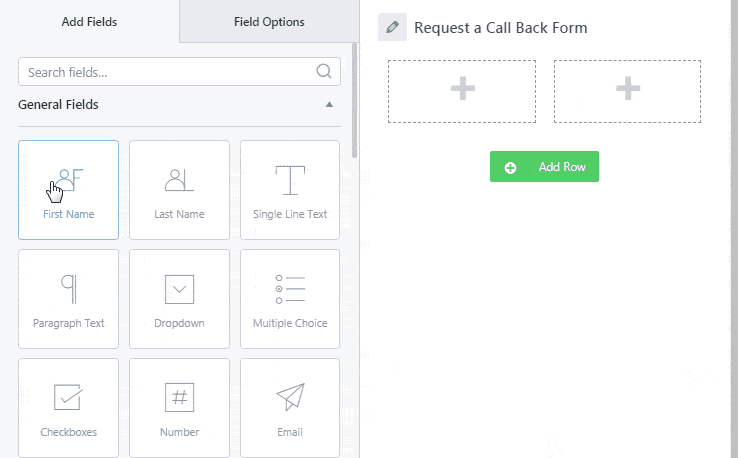
Similarly, you can hit on the Add Row button and click on the Pencil icon to select the row type (either single or double) then, add the required fields as per your necessity.
Besides, you can effortlessly configure your form fields from the Field Options tab. Finally, don’t forget to click on the SAVE option to save your form.
Step 4: Configure General Settings of Your Request a Call Back Form
Now that you’ve created a form, it’s time to configure the general settings of your request a call back form. For this, click on the Settings>>General.

Under the General tab, you’ll find many options for configuring your form settings which are briefly explained as given below.
- Form Name lets you provide a suitable name for your form.
- With a Form Description Option, you can give a short and sweet description of the purpose of your form.
- Form Disabled Message is displayed when you disable the form from Everest Forms>> All Forms page using a toggle button.
- Successful Form Submission Message lets you display form submission success messages to your users.
- The Redirect To option enables you to land your users on the page or URL of your interest.
- Layout Design lets you choose from the two form designs, i.e., Default Layout and Classic Layout.
- Form Class allows adding additional classes to style your form.
- Submit Button Text enables you to edit the text for your submit button as submit, send, call me, and so on.
- Submit Button Processing Text lets you add an appropriate text to display when the form is processed.
- With Submit Button Class, you can add the class name for the submit button.
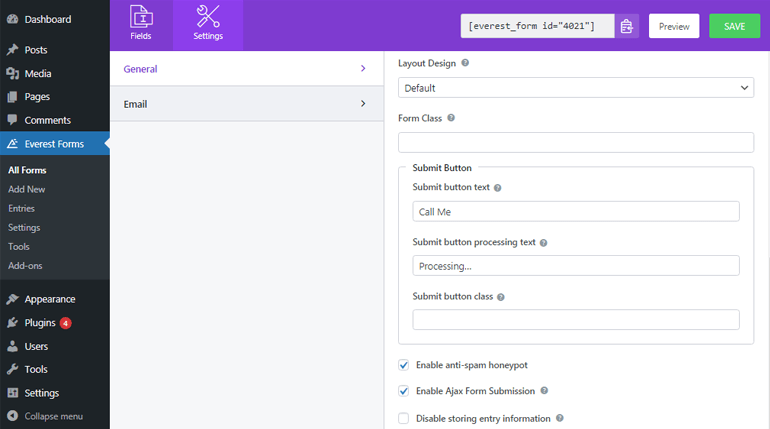
Besides, this WordPress plugin also allows enabling or disabling anti-spam honeypot and the ajax form submission option. It even provides you the option to disable storing entry information.
Step 5: Configure Notifications of Your Request a Call Back Form
Setting up form notifications can help you remain informed whenever your website visitors submit a call back request form. This way, you’ll be able to manage callbacks to your customers easily and quickly. Similarly, you can also notify your customers that their form has been successfully received.
For this, go to Settings>>Email and toggle on the Email button to manage your email notifications.
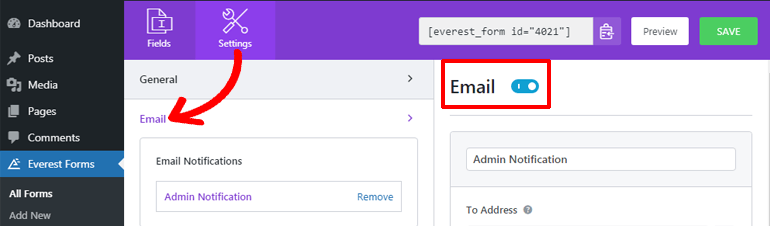
One of the perks of using Everest Forms is that it allows you to configure unlimited email notifications. For instance, you can set up the email notification as follows:
I. Setting Up Admin Email Notification
II. Setting Up User Email Notification
I. Setting Up Admin Email Notification
Admin email notification is the email notification that is triggered to the admin whenever users submit the form. The best part is that you don’t even need to configure an admin email notification in Everest Forms, as it’s set up by default. However, you may need to check the settings to be sure that everything is alright.
Under the admin notification tab, you can configure various settings, which are briefly discussed as given below:
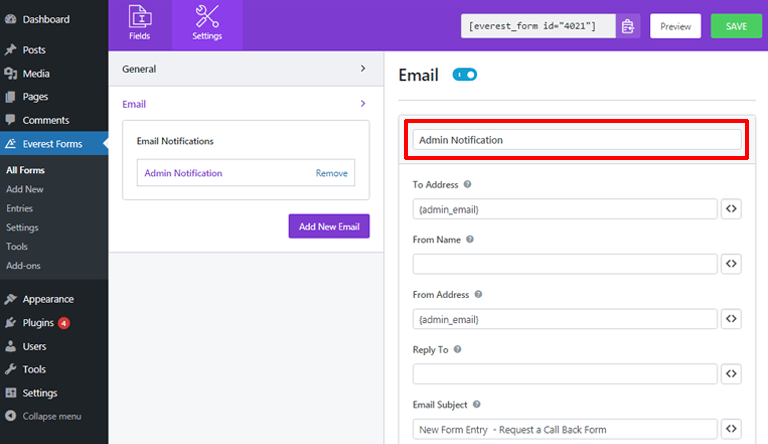
- To Address lets, you add an email address where you want the notification to be delivered when users submit the form. Here, you can simply enter the admin’s email address.
- From Name enables you to add the name of the users who filled the form. For your ease, you can use the smart tags option to grab the name of your users automatically.
- From Address is the address from where the form is sent. Hence, you can use the email address of the admin here.
- Reply To allows you to add the email address where you want the email to be received when you reply to the email. Here, you can use the smart tags option to automatically grab the email address of your users submitting the form.
- Email Subject lets you add the subject of the email.
- Email Message lets you enter the email message that you would like to send along with the forms.
II. Setting Up User Email Notification
User Email notification is the email notification that is triggered to the users who submit a form. Setting up user email notifications is a great way to let your users know that the concerned authority has successfully received their forms.
To configure the user email notification, navigate to Settings>>Email and click on the Add New Email button.
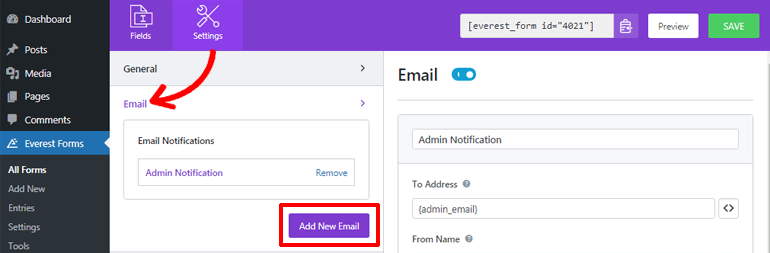
Now, provide a suitable name, for example, User Notification, and start configuring its settings.
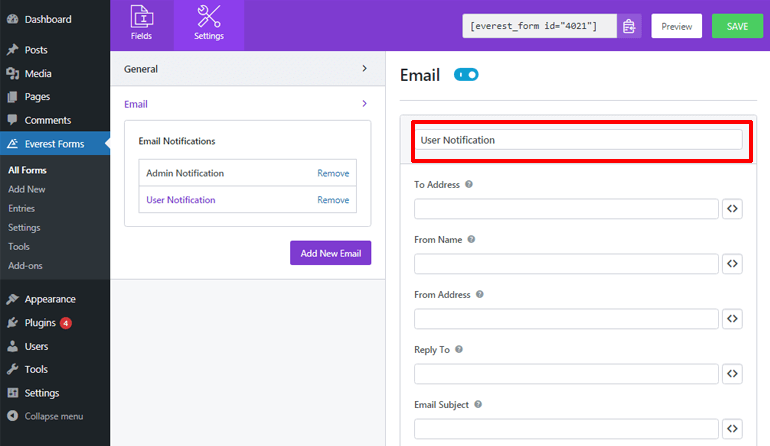
- In the To Address field, you can use the smart tags to grab the email address of your users who filled up and submitted their forms.
- You can add the name of your company in the From Name field.
- In the From Address, add the email address of the admin.
- Use the admin email address for the Reply-To field as well.
- You can also add the subject and message to your email as before.
Step 6: Add a WordPress Request Call Back Form to Your Site
You’ve created a WordPress request call back form and made the necessary settings. But it won’t be visible to your users unless and until you add your form to your website. With Everest Forms, you can easily add your form to your WordPress pages or posts, and anywhere you like.
Now, let’s have a look at how you can add a form to your WordPress site.
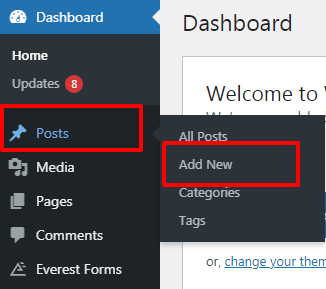
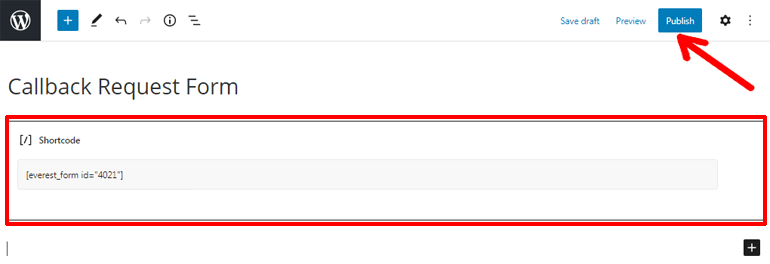
From your dashboard, go to Posts>> Add New.
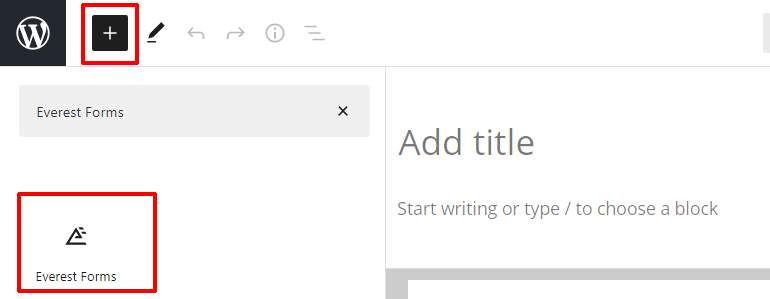
After that, click on the Add block (+) button at the top and search for the Everest Forms block and click it.
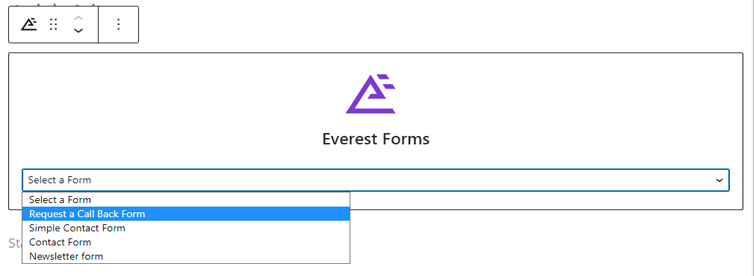
Again, press the drop-down menus and select the required form.
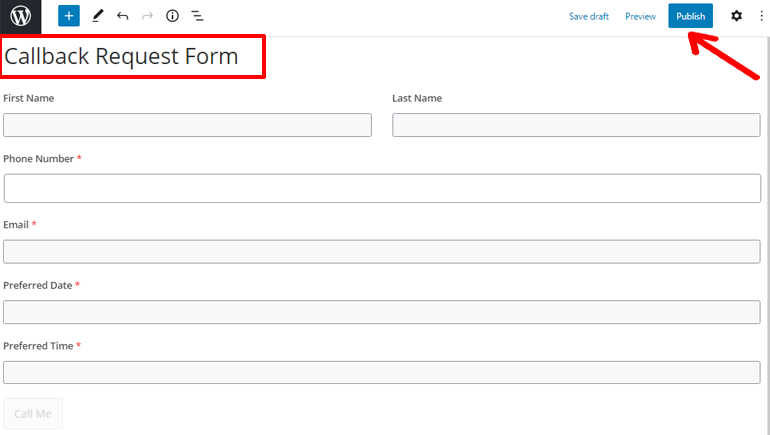
After providing a suitable title to your form, you can go ahead and hit the Publish button to make your form visible to your customers.
Alternatively, you can also go to Everest Forms>>All Forms and copy the shortcode of the required form.
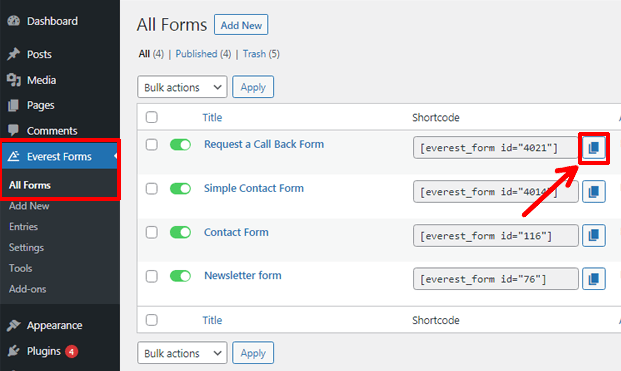
Now, paste it to your posts or pages and hit the Publish button at the top to make it go live.
Congrats! You’ve successfully added a WordPress request a call back form for your site.
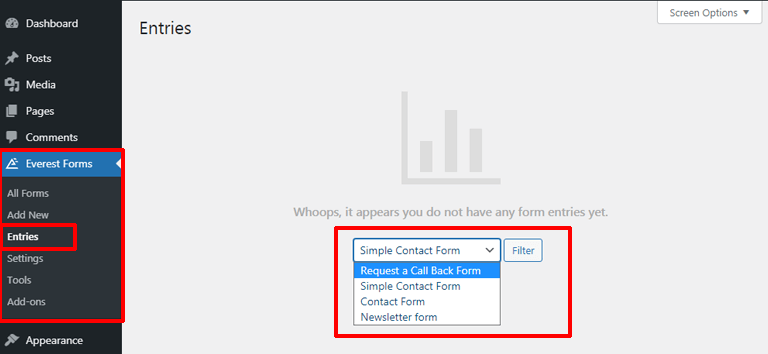
View Form Entries in Everest Forms
Everest Forms not only makes it easy to create and publish your forms but also enables you to track form entries right from your dashboard. To view your entries, you can go to Everest Forms>> Entries. Now, filter the form by the name, and it’ll be displayed right on your screen.
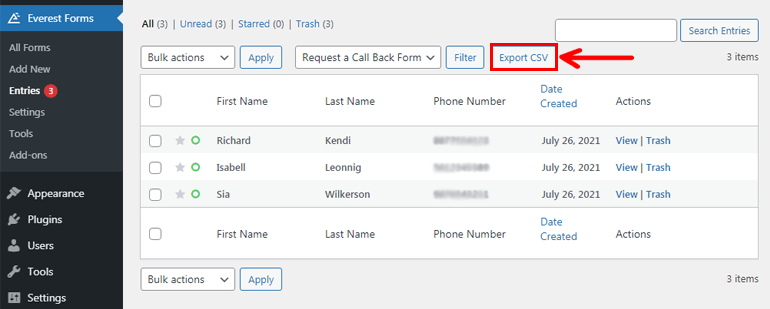
With this plugin, managing form entries is easy as a pie. Not to mention, you can also export your form entries as a CSV file with a push of a button.
Further, with pro-version, you can get more advanced form entries analytics. For instance, your forms can be represented graphically (bar graphs and pie charts).
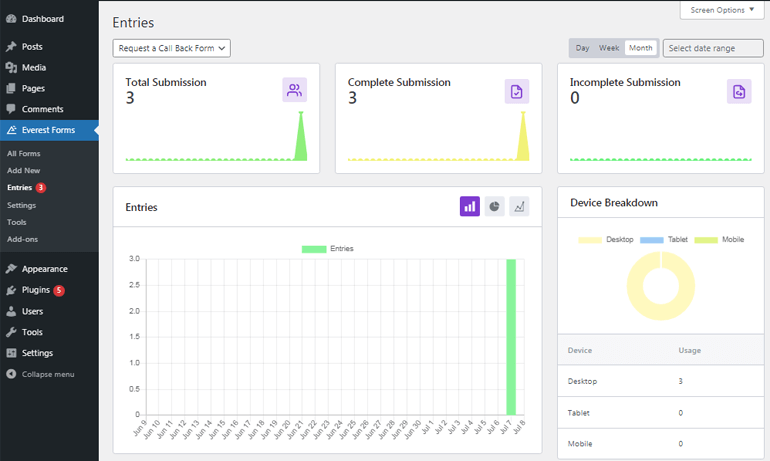
You can also filter the forms by day, week, or month and view the total, complete, and incomplete form submissions. Besides, you can also find out which devices people use to fill up your form like desktop, mobile, tablets, etc.
Wrapping it Up
Adding a simple WordPress request a call back form to your site can significantly influence the success of your business. So, wait no more and get started with Everest Forms right now for a wonderful form-building experience.
With a fantastic contact form plugin like Everest Forms, creating call back request forms or any other forms for your website is just a plain sail. Thanks to its ease of use and amazing features that make this possible. Also, it’s worth mentioning that beautifully designed pre-built form templates further make your task even easier.
After reading this tutorial, we expect that now you know how to create a request a call back form for your WordPress site.
Was this article helpful? If yes, please share it on your social platforms and give this post a little boost. Our social media handles are right in front of you.
We also have other helpful tutorials worth checking out. So, how about creating a donation form and online booking form in WordPress.


![Zakra 3.0 | Zakra Pro 2.0 Release [Major Updates!]](https://i.ytimg.com/vi/g3rifl7kWvg/maxresdefault.jpg)