Do you want to add a contact form to your WordPress site with 2 columns and don’t know how?
No worries! After reading this article, you’ll be able to create WordPress contact forms with 2 columns without any trouble.
Contact forms are very important because it provides an efficient communication channel for you and your audience. Therefore, you need a contact form that is well-structured including all the required fields.
At the same time, it must be simple and clear for the users to understand. For this, you can simply divide your contact form with rows and columns.
To learn how to create a multi-column WordPress form, just follow the simple steps below:
Table of Contents
Step 1: Choose a WordPress Form Plugin with 2 Columns Option
You will find many contact form plugins out there that lets you create a WordPress contact form with a 2 column layout. However, we recommend using the Everest Forms plugin.

Everest Forms is the best contact form plugin that allows you to create any type of contact form for your WordPress site. You can create unlimited forms which are 100% responsive.
Many free contact form plugins don’t offer the multi-column layout feature. But, with Everest Forms, you can easily create contact forms with 2 column layout without paying anything.
It is available free in the WordPress repository. So, you can download it easily and install it on your WordPress site.
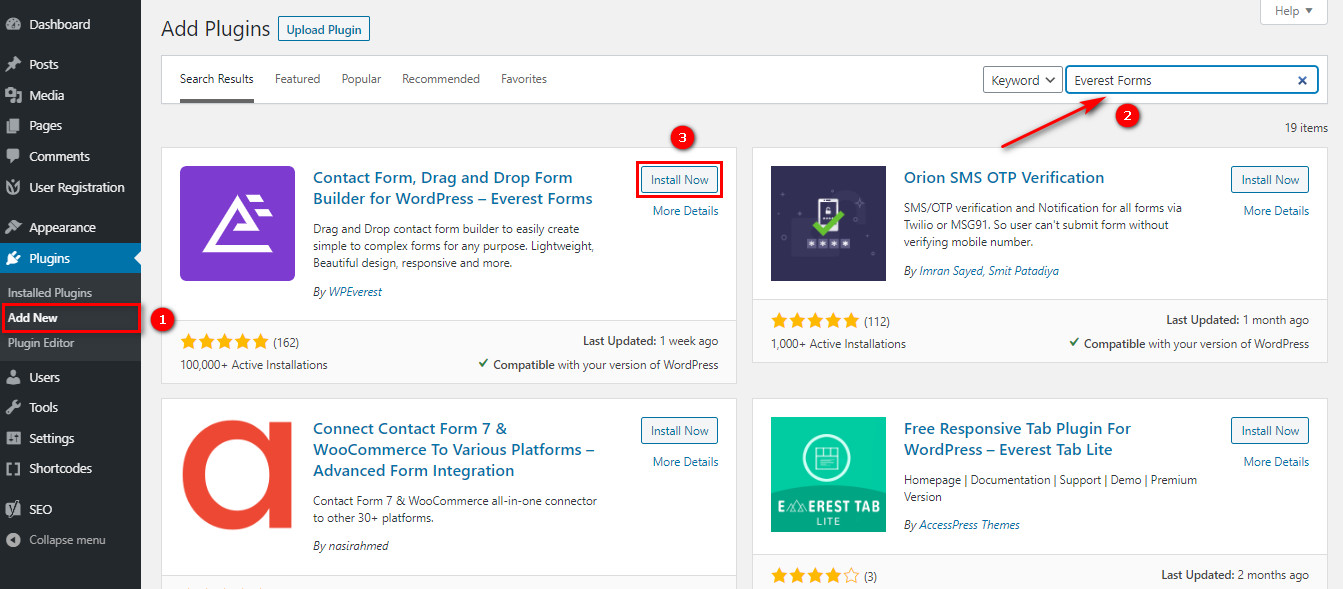
Step 2: Install Everest Forms Plugin Into Your Dashboard
To install Everest Forms, go to your WordPress dashboard and click on Plugins -> Add New. Here, you can search for the Everest Forms plugin. Once you find it, click on the Install Now button to download it to your site.
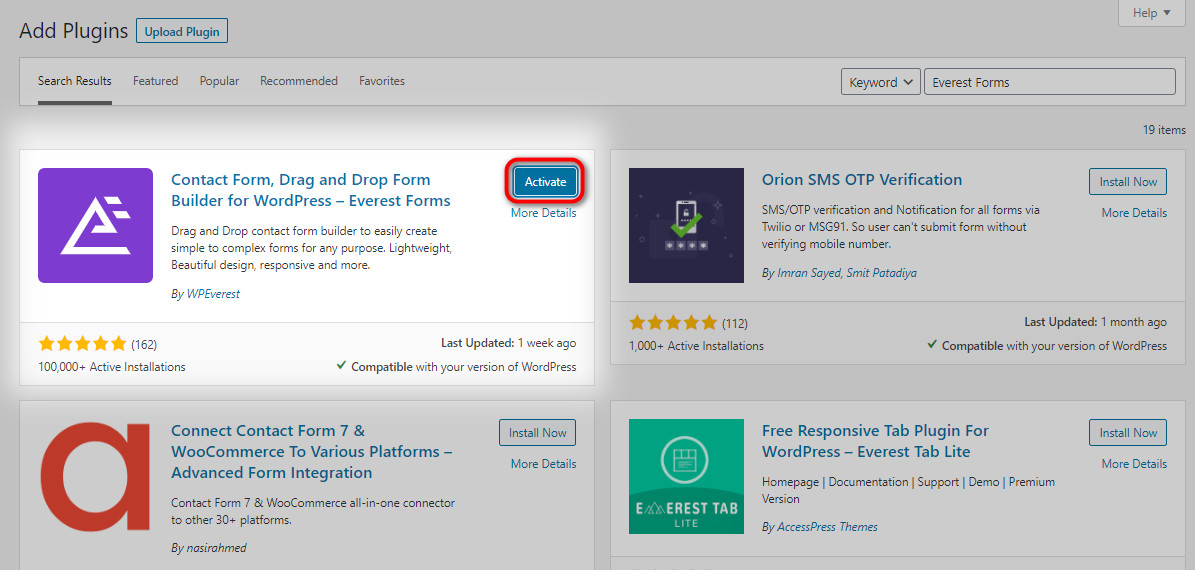
After that, click on the Activate button and get started.
Step 3: Create a New Contact Form
Once you install and activate the Everest Forms plugin, you can see the Everest Forms tab on your WordPress dashboard. Go to the Add New tab to create a new contact form.
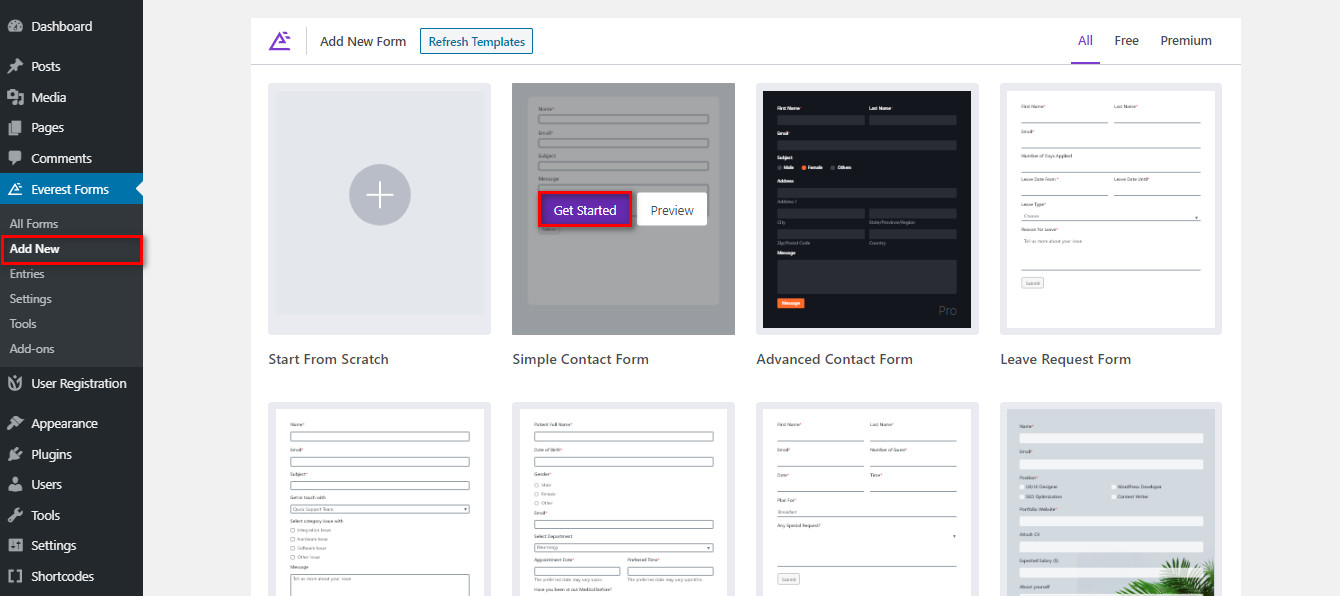
Here, you can see the various free and premium templates. You can choose one of these templates to save time. You can choose a form template with a multiple-column layout directly. Or, you can Start From Scratch. Then, you can name your form too.
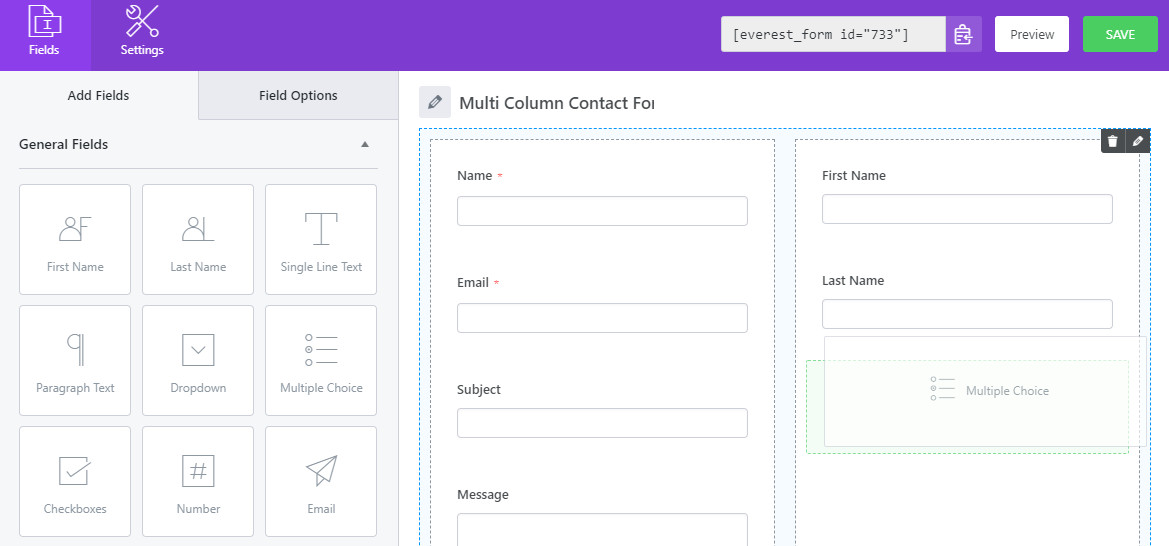
Now, you will be able to see the drag and drop form builder. It allows you to add form fields by simply dragging the fields and dropping them to the desired position.

Step 4: Change the Column Layout
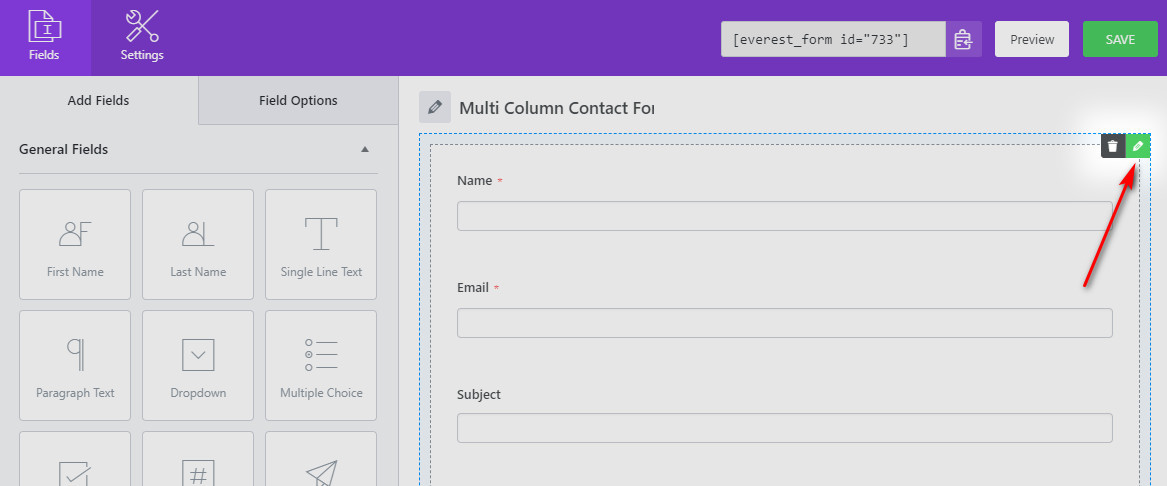
Now, you can easily add 2 columns in the Everest Forms contact form. All you need to do it hover around the right side of the form builder. Then, you can see an edit button on the corner. Click on the edit button and you can choose the 2 column layout.
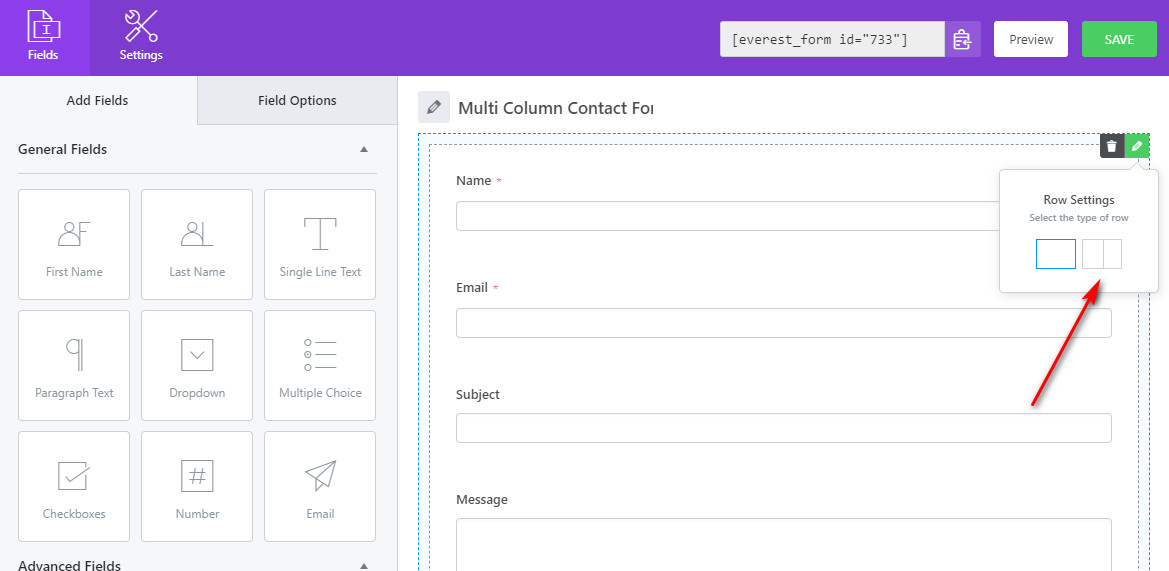
After that, you will be able to display form fields in 2 columns. Just like before, you can drag and drop to insert the form fields in the 2 columns.
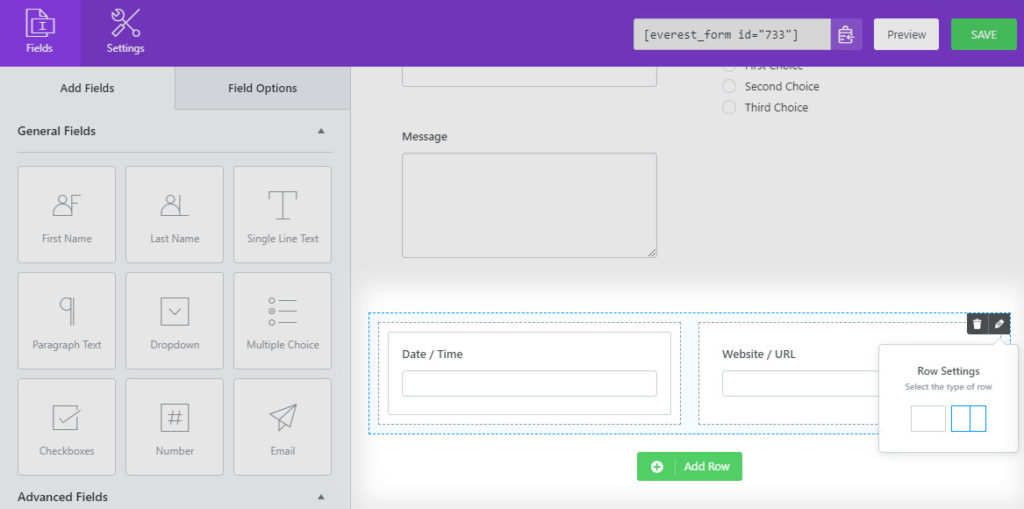
Similarly, you can add new rows to your WordPress contact form too. Just click on the Add Row button on the bottom of the form builder.
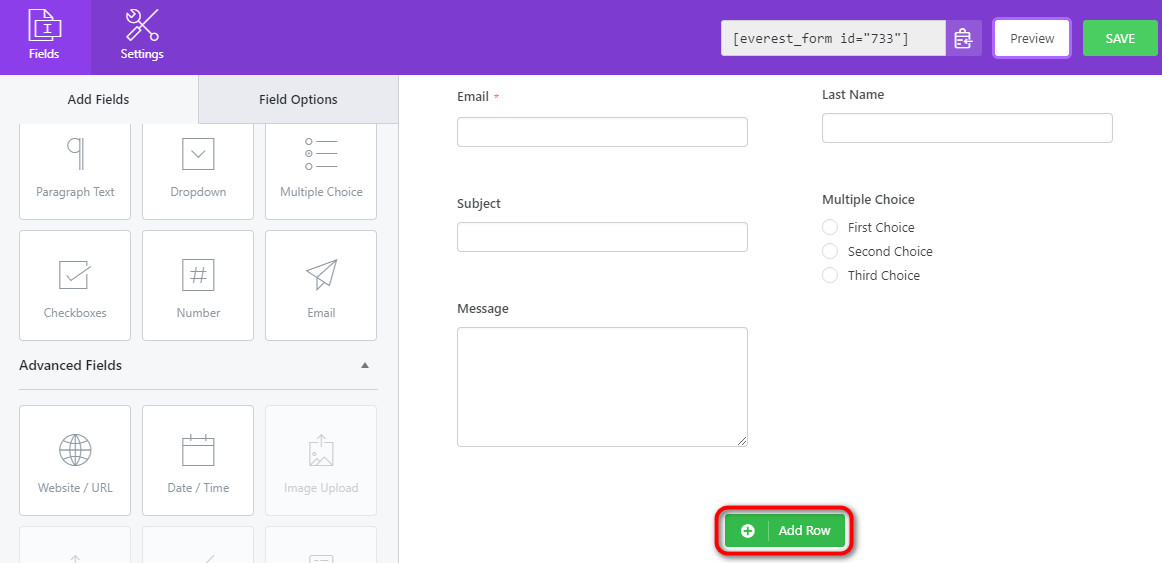
After you add a new row to your contact form, you can add form fields. Then, you can change the column layout of this row the same way.
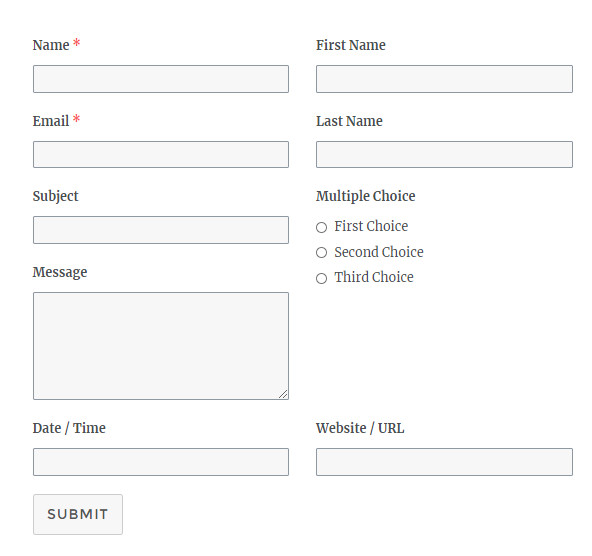
Frontend View of the Contact Form with 2 Columns:
Click on the Preview button on the form builder to see how your WordPress contact form with 2 columns looks on the frontend.
Concluding:
Therefore, you can easily create a WordPress contact form with 2 columns with the help of Everest Forms. Its multi-column feature allows you to make you efficient and user-friendly forms for your website.
Hopefully, you can create 2 column WordPress contact forms for your site effortlessly now. If you want more WordPress tutorials like this, check these out:
- 3 Easy Steps to Create a Customer Complaint Form in WordPress
- How to Easily Create a WordPress Popup Form?
- How to Accept E Signatures with WordPress Forms?


![Zakra 3.0 | Zakra Pro 2.0 Release [Major Updates!]](https://i.ytimg.com/vi/g3rifl7kWvg/maxresdefault.jpg)