Are you looking for ways to integrate Convertkit on your WordPress site? Look no further! You’ll learn how to easily integrate ConvertKit and create a custom Convertkit WordPress form for your blog in this WPEverest article.
Table of Contents
Why Integrate ConvertKit to your Blog Site?
ConvertKit is an Email Marketing platform created for enhancing and increasing your business online. And, it is the best for all types of blogging businesses form hobbyists and small businesses to professional bloggers. This easy-to-use tool allows you to optimize your blog for conversions and helps you to easily manage your audience/subscribers. Some of the main features offered by the email marketing platform are:
- Helps you Increase Email Marketing List
- Create Beautiful Landing Pages for your Business
- Easily edit and deliver emails using Email Designer
- Easy and Well-timed Marketing Automation Feature
- Track Conversion Rates on your Dashboard
Likewise, there are more reasons to use ConvertKit to build and grow your email marketing list for your blogging business. There are many ways you can integrate ConvertKit to your site. And, it is even easier for WordPress users with the use of Everest Forms plugin. Read the easy steps below for easy and simple ConvertKit WordPress Integration.
How to Create Creating a Custom ConvertKit WordPress Form?
Step 1: Install Everest Forms on your WordPress Site
The first thing you need to do is to install Everest Forms on your WordPress blog. Everest Forms is one of the best form building plugins which allows you to create amazing forms for any purpose that your site requires. The plugin offers advanced features and valuable add-ons that extend the functionality of your forms.
One of these add-ons is the ConvertKit add-on. You can add subscribers to your ConvertKit email lists directly from Everest Forms form submissions. The add-on eliminates the requirement of any third-party app to connect your WordPress forms with ConvertKit.
You can check out the plans and pricing page for more details on the add-on.
Step 2: Configure ConvertKit Settings
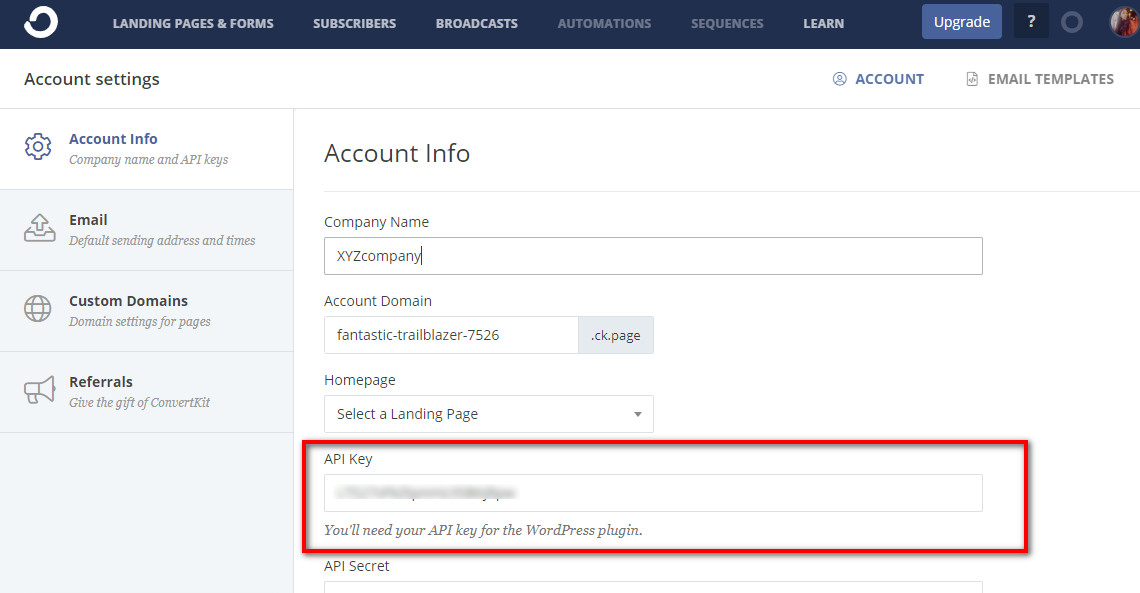
Secondly, you need to retrieve your API key from your ConvertKit account. So, head over to your ConvertKit Account Settings and you can find your API Keys in the Company Info. So, just copy your API Key and go to your WordPress site.
Then, on your WordPress dashboard, go to Everest Forms → Settings → Integrations and click on the ConvertKit settings. Here, you can Add New Connection by adding the ConvertKit API Key that you copied. Also, you can add a Nick Name for your ConvertKit connection.
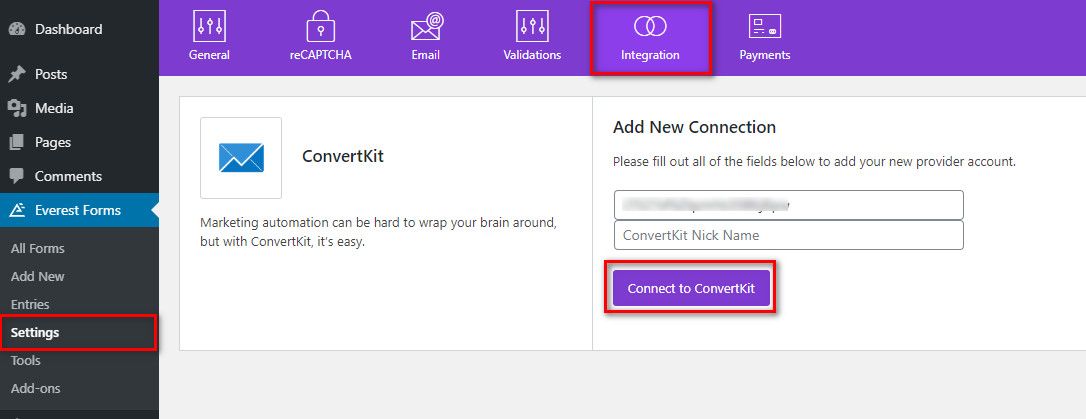
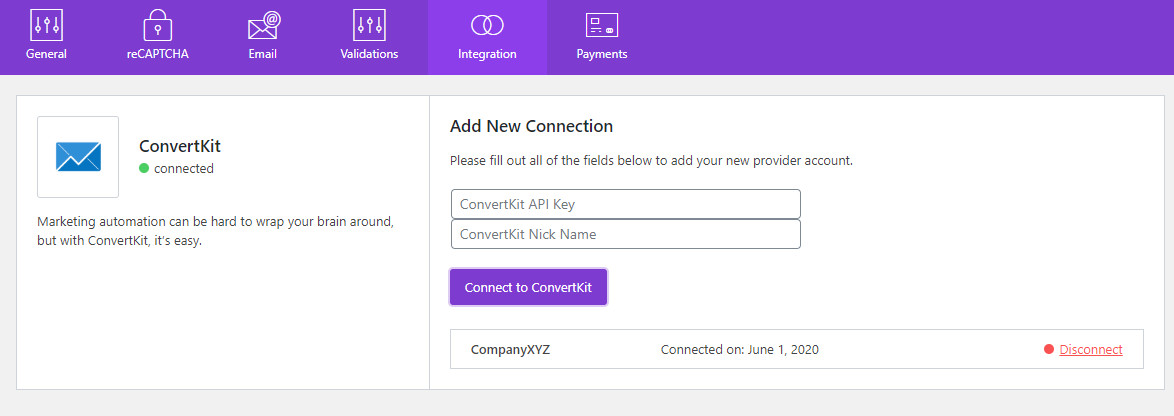
After you add the ConvertKit API Key and Nick Name, you need to click on the Connect to ConvertKit button to establish the connection. You can see the connected message below and you can disconnect the connection when it is not required.
Step 3: Map Everest Forms Fields to ConvertKit List Fields
Now, all you need to do is map the Everest Forms form fields with the ConvertKit Fields. To do this, you need to open your ConvertKit WordPress Form or create a new form if you haven’t already.
Then, go to the Integrations tab on top of the Form Builder. Here, you can see the ConvertKit tab and the Add New Connection option where you can type the connection name. After you add the connection, you can see the ConvertKit settings on the left-hand side.
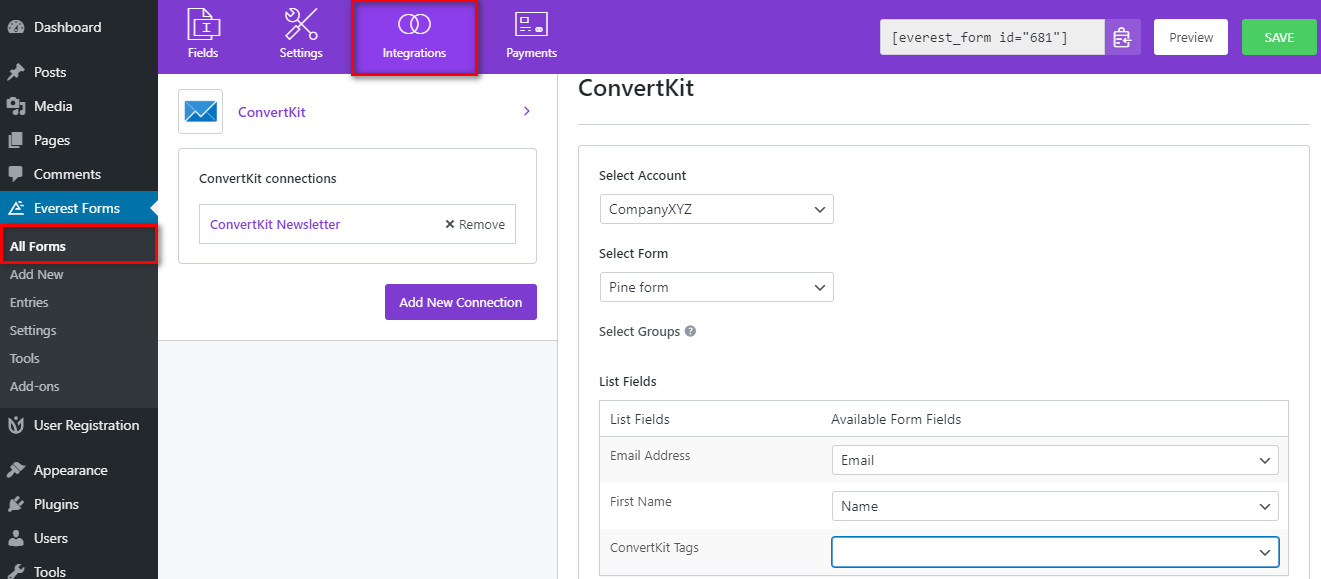
First, you can select your ConvertKit account if you have more than one account. Then, you can choose the form you want to connect with the Everest Forms fields. Also, there is the Select Groups option, which allows you to select the ConvertKit Segment if you have created any.
Now, to map the form fields with ConvertKit, you have the List Fields option. Here, we have mapped the ConvertKit List Fields with the Everest Forms fields by simply using the dropdown selector.
And, the ConvertKit Tags allows you to divide your subscribers to different groups according to your requirements. It is a useful feature when you have customers of multiple products or if you want to group your free and pro users separately.
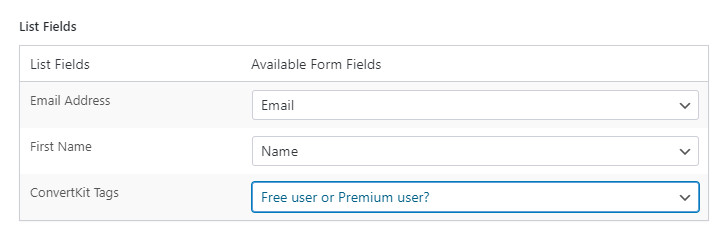
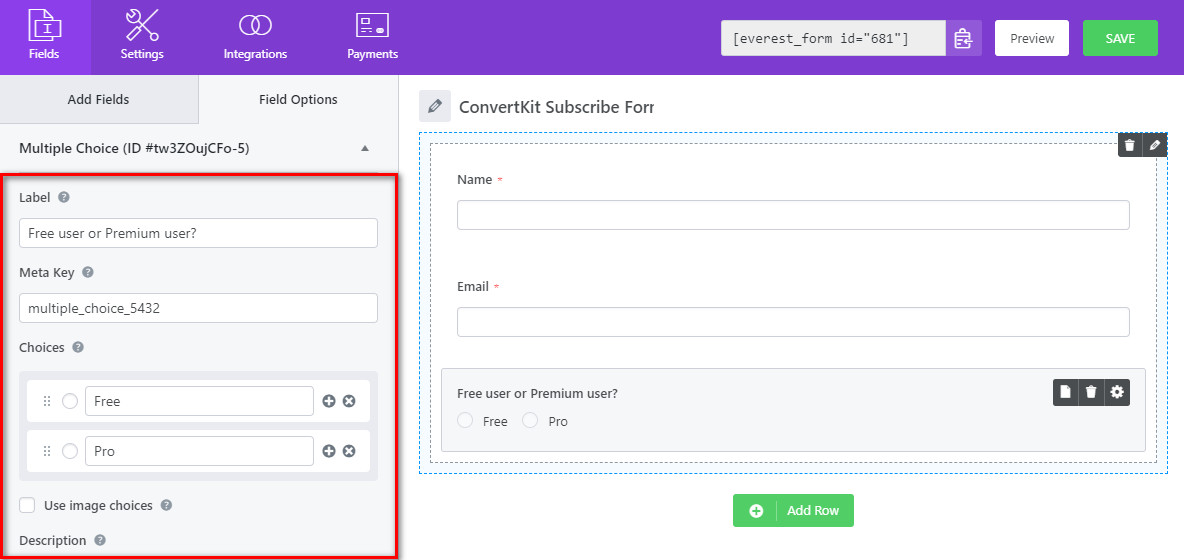
For this, you can just add a new field to create tags. In this tutorial, we have used the Multiple Choice field and added the tags for free and premium users.
How to Use Conditional Logic for Opt-in Option?
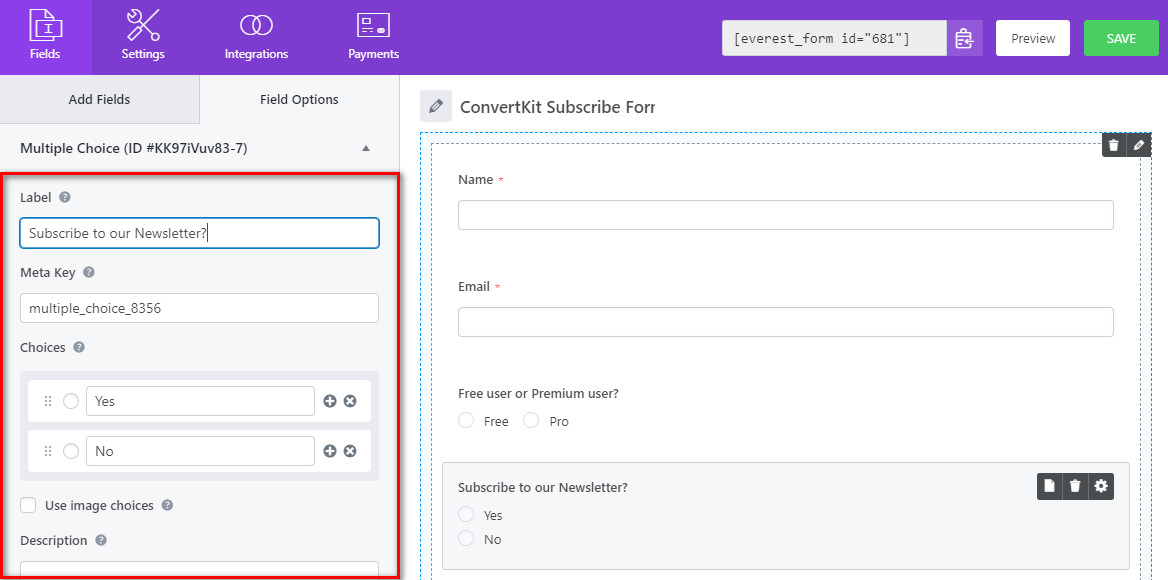
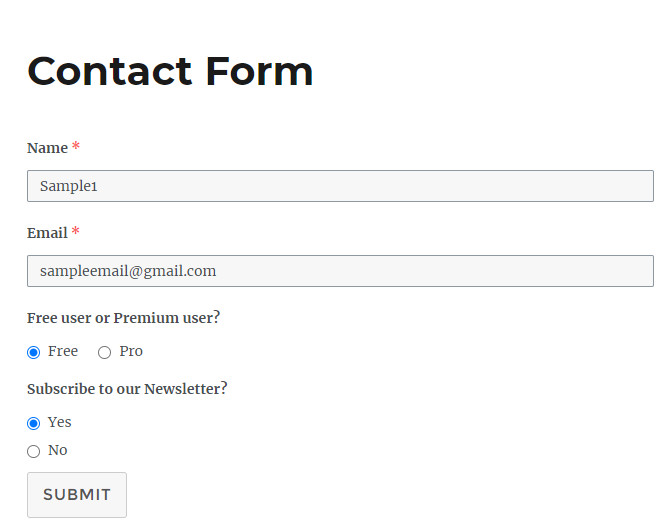
Additionally, the ConvertKit add-on also allows you to add an Opt-in option for your customers. For this, you must first create a field for the user input. Here, we are using the Multiple Choice field to add a “Subscribe to Newsletter” option in the form.
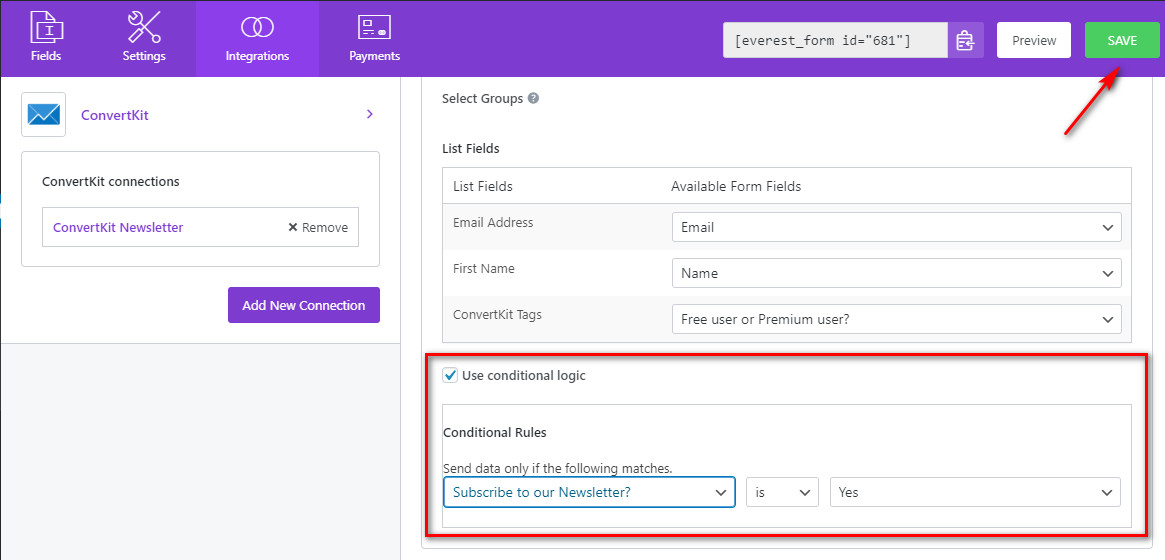
Now, go to the ConvertKit Settings and enable Use Conditional Logic. Then, you can see the conditional logic options. Now, select the Subscribe to Newsletter field from the drop-down selector and the condition set to “Yes”. So, this conditional rule allows users to opt-in to subscribe to your ConvertKit email list. Don’t forget to SAVE the settings and the form is ready to be published.
Step 4: Test your Connection
After you add the form to your website, you can submit a sample form submission and check your connection with ConvertKit. The frontend view of the form will look something like this.
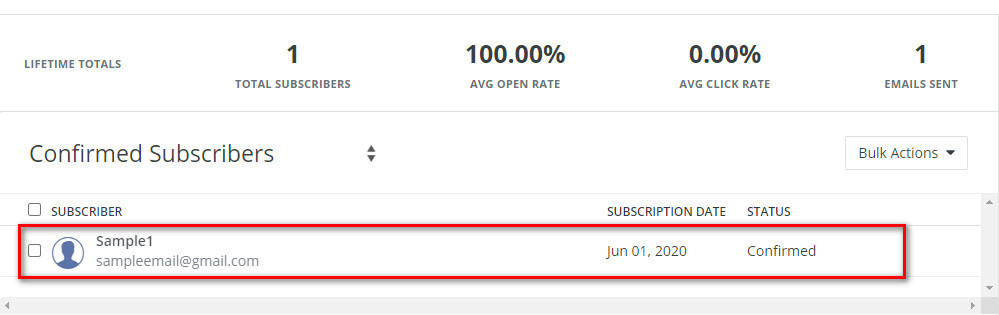
After you submit your form, go to your ConvertKit account. You can see that the subscriber is added successfully.
Concluding:
As you can see, Everest Forms allows you to integrate your ConvertKit account with your WordPress site. The ConvertKit add-on allows you to connect your WordPress Forms with ConvertKit Form directly from the WordPress dashboard. This makes the process so easy and simple for WordPress users. Hopefully, you can now easily integrate ConvertKit and create a custom ConvertKit Form for your business.
Don’t forget to share this article if it was helpful for you. Also, you can check out more insightful articles for your WordPress site.
- How to Create a Mailchimp WordPress Form?
- A Beginner’s Guide to Conditional Logic in WordPress Forms
- 5+ Best Free WordPress Registration Plugins for 2020


![Zakra 3.0 | Zakra Pro 2.0 Release [Major Updates!]](https://i.ytimg.com/vi/g3rifl7kWvg/maxresdefault.jpg)