Are you looking for ways to add your users in your email marketing lists? Great! This article is just what you’re looking for. After reading this WPEverest tutorial, you’ll learn how to register users to your email list with a Mailchimp WordPress form easily.
Table of Contents
Why Connect Mailchimp with User Registration?
Mailchimp is a great email marketing platform that allows you to provide email services and manage your audience effortlessly. The audience is a list of subscribers who opt-in to your email services. Undoubtedly, Mailchimp is one of the best options you have to manage and increase your email marketing services. So, you need to check it out if you don’t use it already.
Moreover, you can integrate Mailchimp on your registration forms, and add a “Subscribe to Mailchimp” option. Doing this will give your users the freedom of choosing whether or not to subscribe to your Mailchimp list. For this purpose, there are many form builder plugins that offer a Mailchimp integration.
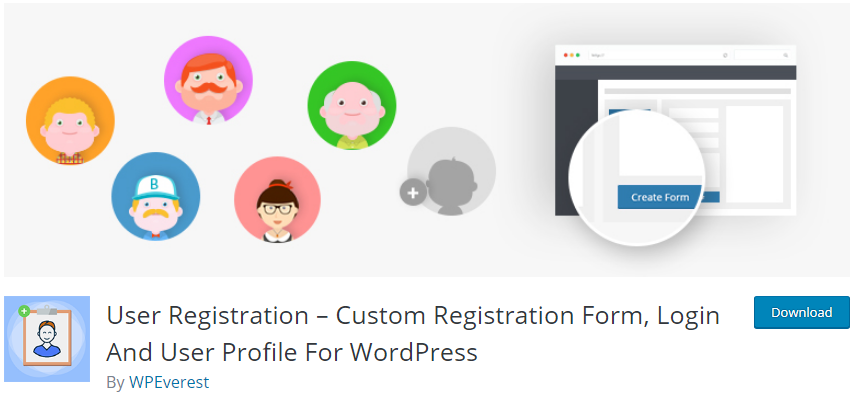
Here, we are using our User Registration plugin. You can use its easy drag-and-drop feature to create powerful registration forms for Mailchimp in no time. Similarly, it offers other features like multiple column designs, reCaptcha integration, email notifications and more.
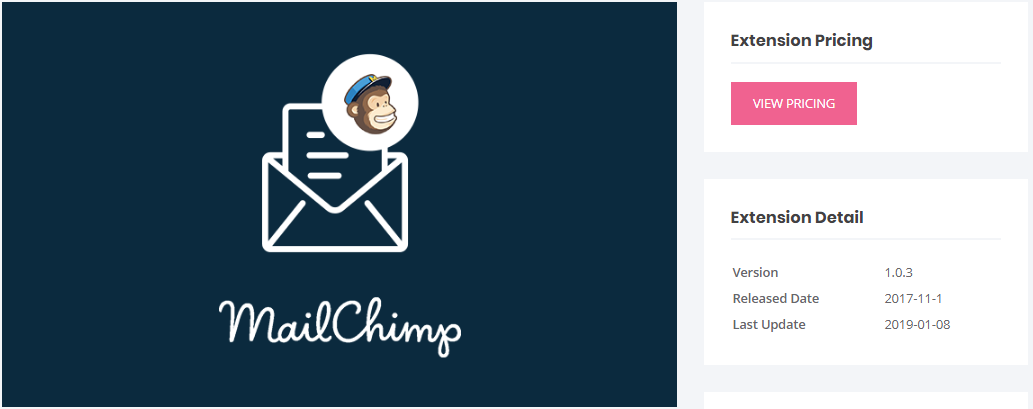
With our premium Mailchimp add-on, you can easily connect your mailchimp account with User Registration plugin. It is available on all our pro plans.
If you want more details on the pricing then, you can check our Plans and Pricing page, and choose the best plan for you.
After you download and install the User Registration plugin and Mailchimp add-on, follow the instructions below.
How to Create a Mailchimp WordPress Form?
Step 1: Create a WordPress Registration Form
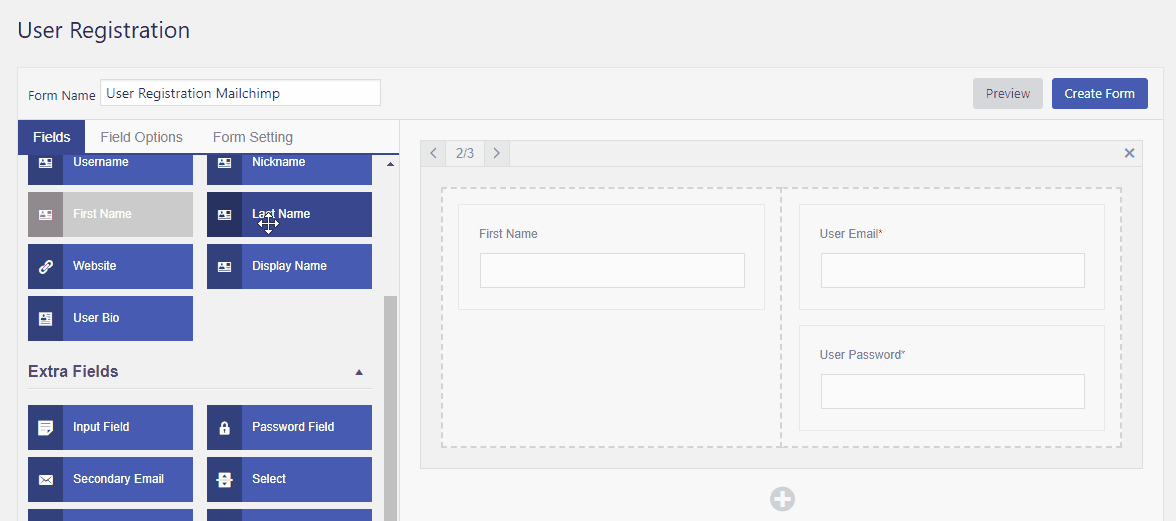
First of all, you need to create a new registration form if you haven’t created one already. For this, go to User Registration → Add New.
Now, insert the form field that you require in your form. You can simply drag and drop the fields to the positions you want. Also, make sure you include the fields that are present in your Mailchimp list too.
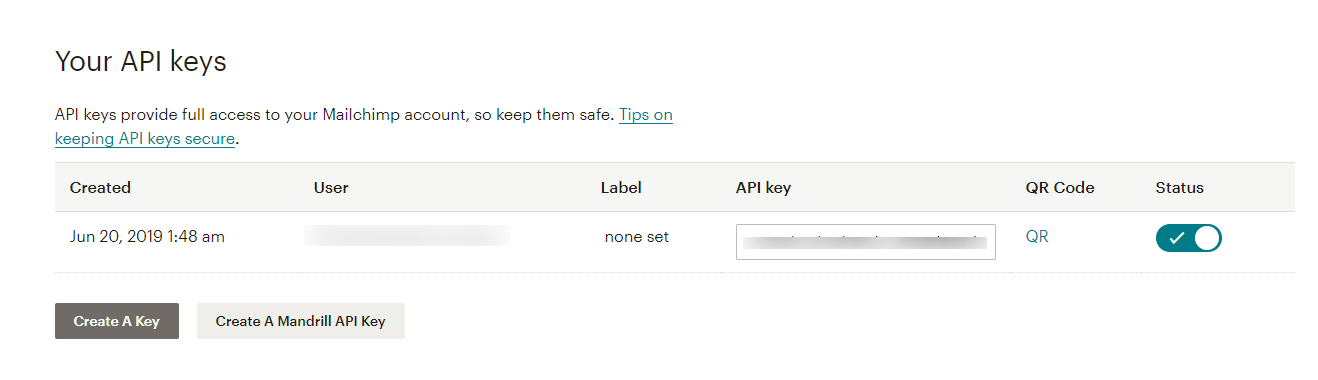
STEP 2: Get your API key
Next, you need to get your API Key from your Mailchimp account. For this, go to Account → Extras and click on API Keys. Then, copy the API key from the Your Keys section.
STEP 3: Set up Mailchimp
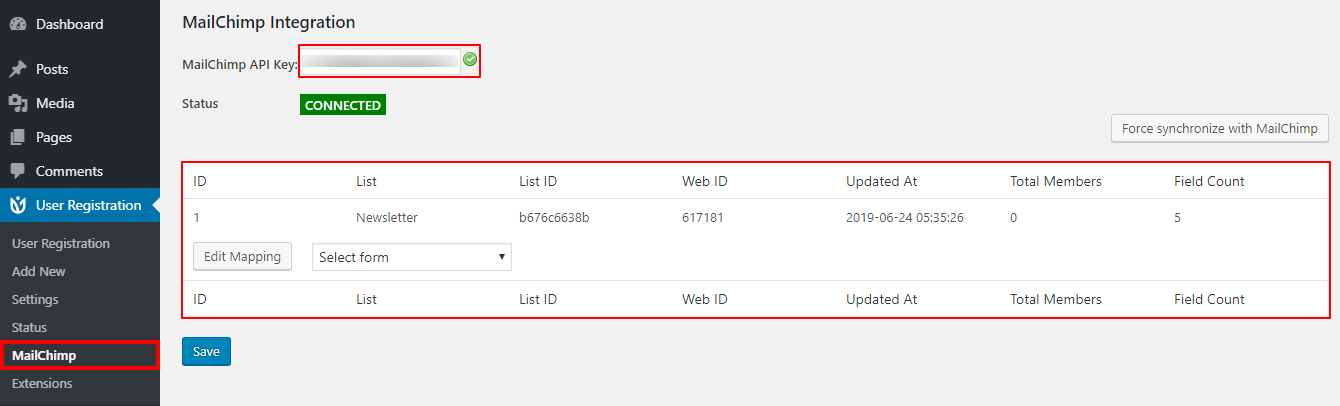
Then, you need to set up your Mailchimp account on your site. So, Go to User Registration, and Click on the Mailchimp tab. Here, you need to enter your Mailchimp API key first.
After you’re connected, your Mailchimp list will be integrated there.
Now, you need to select the Mailchimp WordPress form you created. To connect the Mailchimp list fields with the registration form fields, click on Edit Mapping button.
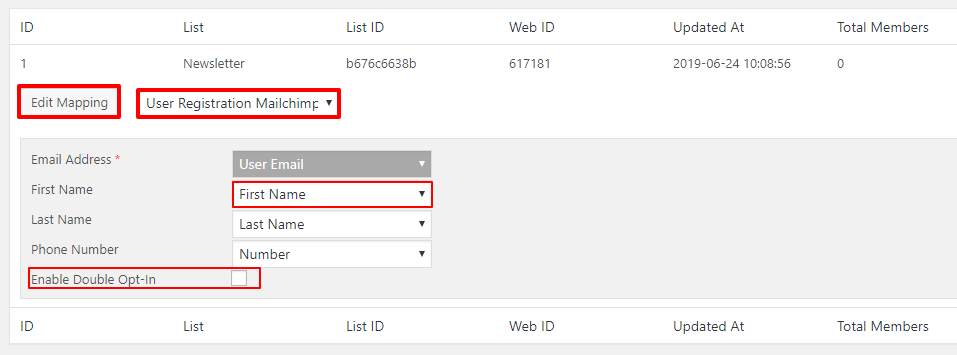
Also, there is an Enable Double Opt-in option. If you enable this, your users who opt-in to subscribe to your Mailchimp list on the form will get a confirmation email. And, they will be subscribed only after they confirm by the email.
Once you finish the settings, click on Save.
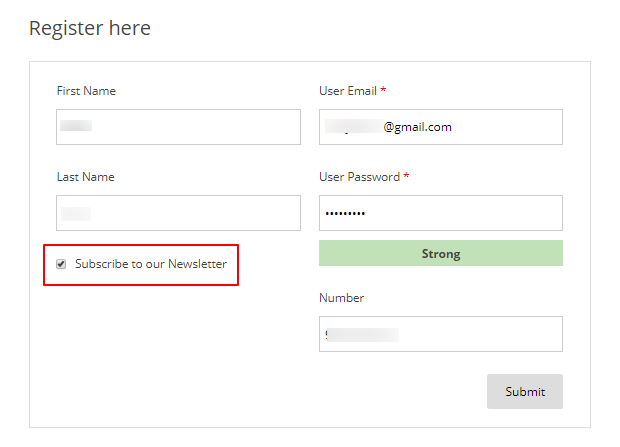
STEP 5: Add subscribe to Mailchimp checkbox
Furthermore, the Mailchimp add-on allows you to add a Mailchimp checkbox field to your form. So, go to User Registration and go to the form you created for Mailchimp.
On the extra form fields, you can see the Mailchimp field. Now, insert the field to your form. You can also add your desired text to the label of the checkbox field.
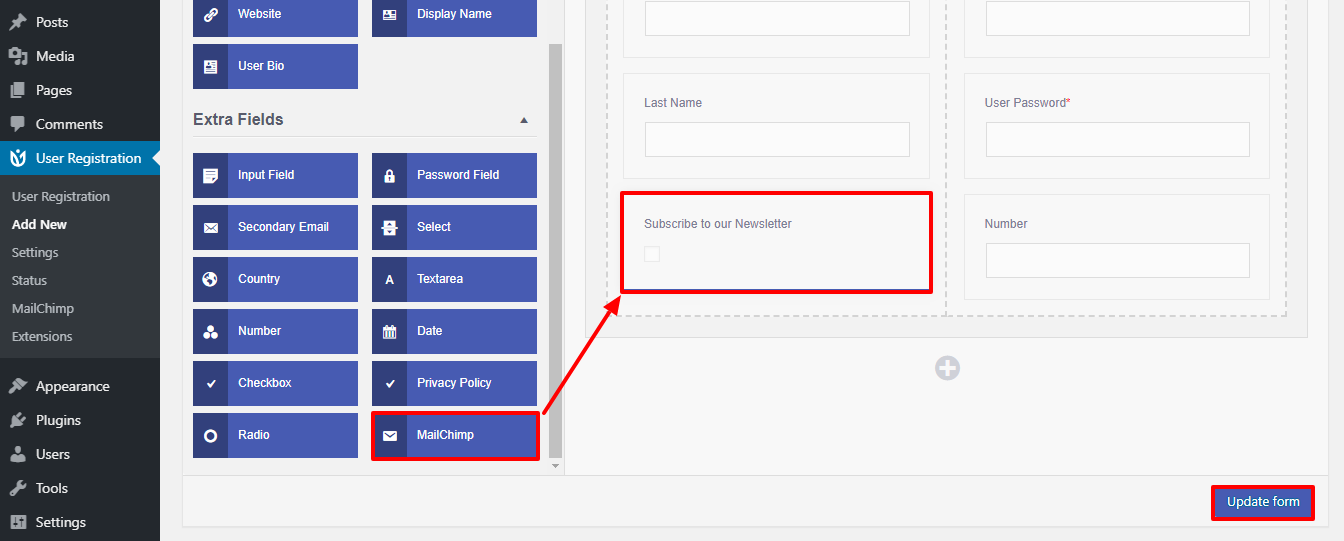
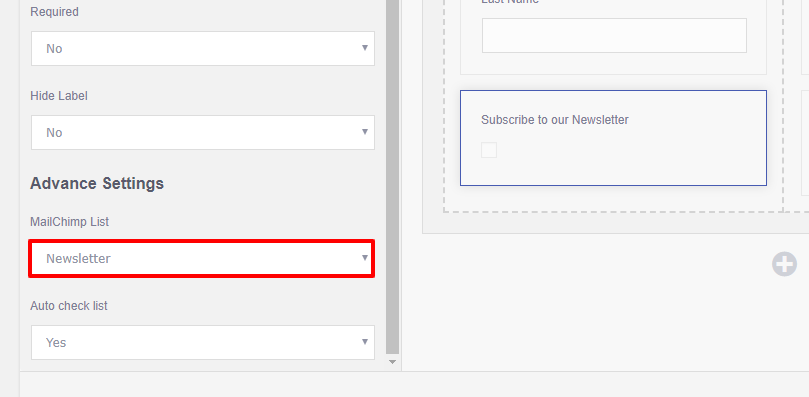
Also, you can go to the Advance Settings in the Field Options, and make sure the correct Mailchimp is selected. After that, click on the Update form button.
Now, users will be able to choose to subscribe to your Mailchimp list with this Mailchimp WordPress from.
Wrapping Up!
Hence, creating a Mailchimp WordPress form is a painless way to allow your users to opt-in to your email marketing services. And, Everest Forms makes the job much easier for you. The premium Mailchimp add-on allows you to integrate your Mailchimp list with your registration form in a few steps. And, the pre-built Mailchimp Checkbox saves you from creating one yourself.
Hopefully, you can create a WordPress Mailchimp registration form without any trouble after reading this tutorial. Don’t forget to share and stay tuned for more tutorials like this!


![Zakra 3.0 | Zakra Pro 2.0 Release [Major Updates!]](https://i.ytimg.com/vi/g3rifl7kWvg/maxresdefault.jpg)