One of the easiest ways to collect payments is through a WordPress form with PayPal integration. Users can simply enter their information into the form and pay for your products/services. The payment will start processing as soon as they submit the form.
But first, you must create a form with PayPal integration. It’s super simple when you have the right tool at hand!
So in this article, we’ll discuss the best tool to create a payment form and how to use it in clear steps. Let’s start!
Table of Contents
Best Way to Create a WordPress Form with PayPal Integration
As we mentioned before, creating even the most complex payment forms is easy when you have the right plugin.
One such plugin is Everest Forms, a renowned contact form builder among WordPress users. It’s famous for its drag-and-drop form builder and a user-friendly interface.

Using Everest Forms, even beginners can easily craft forms for surveys, appointments, hotel reservations, etc. And you get plenty of customization options for individual fields and forms.
Most importantly, it lets you create a payment form that supports the PayPal payment gateway. It comes with a PayPal Standard add-on that adds payment fields to your builder and enables PayPal integration.
In the following section, we’ll give you a step-by-step guide to how you can use Everest Forms to build a payment form.
How to Create a WordPress PayPal Payment Form?
Just follow the steps we’ve explained, and you should be able to create a WordPress PayPal payment form in no time.
1. Install and Activate Everest Forms Pro and PayPal Standard Add-on
First, you need the free Everest Forms plugin installed and activated on your website. The Pro plugin sits on top of the core plugin to provide you with more advanced features.
Only after you’ve installed both the free and premium versions of the plugin, you’ll be able to install the PayPal Standard add-on.
We have a separate article on how to properly set up Everest Forms Pro. So, check it out if you need help installing the plugin.
Once you have the free and pro versions of Everest Forms, you can proceed ahead.
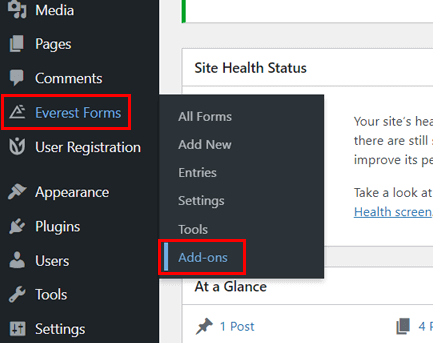
Now, go to Everest Forms >> Add-ons in your WordPress dashboard.
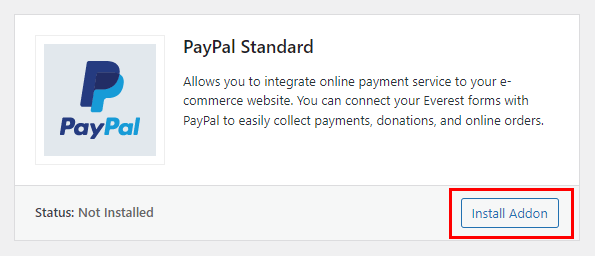
Here, search for the PayPal Standard add-on and click Install Addon.
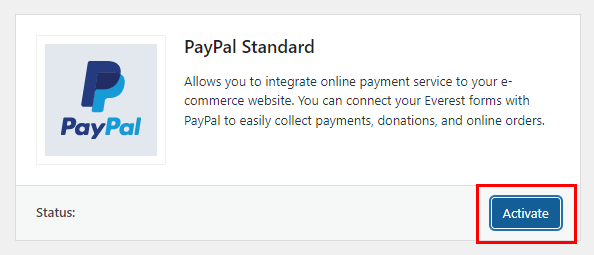
Then, Activate it as well.
With that, you’ve successfully set up Everest Forms and the PayPal Standard add-on.
2. Create a New Payment Form
It’s now time to create a new payment form for your WordPress site. For that, Everest Forms Pro offers 5 payment fields.
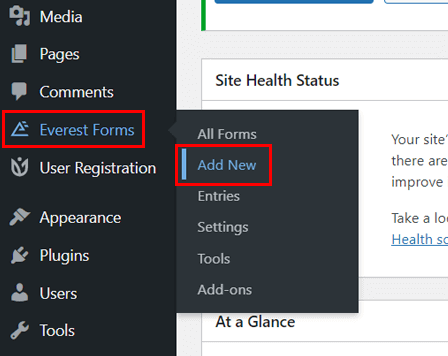
Start by opening Everest Forms >> Add New on your WordPress dashboard.
Now, Everest Forms offers various pre-designed templates for you to use. Using these templates, you can create contact forms, leave request forms, hotel booking forms, etc.
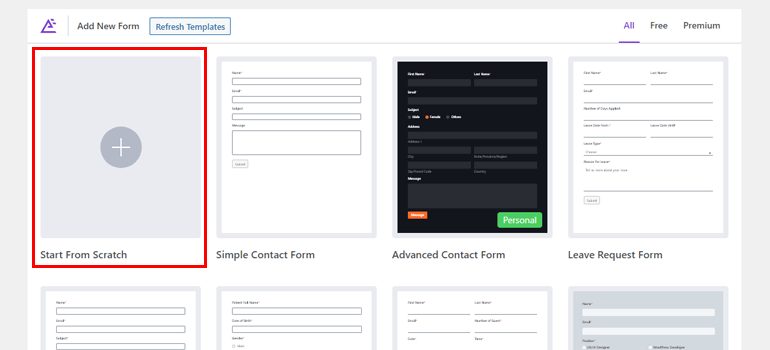
In this guide, we’ll show you the steps to create a payment form from scratch. So, click on Start From Scratch. Give your form a name and hit Continue.
This opens the Everest Forms form builder.
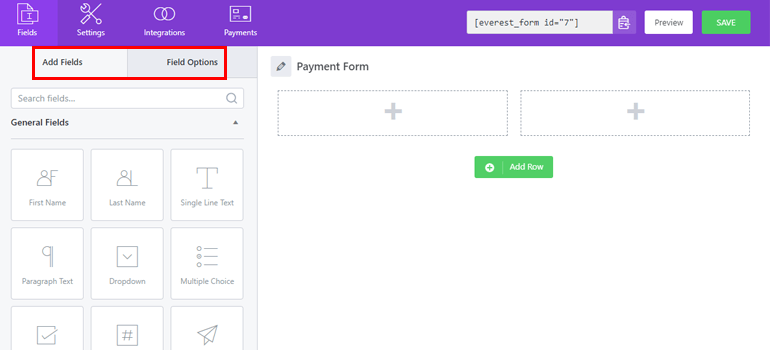
You’ll find the form fields and their customization options on the left side of the field. You just need to drag and drop the fields you need into the form on the right.
As you scroll down, you’ll see the Payment Fields.
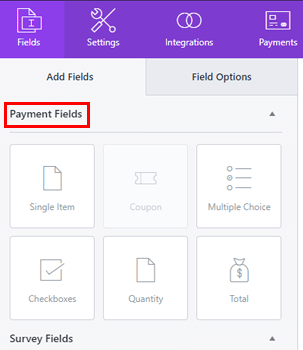
Let’s find out the purpose of each payment field in your form!
Single Item: This field helps you add the single item that you’re selling to the form. You can give a predefined price to the item or let users enter the price. Otherwise, you can keep the item hidden as well.
Multiple Choice: Using this field, you can add various product choices, out of which the user can select a single option. Plus, it allows you to assign a price to each product manually. You may even use image choices instead of text choices.
Checkboxes: The Checkboxes field is similar to the Multiple Choice field. The only difference is that the user will be able to tick as many options as they want.
Quantity: It asks users the quantity of the product they’re buying. You can then set the field the form needs to calculate the amount with. The field can be Single Item, Multiple Choice, or Checkboxes.
Total: The Total field displays the total amount the user needs to pay based on the quantity and product price.
You can add any of these fields to your form per your needs. Once you’ve added all the required fields, you can move on to customization.
When you click on a specific field on the right, the builder displays its field options on the left.
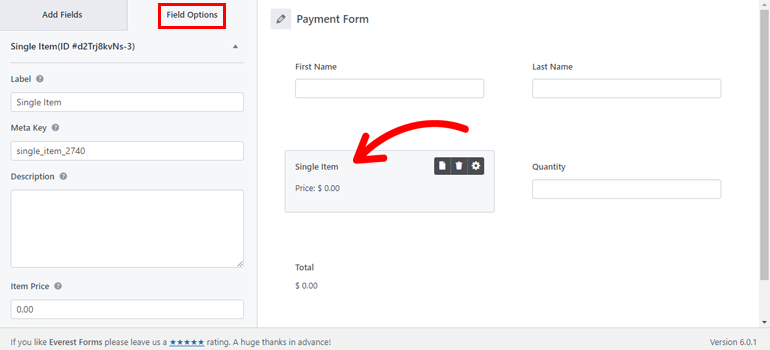
Here, you can edit the field Label and Description. You can also make the field required and enable a tooltip for it.
Besides that, the Advanced Options allows you to add Placeholder Text, Default Value, CSS Classes, Hide Label, and more.
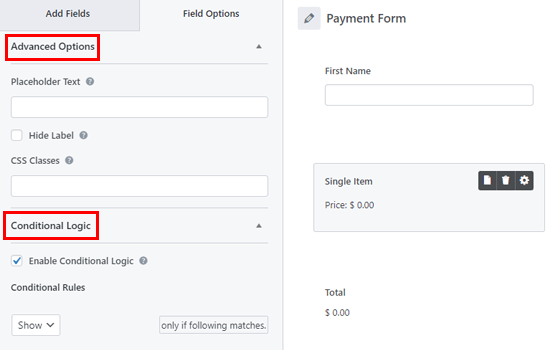
The Conditional Options let you apply conditional rules to a field. This way, the form shows or hides the field based on previous user inputs.
Note that the customization options vary from field to field. Each field shares most of the customization options but not all.
For example, you can set Item Price and Item Type in the Single Item field.
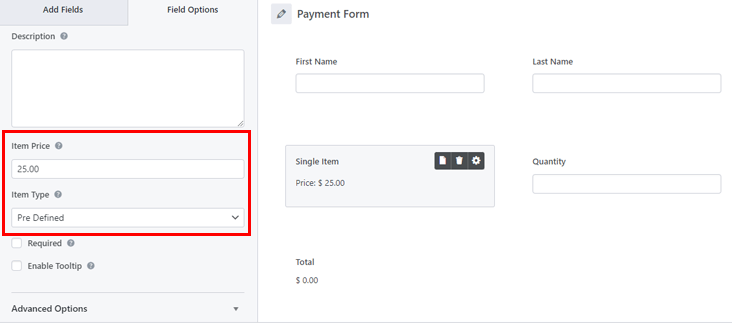
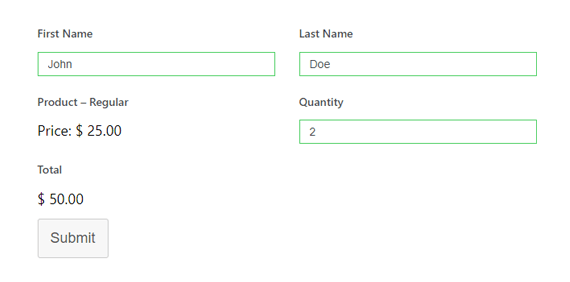
Likewise, you must select the field you want to calculate the total with for the Quantity field. We’ve chosen the Single Item field from the dropdown. So, the quantity the user enters is multiplied with the product price to display the Total.

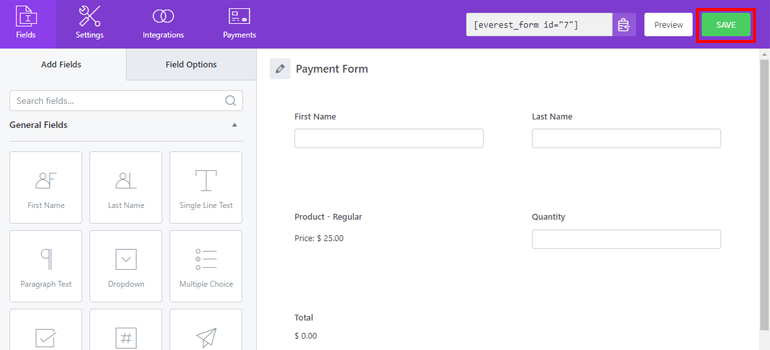
When the form building is complete, don’t forget to save the changes by clicking the Save button.
3. Enable PayPal Standard for the Form
Now, here’s the most crucial step. After creating the form, you still need to enable PayPal payments.
To do that, click on the Payments tab that’s at the top of the builder to open the PayPal Standard options.
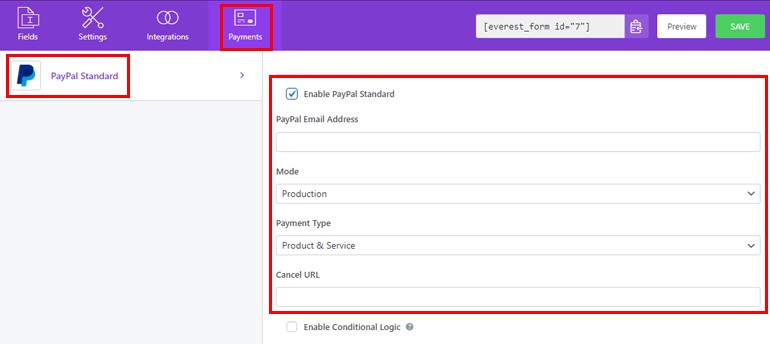
Here, the Enable PayPal Standard checkbox is ticked by default. This opens up all the configurable PayPal settings for your form.
PayPal Email Address: First, you need to enter the PayPal email address of the payment receiver.
Mode: You get Production and Sandbox modes for the form. Choose the Sandbox mode if the form is for testing purposes only.
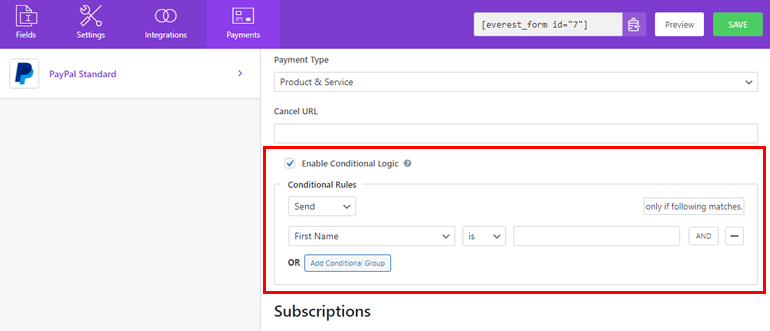
Payment Type: Choose the type of payment you’re receiving. It can be for a product/service or a donation.
Cancel URL: Enter the URL the user will be redirected to if they cancel their payment on PayPal.
Additionally, Everest Forms lets you apply conditional logic to decide when a form is sent to PayPal for processing. You can make as many conditional rules as you like.
Moreover, you can set up a recurring subscription payment system with PayPal. To create a recurring plan, you must enter the Plan Name, the Recurring Period, and Customer Email.
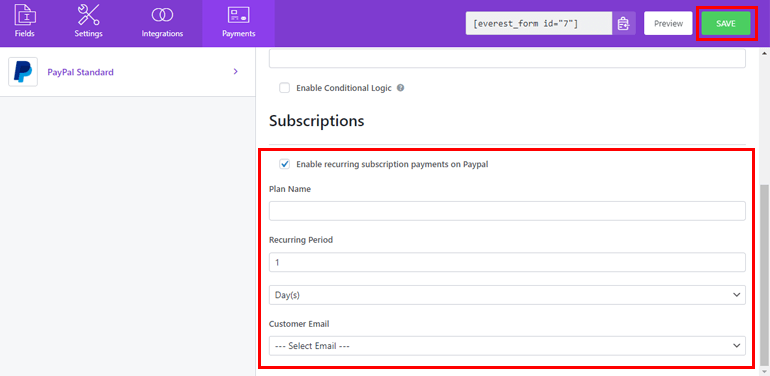
You can configure each setting as you see fit and hit the Save button to save all the settings.
4. Configure Form Settings
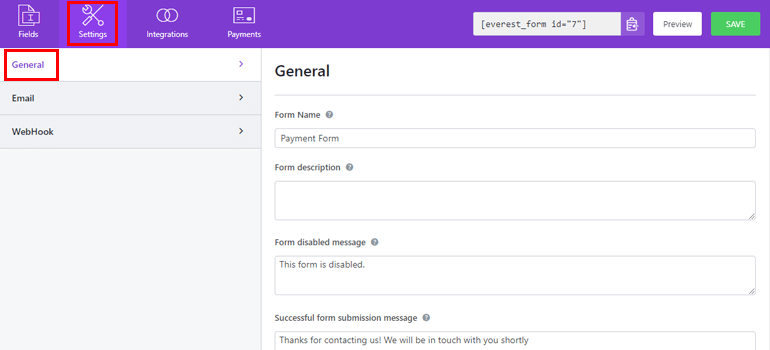
Before publishing the payment form on your site, you can configure the necessary form settings from the Settings tab.
General: You can change Form Name, Form Description, Submit Button Text, Form Disabled Message, Layout Design, etc. Plus, you can enable conditional redirection after submission, AJAX form submission, and more.
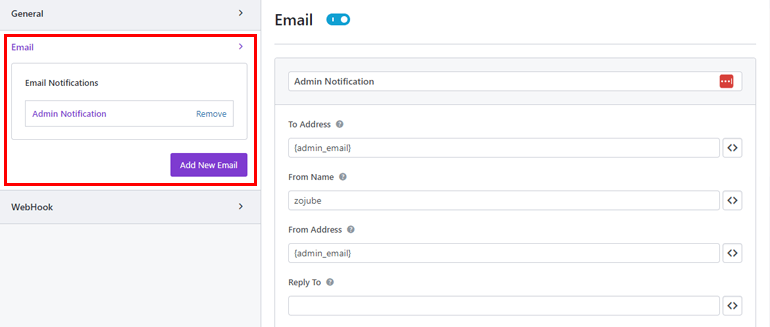
Email: This lets you create and customize as many admin and user emails as you want. You can set the From Address, To Address, From Name, and other parameters for each email.
WebHook: You can send the form data to an external URL using the WebHook. You just have to provide the Request URL, Request Method, Request Format, and Request Headers.
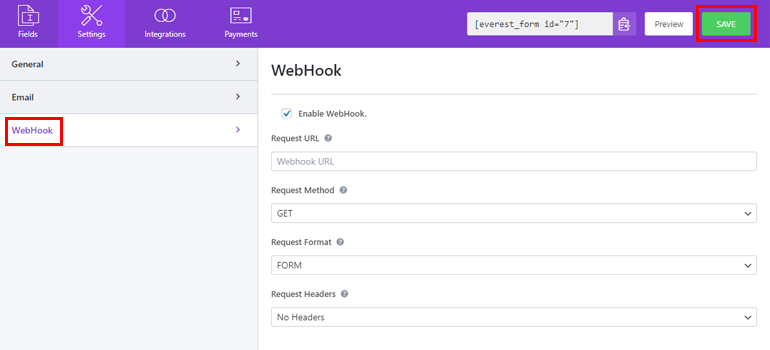
After you’re done, make sure you save the changes by clicking the Save button.
5. Display the Form on Your Website
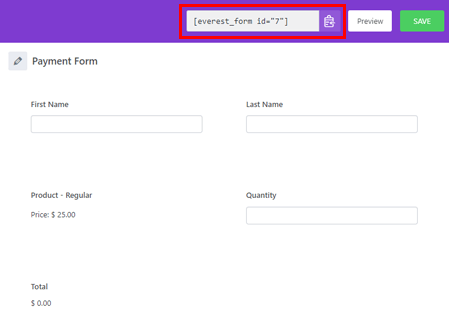
Finally, it’s time to display the payment form with PayPal integration on your WordPress website.
All you have to do is copy the form shortcode you see at the top of the builder.
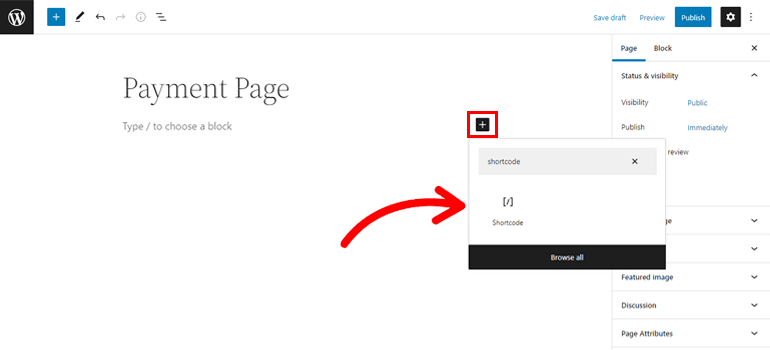
Then, open the page or post in which you want to display the form. Here, add a Shortcode block using the block inserter.
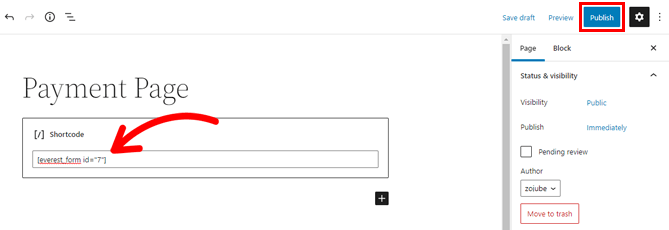
Now, paste the shortcode into the block. Finally, hit the Publish button, and your form should be live on your site. If you’re adding it to an existing page, just click Update.
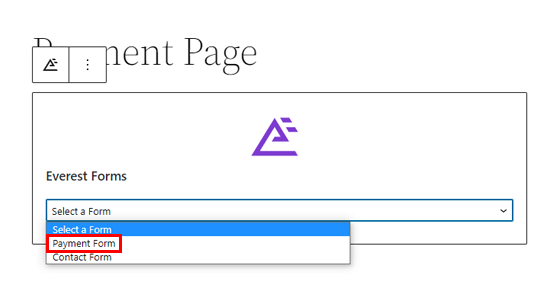
Alternatively, you can display the form using the Everest Forms block. You can add the block to the page or post and choose the form you just created from the dropdown.
That’s it! Now, you have a WordPress PayPal form to handle payments on your website.
Wrapping Up
If you want to quickly accept PayPal payments from customers, you need a PayPal payment form.
Fortunately, Everest Forms lets you create a payment form without breaking a sweat. Thanks to its premium add-on, PayPal Standard. Simply add payment fields to your form, enable PayPal, configure its settings, and you’re done.
But don’t stop there. You can use Everest Forms to add Google Maps to the form, send its data to Google Sheets, and so on.
You’ll find more posts on Everest Forms and its features on our official blog. So, check it out if you’re interested.
Also, follow us on Twitter and Facebook for exciting updates!


![Zakra 3.0 | Zakra Pro 2.0 Release [Major Updates!]](https://i.ytimg.com/vi/g3rifl7kWvg/maxresdefault.jpg)