Are you searching for a way to integrate WordPress forms with third-party apps using Zapier? Do you want to use Zapier to integrate WordPress forms with third-party apps? This article provides a Zapier tutorial for guiding you through the entire process.
Using Zapier to integrate apps into your WordPress site might sound intimidating. But, what if we told you that it’s a matter of a few minutes? All you need is the right form builder plugin that supports the integration of WordPress forms with apps using Zapier.
Thus, follow this tutorial till the end to successfully integrate WordPress forms with third-party apps using Zapier.
Table of Contents
What is Zapier? Why Use It to Integrate WordPress Forms with Third-Party Apps?
Zapier defines itself as “an automation tool that connects your apps and services.” The key concept with Zapier is connecting two or more apps to automate routine tasks. This doesn’t require any coding or support from developers.

To put it simply, when an event occurs in one app, Zapier can tell another app to perform a particular action.
When you build a WordPress form, you might have to perform multiple tasks to manage the form and its data. For example, you have to copy all the names and email addresses of the users who submitted the form into a spreadsheet. You’ll have to copy individual data from the form if you don’t have any automation tool. A tiring job, right?
But using Zapier, you can simply integrate your WordPress form with Google Sheets and automate the workflow. Here, Google Sheets is a third-party app where you send your form data. As soon as the user submits the form, their data gets copied into the specified spreadsheet.
Besides the above example, you can use Zapier to automate other tasks you require to perform frequently. Further, it saves time and lets you focus on more important parts of your task. Best of all, it has over 4000 apps that you can integrate with your WordPress form.
With that said, let’s now learn to use Zapier to integrate WordPress forms with third-party apps.
How to Integrate WordPress Forms with Third-Party Apps Using Zapier?
Among various WordPress form builder plugins, Everest Forms is the best of its kind. It’s a user-friendly plugin with a drag and drop interface. Also, it provides many in-built form templates and various add-ons. Thus, it’s suitable for building WordPress forms for beginners and experts.
Most importantly, Everest Forms provides a Zapier add-on. This extension lets you connect the forms created with Everest Forms to third-party apps available in Zapier.
Hence, in this tutorial, we’ll use Everest Forms to integrate WordPress forms with third-party apps using Zapier.
Step 1: Install and Activate Everest Forms and Everest Forms Pro Plugin
The first step is installing and activating the Everest Forms plugin on your WordPress dashboard. Since Zapier add-on is available only in the premium versions of Everest Forms, you’ll also need to buy Everest Forms Pro.
Note that the add-on is included in the Agency and Professional plans only. So, you must choose among these two premium plans to use the add-on.
If you need help with the installation and setup process, read our complete guide on installing Everest Forms Pro.
We’re confident that you’ve now activated the Everest Forms Pro plugin. So, keep on following our other steps as mentioned below.
Step 2: Create A New WordPress Form Using Everest Forms
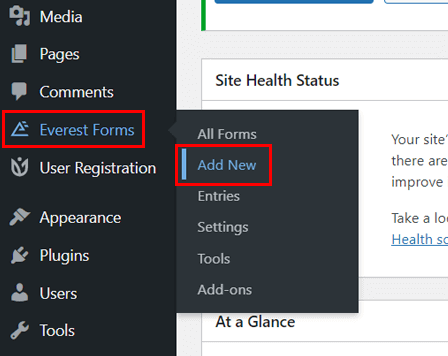
Let’s now create a new WordPress form using Everest Forms. For this, navigate to Everest Forms >> Add New.
As we’ve mentioned, Everest Forms provides various pre-built templates that you can use immediately. At the same time, you can also modify the templates further.
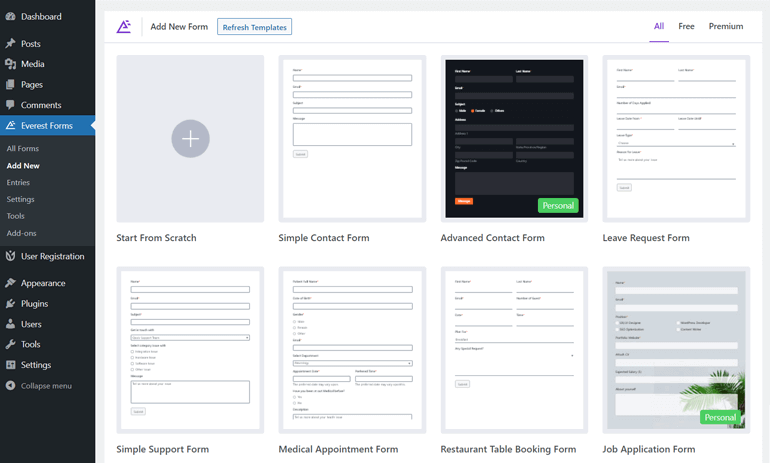
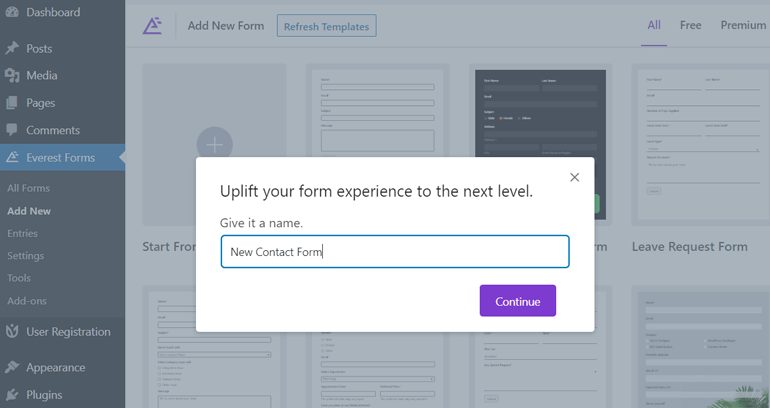
However, in this tutorial, we’re building a new WordPress contact form from scratch. So, click on Start From Scratch.
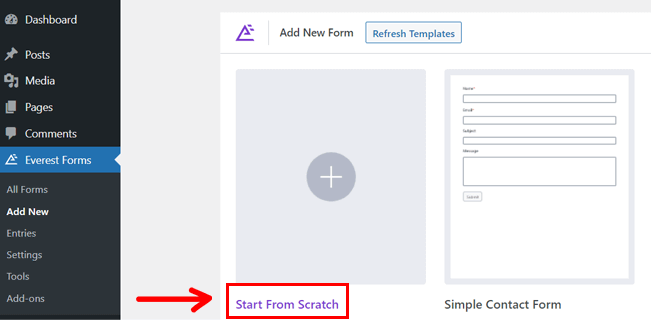
Instantly, it asks you to name the form. Provide a suitable name to the contact form, and hit the Continue button.
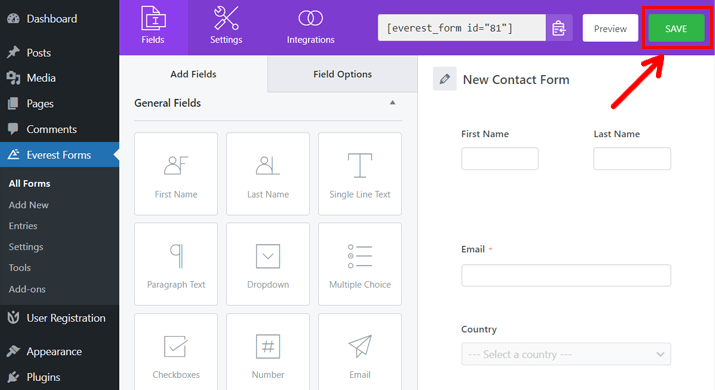
Now, drag the form field from the left and drop it into the form editor on the right. Using the drag and drop interface, you can add the necessary form fields one after another.
Once you add the required form fields, hit the Save button at the top-right corner of the form.
For a detailed guide, go through our article on creating and customizing a contact form using Everest Forms.
Step 3: Connect Everest Forms with Third-Party Apps Using Zapier
As you’ve completed the above steps, your WordPress site has the core Everest Forms plugin and Everest Forms Pro. You’ve also created a simple contact form.
Now, you just need to install the Zapier add-on and to integrate WordPress forms with third-party apps using Zapier.
A. Install and Activate Zapier Add-on
On your WordPress dashboard, navigate to Everest Forms >> Add-ons.
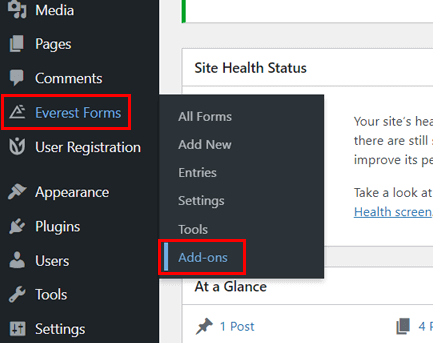
You’ll see a new interface with Everest Forms’ available add-ons. Now, scroll below until you find the Zapier add-on.
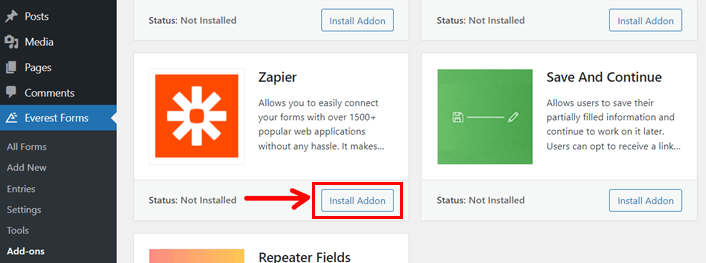
As you see the add-on, click on the Install Addon button. Within a few seconds, it shows the Activate button; hit the button.
Now, your WordPress site has a Zapier add-on, using which you can integrate WordPress forms with third-party apps.
B. Integrate Everest Forms with Zapier
Let’s integrate Everest Forms with Zapier next. But before that, we’d like to ask if you’ve got a Zapier account? If yes, you can proceed with the below-mentioned steps; otherwise, please create one. It has both free and paid plans that you can choose according to the requirement of your WordPress site.
Also, make sure you open your Zapier account on one tab and your WordPress dashboard on another tab of the web browser. You’ll have to keep switching between these two during the whole process.
I. Make a Zap
A Zap is an automated workflow that orders the integrated apps to follow the command: “When this happens, perform that.” It consists of a trigger and one or more actions that should be performed.
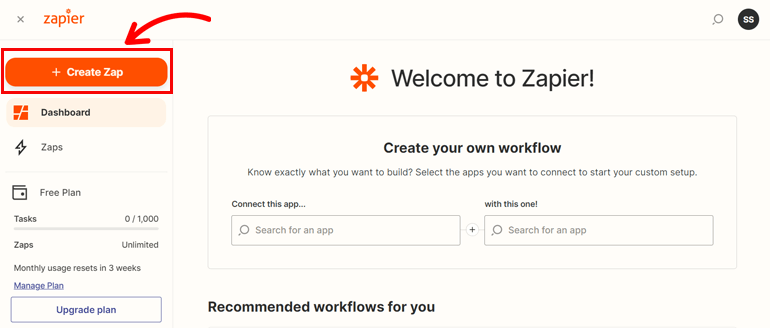
To make a Zap with Zapier, login into your account and visit the dashboard. On the left-hand side of the dashboard, you’ll see a Create Zap button; click on the button.
It then directs you to the new page, which is a Zap editor. It’s now time to name the Zap that you just created. Click the pencil-like icon on the top left corner and name the Zap.
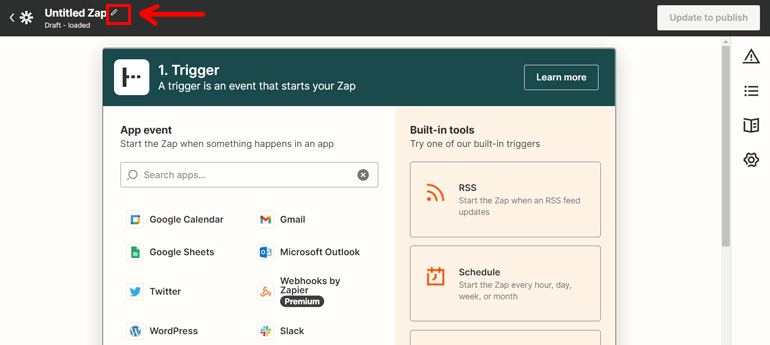
The Zap editor saves all your changes as a draft until you finish the process.
II. Set Up Trigger
The next step is to set a trigger for the Zap.
A trigger is what starts a Zap or kicks off the automated process between your apps.
For example, you want to add a user’s name and email address to a spreadsheet each time user submits your WordPress form. Here, the trigger is ‘submission of the form.’
So, to set up such a trigger, search for Webhook using the search bar.
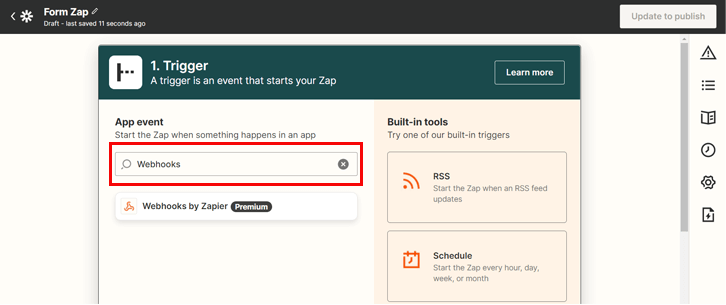
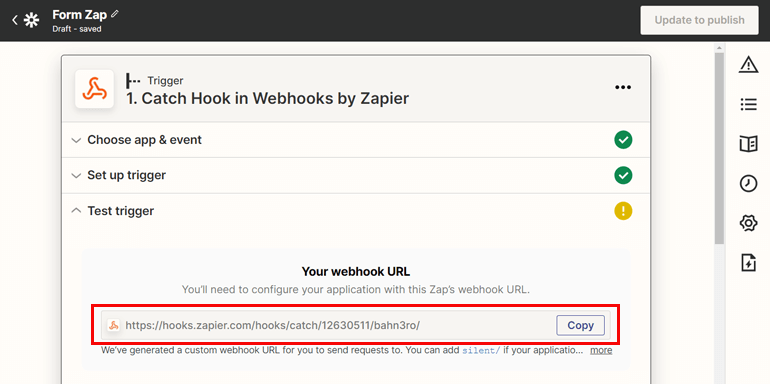
Now, choose an event for the trigger under the Event; select Catch Hook. That’s what starts the Zap.

Click on the Continue button and proceed on.
Immediately, it provides you with the Zap’s webhook URL. So, copy the custom URL.
After that, visit your WordPress dashboard and navigate Everest Forms >> All Forms.
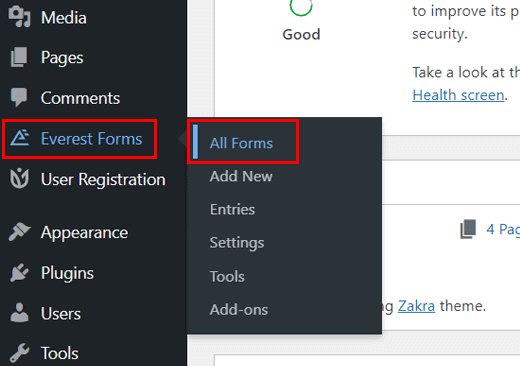
Open the contact form you just created where you want to integrate third-party apps using Zapier.
Next, click on the Integration tab at the top. It displays the option for Zapier integration with enable option and Webhook URL. That’s because you’ve installed the Zapier add-on.
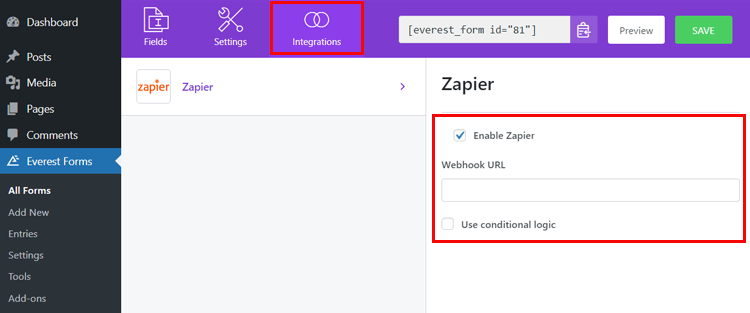
Now, check the Enable Zapier if it’s unchecked. Then, paste the Webhook URL you just copied from your Zapier account.
You can also use the conditional logic for the form for sending data through Zapier integration.
Hit the Save button after you finish the process.

III. Test the Trigger
You’ve integrated Zapier with your WordPress form as you complete the above steps. But, you must test the trigger to know whether or not the Webhook catches the information from your contact form.
So, let’s start testing the trigger.
For testing, your form should have a form entry. You can either fill it out by yourself or ask others to fill it for you for testing. Once you get the form entry, click on the Test Trigger button on Zapier.
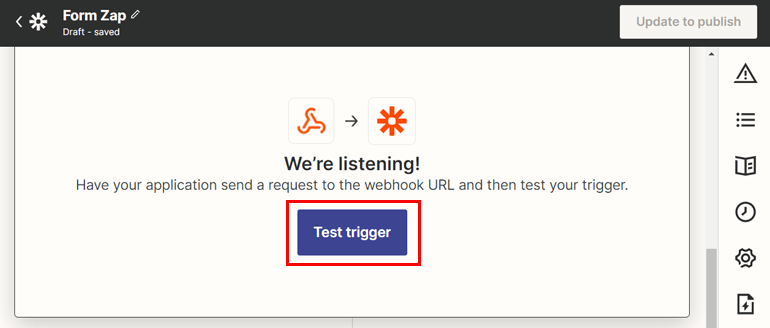
If the integration is successful, it displays a message saying “We found a request” and also shows all the form entry data.
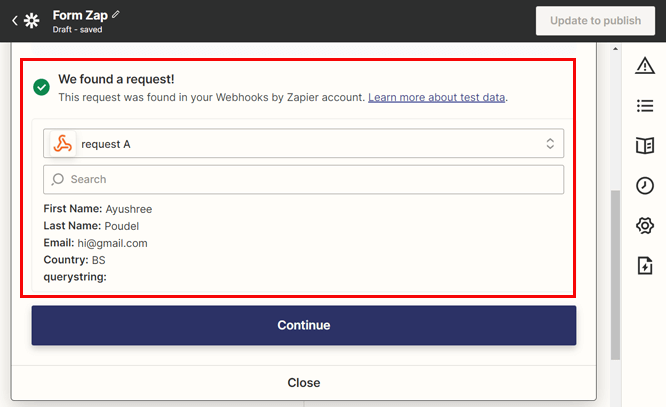
Now that you know you’ve successfully set up the trigger, proceed by clicking on the Continue button.
C. Connect Third-Party Apps Using Zapier
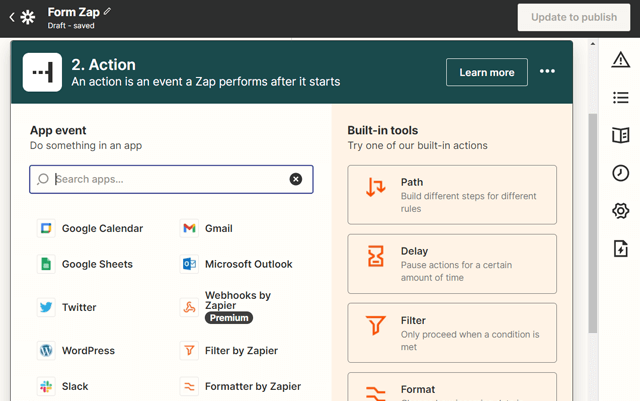
You’ll see the second step as Action on your Zapier dashboard as you hit the continue button. This is an important step where you connect the third-party app using Zapier.
An Action occurs after a Zap is triggered. So, while form submission is a trigger, adding the new contact to a spreadsheet is an action. Here, Google Sheets is the third-party app where the resulting action occurs.
That’s why, you’ll be connecting a third-party app to Everest Forms in this step.
Zapier offers integrations for more than 4000 apps to automate your routine task. However, in this article, we’re using Klaviyo as the third-party app to integrate with the WordPress form.
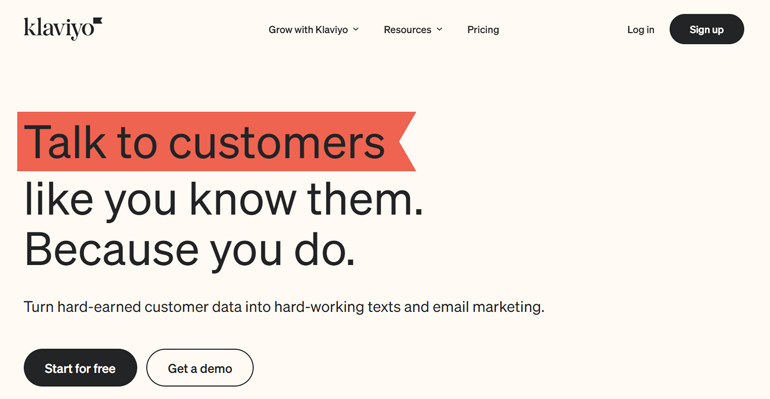
Klaviyo is an email and SMS marketing automation platform that stores all your customers’ data and provides personalized tools to grow your revenue. It’s a powerful platform that drives customer experiences and scales up your business.
Besides, it lets you study customers’ behavior more closely by analyzing data in real-time – a perfect tool to grow your business smartly.
Thus, using Klaviyo as our third-party app, we’re sending form submission data of our customers to Klaviyo’s marketing list.
I. Choose Action App & Event
Action App is the app where the task will be performed as soon as Zap starts. App Event is where you specify what event you want to happen in the chosen app.
You can connect any available third-party apps as per your requirements using the App field. For now, let’s choose Klaviyo using the search bar.
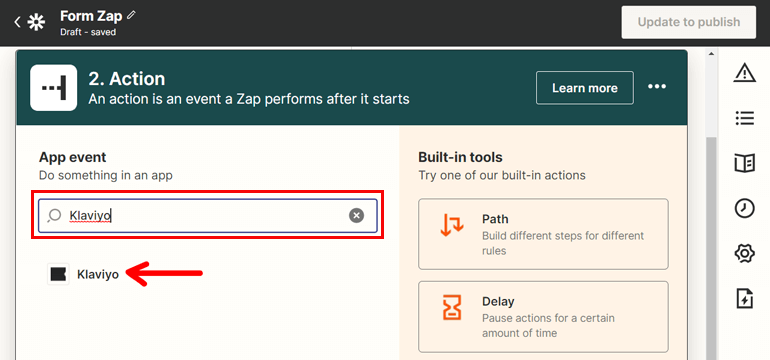
You’ll now see a new field for Event. Choose the event you want to occur using the drop-down menu. Here, we’re choosing Add Subscriber.
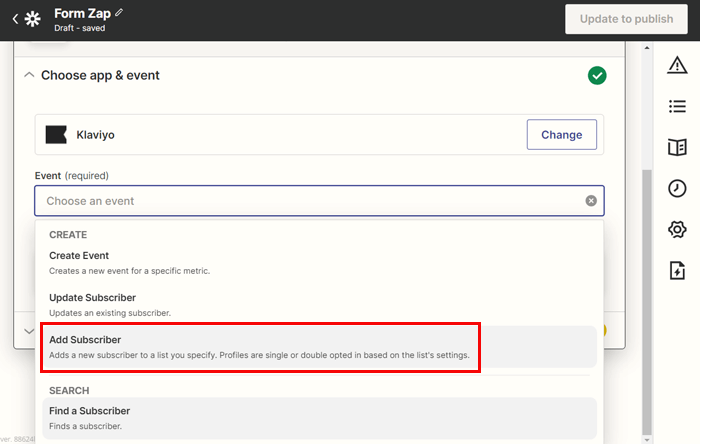
Thus, when a Zap runs, a new subscriber is added to Klaviyo when a user submits the WordPress form. Hit Continue to proceed on.
II. Choose an Account
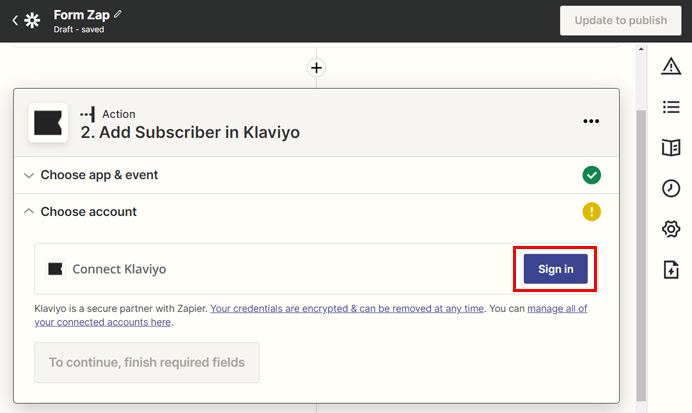
You’ve specified the third-party app, but you haven’t selected your account for Klaviyo. So, to choose a Klaviyo account where you want to connect, click on the Sign in button.
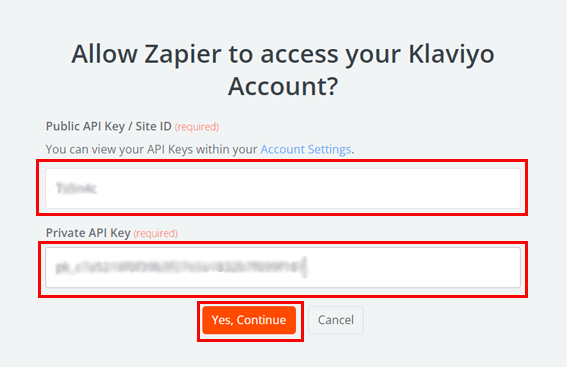
A new interface appears, asking you for the public and private API keys. So, click on the Account Settings link.
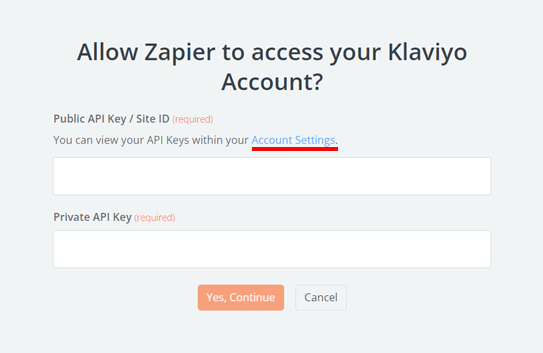
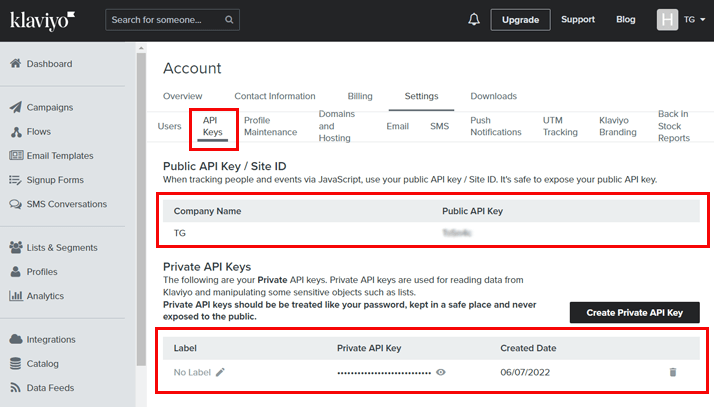
It’ll redirect you to your Klaviyo account, where you can find the public and private keys under API Keys.
Now, copy these keys one by one and paste them into the field of public and private API keys as asked by Zapier. Once done, hit the Yes, Continue button.
Now, visit your Zapier dashboard. Since you’ve specified the account for Klaviyo, you’ll get the same account in the Choose account field.
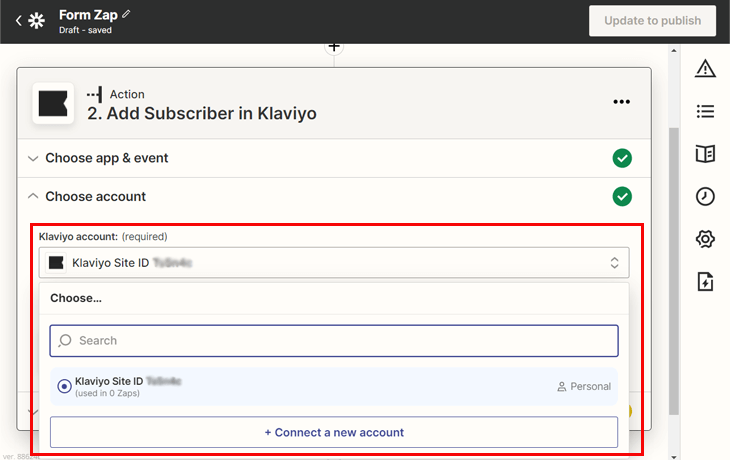
Click on the Continue button when done.
III. Set Up Action
Now, it’s time to set up the data that you want Zapier to fetch from your WordPress form and send to the action app, i.e., Klaviyo
Set the list as per your choice where you want to add the new subscriber. Klaviyo has two options: Newsletter or Preview List.

You can also create a new custom list in your Klaviyo dashboard and select the list.
Next, the fields have a drop-down menu using which you can pull all the required fields’ data from your WordPress form. Some of the fields are optional here, while others are required.
Thus, if you want to add the email information from a form submission into the list, select the Email field from the dropdown. You can ignore the fields you don’t need data on.
When you complete fetching all the required information, hit the Continue button.
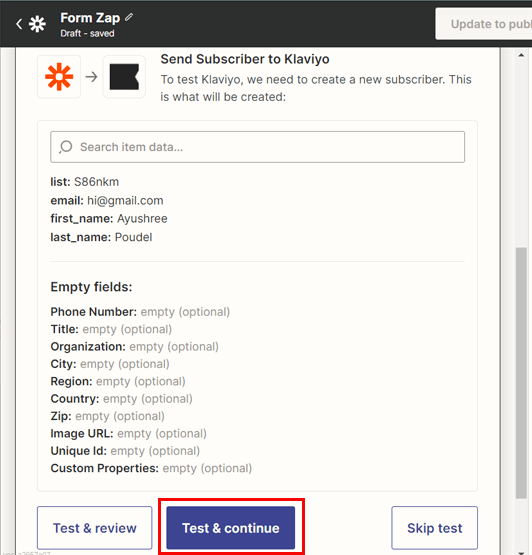
Then, you’ll reach the Test Action step, where all data you fetched is also shown.
IV. Test Action
This step is to test whether your Zap is working or not.
First of all, the screen will display all the data that will be sent to your action app. Now, click on the Test & continue button.
You’ll be redirected to the screen saying, “A subscriber was sent to Klaviyo.” It indicates that the action step was performed. On the other hand, the list on your Klaviyo will have a new subscriber added. Thus, you can now publish the Zap by hitting the Publish Zap button.

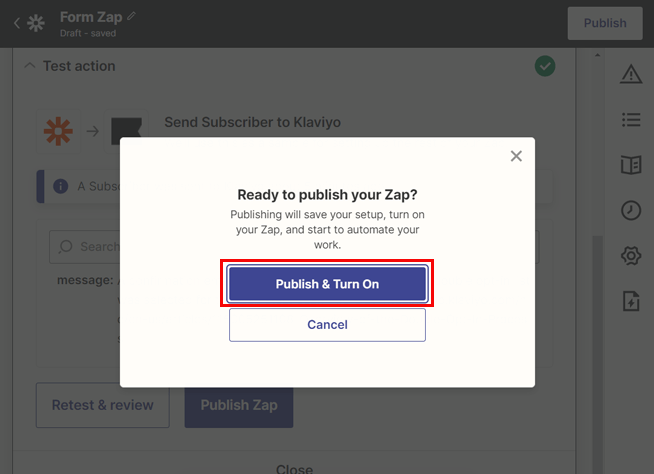
To know whether you’re ready to publish your Zap or not, it will ask you for further confirmation. Here, you can hit the Publish & Turn On button.
Bravo! You’ve successfully integrated the WordPress form with the third-party app, i.e., Klaviyo using Zapier. Now, whenever a new user submits the form, your Klaviyo list will have a new subscriber added automatically.
Similarly, you can integrate other third-party apps by following this Zapier tutorial. The only changes you might face are in the steps connecting the form to third-party apps.
Wrapping It Up!
That brings us to the end of the article. We’re confident that you can now easily integrate WordPress forms with third-party apps using Zapier.
Since the Everest Forms plugin has made the process much simpler, you’ll get the job done efficiently. If you still encounter confusion while using Zapier to integrate WordPress forms with third-party apps, please reach us through the comment section. Also, the support team of Everest Forms is always ready to help you.
Besides, you can also use Everest Forms to add Google Map to the WordPress contact form, send a confirmation email for form submission, and more. So, you can create a full-fledged professional website using this plugin’s rich features.
If you want more tutorials related to WordPress and Everest Forms, you can visit our blog.
Before you leave, follow us on Twitter and Facebook to get notified of every new article.


![Zakra 3.0 | Zakra Pro 2.0 Release [Major Updates!]](https://i.ytimg.com/vi/g3rifl7kWvg/maxresdefault.jpg)