Are you wondering how to customize WordPress forms styling without coding? Then, your search ends right here.
Since WordPress doesn’t have a built-in contact form, you need to use a plugin to create one. And no matter which plugin you use, you need to have coding knowledge to customize the form.
But, the Everest Forms plugin is an exception. You can use this incredible form builder plugin to style your WordPress forms any way you want without having to code. So, this article is a complete guide on the process of styling a form with Everest Forms.
Let’s start with a brief overview on Everest Forms, the best plugin to customize your WordPress forms’ styling
Table of Contents
Best Plugin to Customize WordPress Forms Without Coding
First of all, forms are valuable to any website. They play a key role in collecting potential leads engagement and help in building a mutual relationship with your visitors.
So, you want a visually appealing WordPress form that catches a user’s attention. One way of doing this is matching the design of the form to your website’s overall theme.
But, this is a very challenging task for non-tech people. Most of the form plugins require you to do some coding to customize the design of a form.
But worry not, Everest Forms lets you modify the design of your form without using any code. It offers the innovative Style Customizer add-on, allowing you to easily edit any element of your form.
That’s why, Everest Forms is the best tool you’ll find to customize WordPress forms style without coding. We’ll be using this plugin to demonstrate how you can style your forms quickly.
But, do note that you need to buy the Everest Forms premium version for access to the Style Customizer add-on.
How to Customize WordPress Forms Styles Without Coding?
1. Install and Activate Everest Forms Pro
As mentioned before, you need both the free and pro versions of the Everest Forms plugin to style your forms using the Style Customizer add-on. So, you must first purchase a premium plan from the official pricing page.
You can then start installing the free and pro plugins on your website. If you need help, you can check out our article on how to install and activate Everest Forms Pro.
After installing and activating the plugin, you can proceed to the next step.
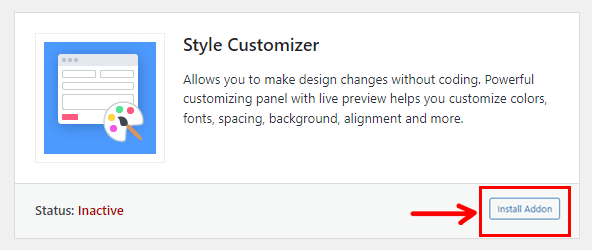
2. Install and Activate the Style Customizer Add-on
Now, it’s time to install and activate the Style Customizer add-on.
For that, go back to your website’s dashboard. Navigate to Everest Forms>>Add-ons and search for the Style Customizer add-on.

As you find it, press the Install Addon button.
When the installation is complete, press the Activate button.
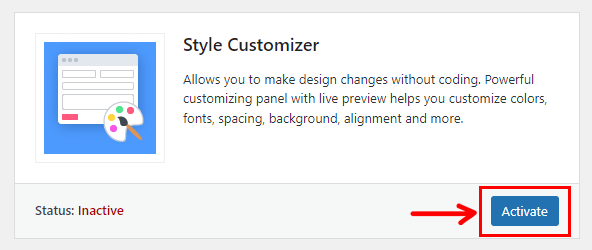
That’s it! You’ve successfully installed and activated the Style Customizer add-on.
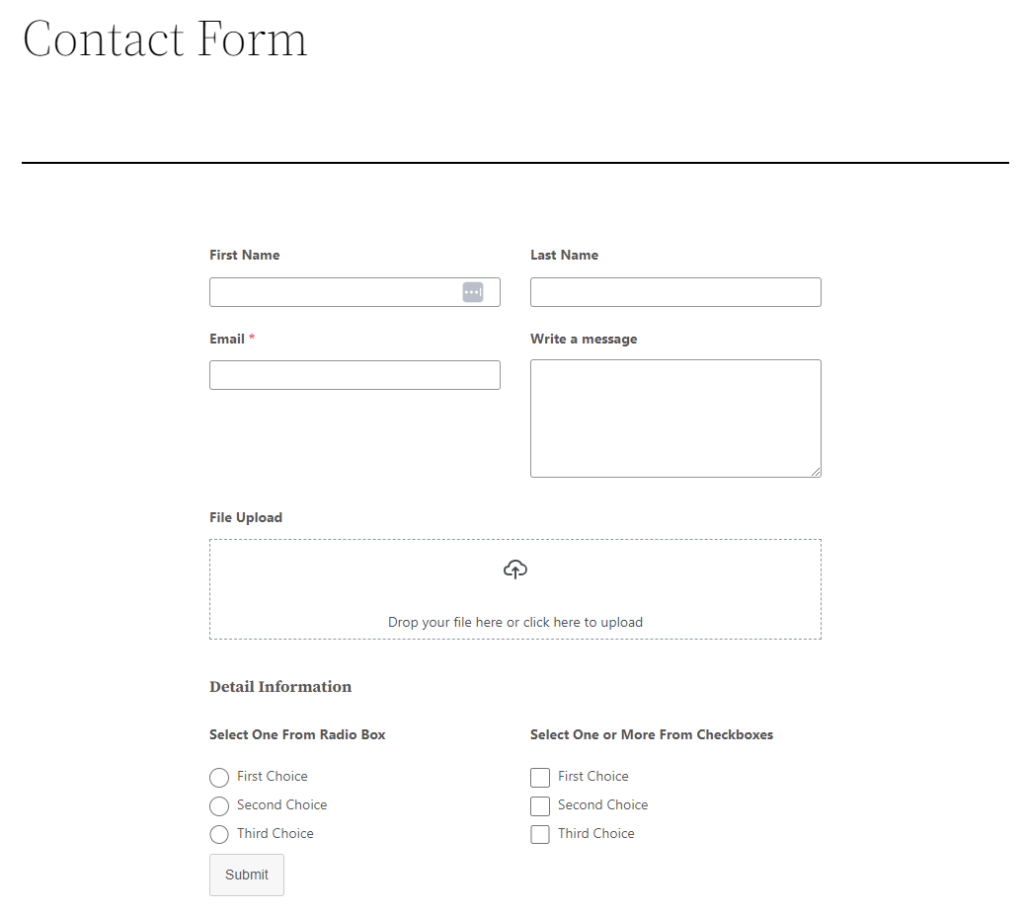
3. Create a New Contact Form
After activating the add-on, it’s time to create a new form.
Simply go to Everest Forms and click on Add New.

Here, you can see different ready-to-use form templates offered by Everest Forms. You can create appointment forms, job application forms, etc. as per your needs.
However, in this article, we’ll be creating a simple contact form from scratch.
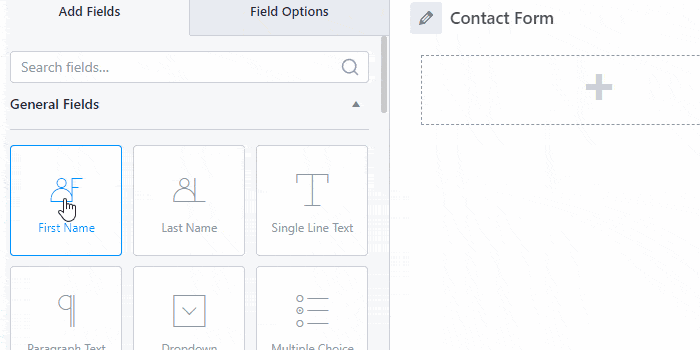
So, click on Start From Scratch, and give your form a name like a Contact Form.
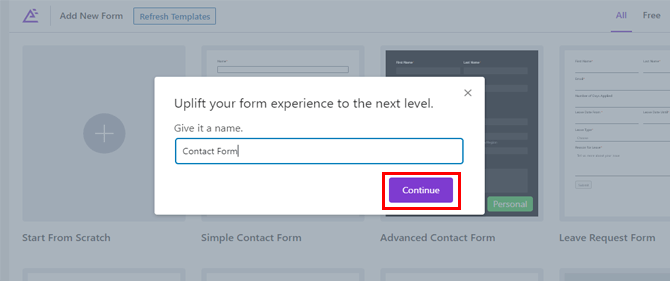
Hit Continue and, you’ll be taken to the form builder.
All you have to do is drag and drop the fields you want to add from the left side to your form on the right.
For a more detailed guide, check our post on how to create a contact form using Everest Forms.
4. Customize Your Contact Form with Everest Forms Style Customizer
Once you have a form ready, it’s time to customize its style with the Style Customizer.
In the form builder, you’ll see a brush tool at the bottom right corner. Clicking on that icon will take you to the form customizer page with various styling options.
We’ve discussed each option the customizer offers below.
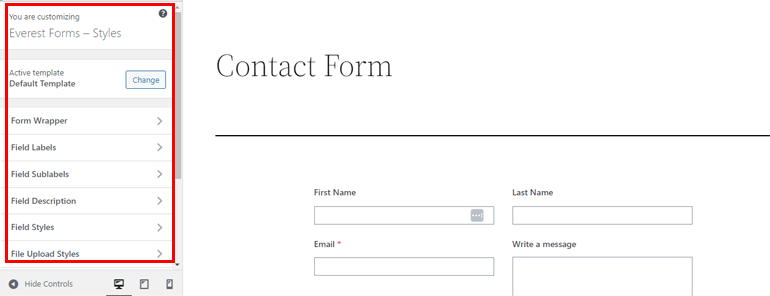
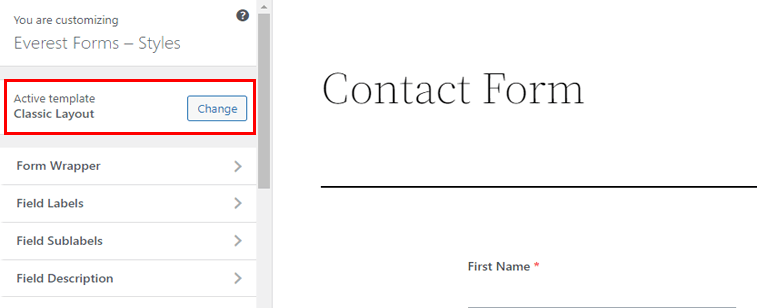
i. Active Template
This option lets you change the layout of your form. You can choose between Default and Classic Template from here.
ii. Form Wrapper
The next option is Form Wrapper which allows you to change the overall structure, color, and background of your form.
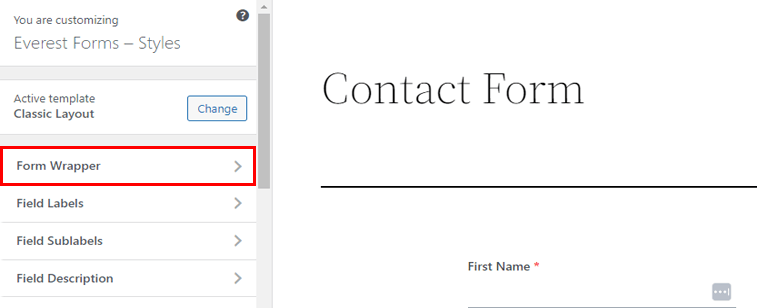
You can edit the following components of your form:
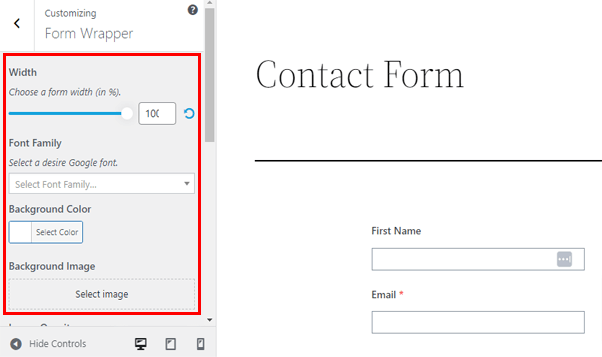
Width: You can adjust the width of your contact form’s field. For that, all you need to do is drag the pointer to the right to widen the area and to the left to narrow it.
Font Family: This option lets you change the form field’s font family.
Background Color: It enables you to adjust your form’s background color. Choose the color of your choice with the Select Color button. You can simply click the Default button if you don’t like the changes.
Background Image: You can set the background image of your contact form using this option. However, remember that the image you want to add should be in your media library.
Border Type: You’ll get different options to change your form’s border like dotted, dashed, solid, etc.
Border Width: This option allows you to change your form’s border width. You can select the link icon to keep your form’s width equal on all sides. On the other hand, unselecting it lets you set the border width individually on each side.
Border Color: This enables you to change your contact form’s border color.
Border Radius: You can adjust your form’s border-radius with this option. It allows you to increase or decrease the curves of the border corners.
Form Margin: You can change your form margin using this option. Similar to border width, the link icon lets you set the margin equally on all sides or set each side individually.
Form Padding: This enables you to set the space between the border and the form fields.
iii. Field Labels
Field Labels, as the term suggests, give your empty fields a label so that users know what information the field is asking.
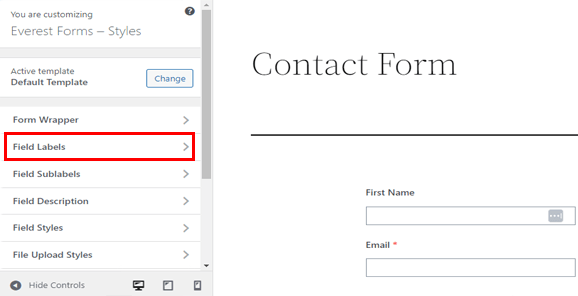
You can customize the following aspects of your field labels through this option:

Font Size: It lets you change your field label font size. Just drag the pointer toward the right or left side to increase or decrease your form’s label font.
Font Color: Likewise, you’re able to select and change the color of your label font.
Font Style: This option helps you change your form field label font style and make it bold, italic, etc.
Text Alignment: Using this option, you can position the label to the left, middle, or right of your form.
Line Height: Drag the pointer back and forth to increase or decrease the field label line height.
Margin: It allows you to adjust the space between the field labels on your contact form.
Padding: You can adjust the space between field labels and field borders using this option.
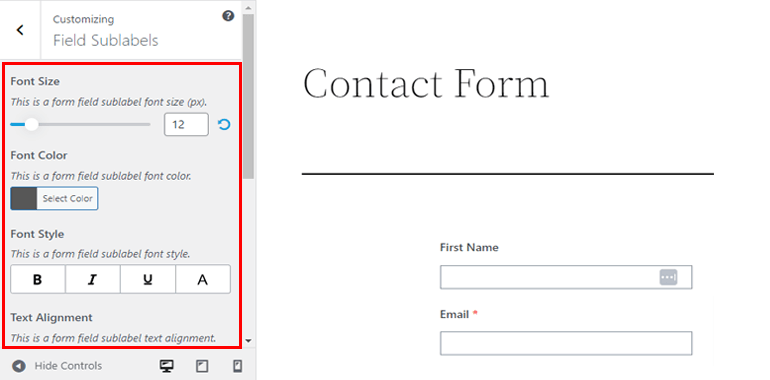
iv. Field Sublabels
Using the Field Sublabels feature, you can customize the style of the field sublabels.
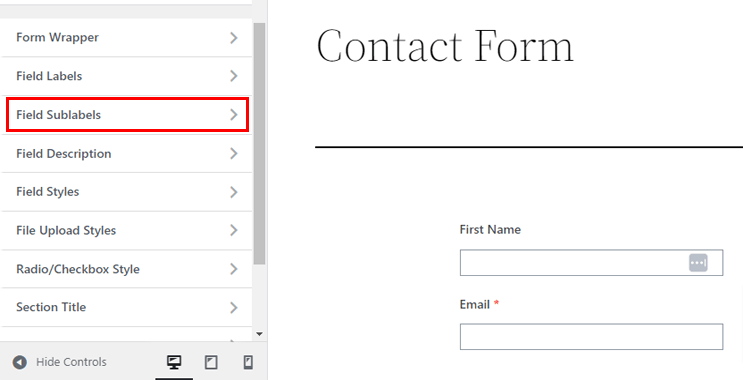
It’s similar to the field labels and has the same customizing options such as Font Color, Font Style, Alignment, and more.
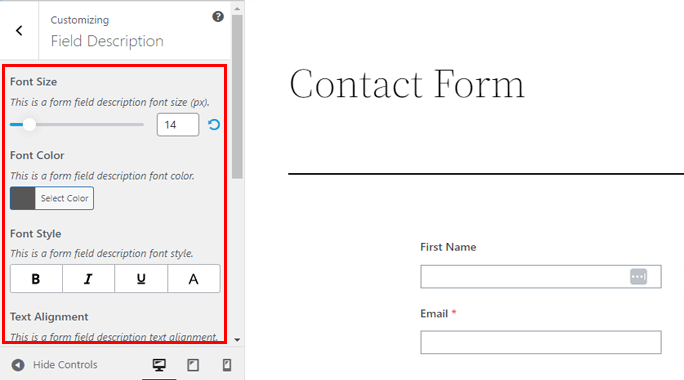
v. Field Description
To help users know what information they should enter into a field, you can add descriptions to each field.
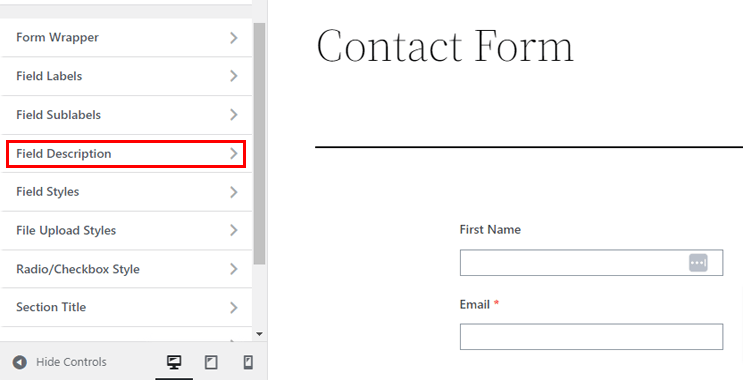
Also, the option lets you customize the field description Color, Style, Line Height, Margin, and Padding.
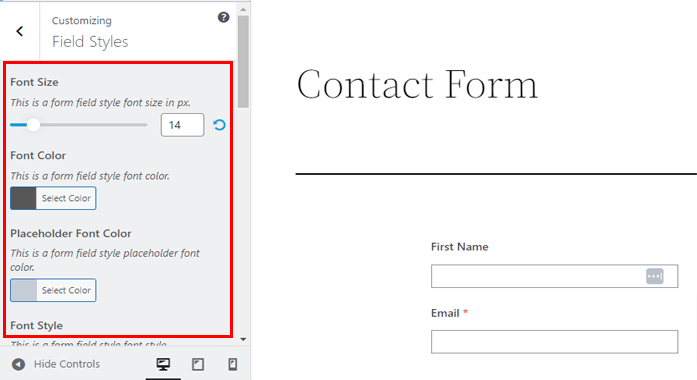
vi. Field Styles
With Field Styles, you’re able to change the style of the field itself, where users enter their information.
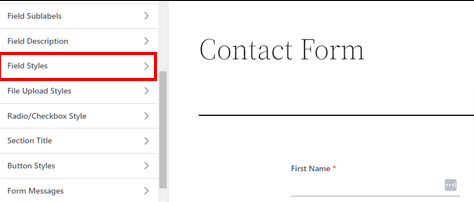
You can customize its Font Size, Font Color, Font Style, Alignment, etc. Furthermore, you get to edit the field Border Type, Border Width, Border Color, Border Radius, and more.
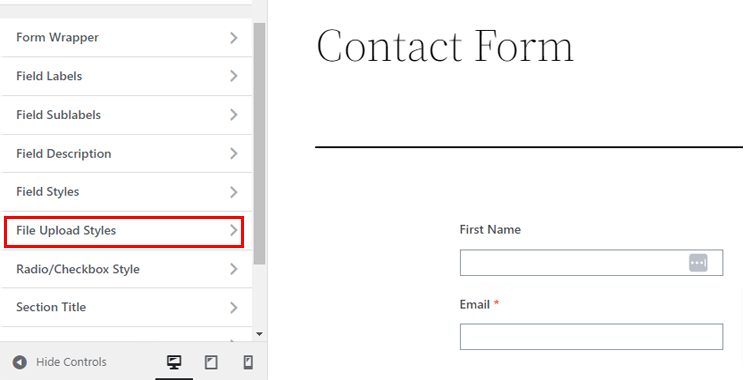
vii. File Upload Styles
Everest Forms offers customization for even the File Upload field.
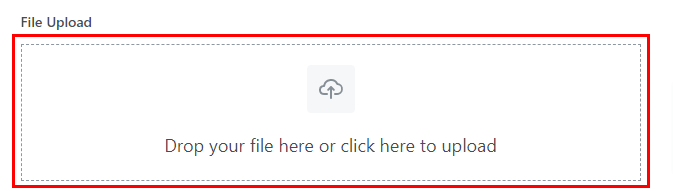
The File Upload Styles section lets you edit the design of the field easily.
So, if you add a file upload field to the form, you get the following styling options:
Font Size: Change the font size of the text in your file upload area with this option.
Font Color: It allows you to change the font color of the text in the file upload field.
File Upload Background: You can even set the background color of the file upload field.
Icon Background: You can see an icon in the file upload field indicating the file upload feature. With this option, you can change its background color.
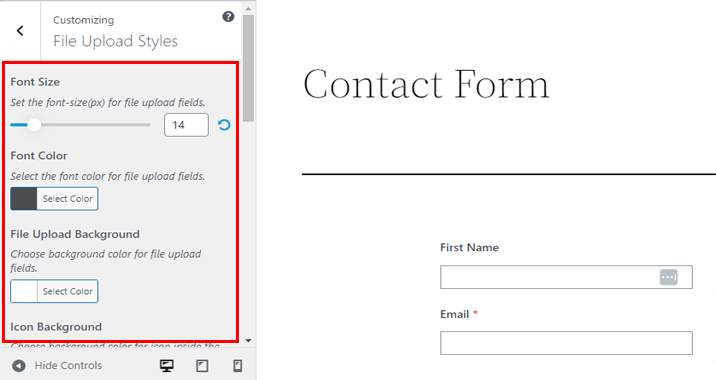
But that’s not all. There are even more options like Border Type, Border Color, Border Radius, File Upload Margin, and File Upload Padding.
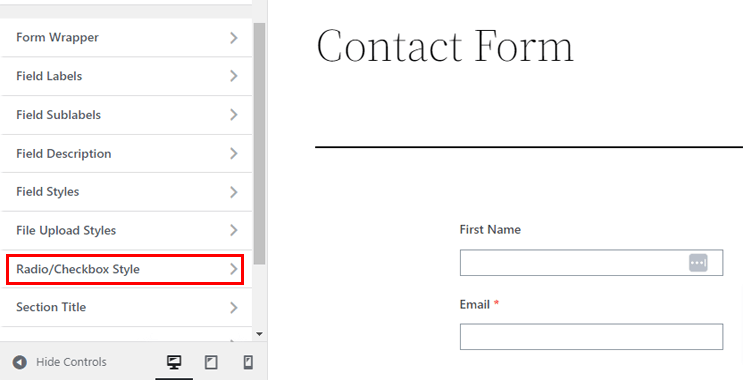
viii. Radio/Checkbox Style
With a radio button, your users can choose one specific item from the list of options. Likewise, checkboxes allow users to choose more than one item from the list of given options.

Using the Style’s Customizer’s Radio/Checkbox Style option, you can edit the style of your radio buttons and checkboxes. You can adjust its Font Size, Alignment, Margin, Font Style, and Style Variation.
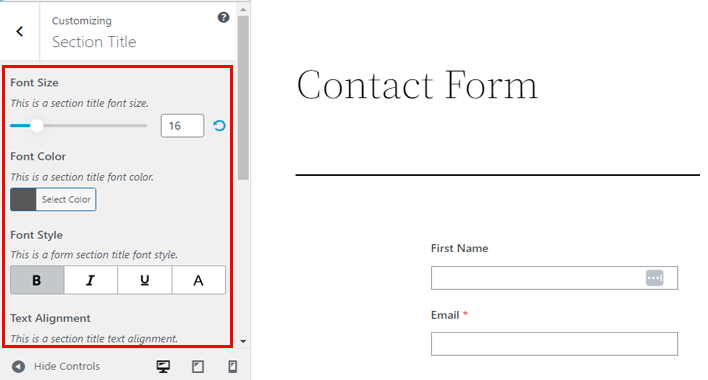
ix. Section Title
With the Section Title field, you can name the different sections of your form.
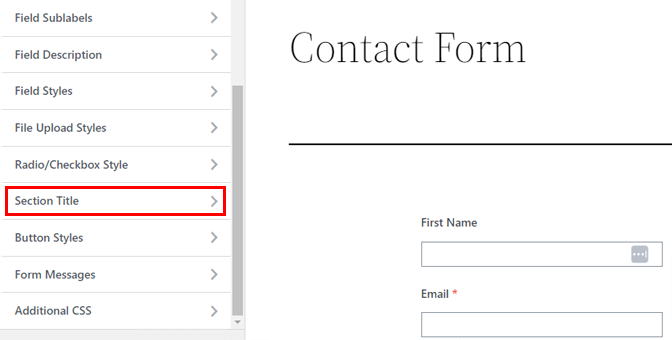
On top of that, you get to edit the titles with the Section Title styling options such as Font Size, Font Color, Text Alignment, etc. You can also increase or decrease the margin and padding of the section title with Form Margin and Form Padding respectively.
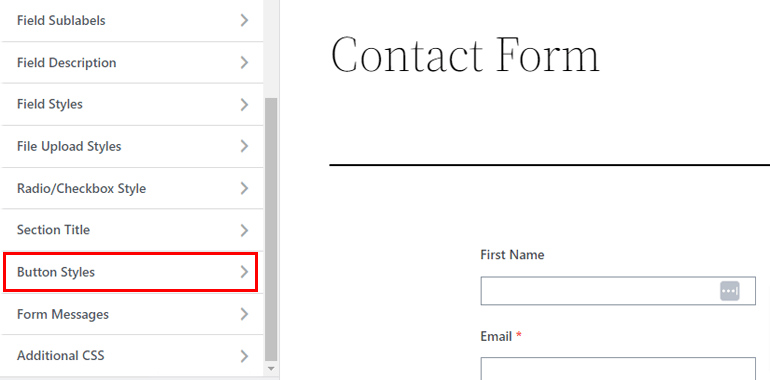
x. Button Styles
Using the Style Customizer, you can also customize your form’s Submit button. You can change its font style, color, alignments, border radius, and more.
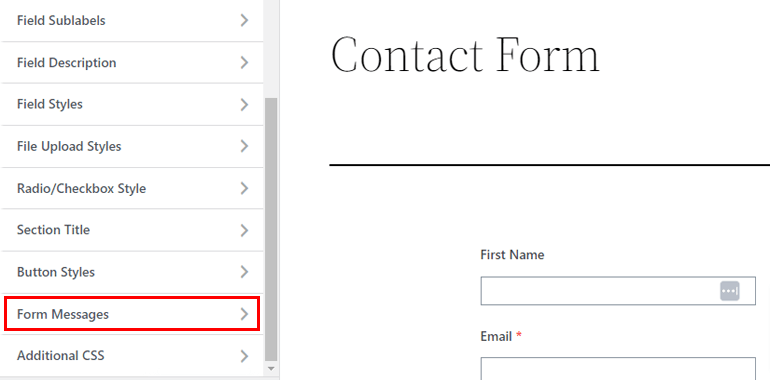
xi. Form Messages
Furthermore, the add-on enables you to customize the messages that appear when a user submits the form.
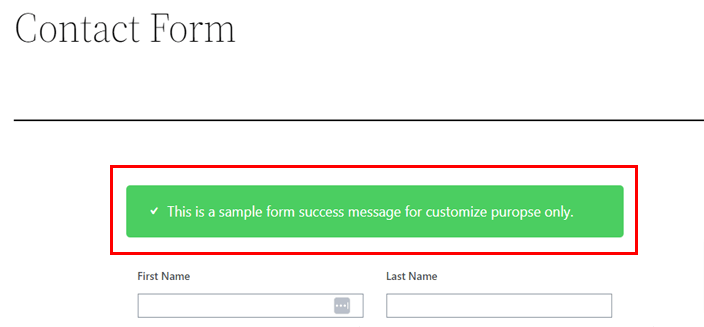
From the Form Messages section, you can edit the Success Message, Error Message, and Validation Message. Each message section has a separate customization option. You just need to press the toggle button and start changing its Font Size, Color, Style, Alignment, etc.
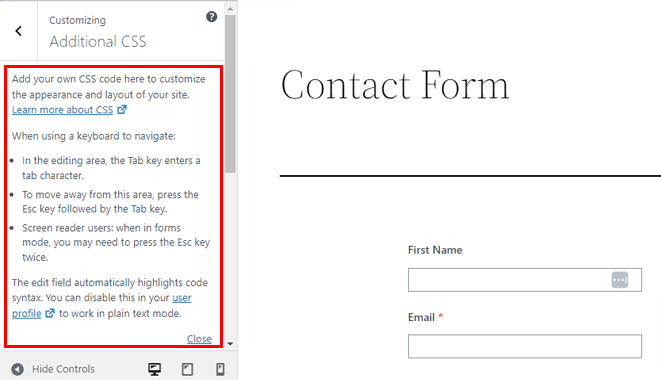
xii. Additional CSS
If you know CSS coding, you have even more freedom to customize the appearance and layout of your website.
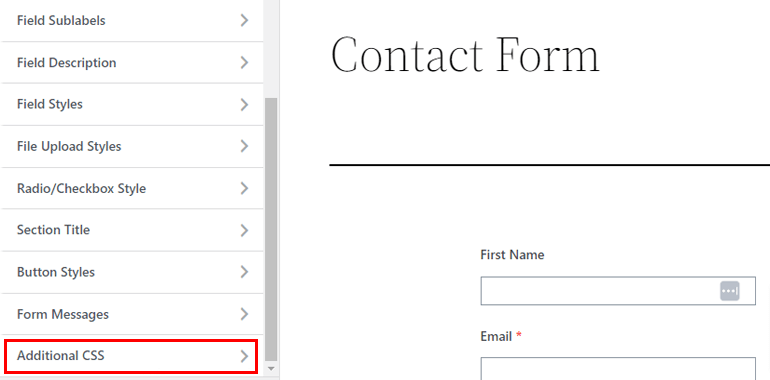
However, this is completely optional. You can stick to the above options if you’re not familiar with CSS.
Otherwise, you can use Additional CSS to stylize your form further. You can see the CSS editor on the left side where you just need to add CSS code.
After making all the changes in your form, don’t forget to press the Save button. This way you’re saving all the changes you’ve made in your form.
5. Configure Form Settings
As you’ve customized your contact form in WordPress, it’s now time to configure the form settings. So, go back to the form builder and click on Settings at the top.
First, you’ll see General settings.
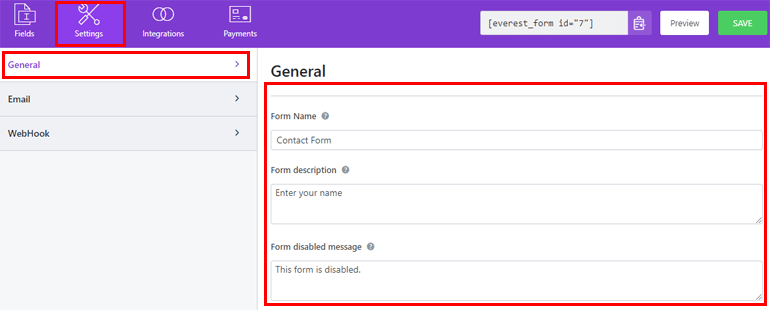
Here, you can set Form name, Form Form description, Form disabled message, Successful form submission message, and many more.
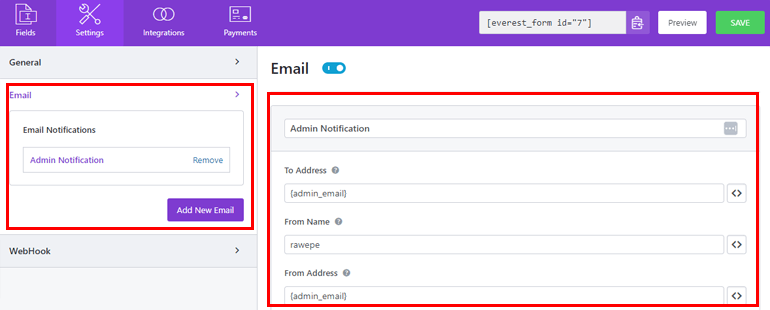
Similarly, in Email settings, you can create admin and user emails to send or receive email notifications. For example, you can send confirmation emails to users after a successful form submission.
For each email, you can edit the To Address, From Address, Reply To, Email Subject, etc.
Once you’re done with the configuration, save the changes with the Save button.
6. Display the Contact Form on Your Site
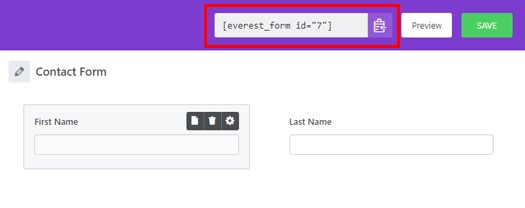
Now, you’re all set to publish the form on your website. To do that, copy the shortcode from the top-right of the form builder.
Then, open the Post or Page where you want to display your form. You can choose an existing page or create a new one. It’s up to you.
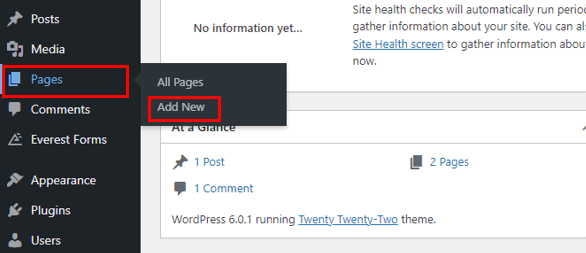
Here, press on the block inserter icon [+] and search for the Shortcode block. Add the block to your page or post and paste the shortcode.

Finally, press the Publish button if it’s a new page. You just need to click the Update button if it’s an existing page.
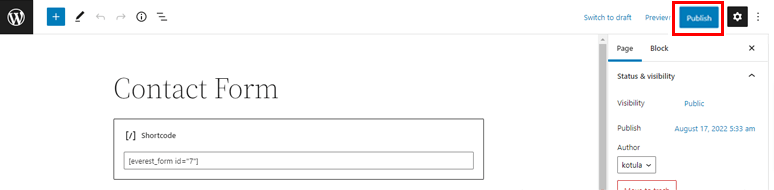
With that, your form should be live on your website!
Alternatively, you can also publish your form with the Everest Forms block. Add it to your page or post and choose the form you just created from the dropdown.
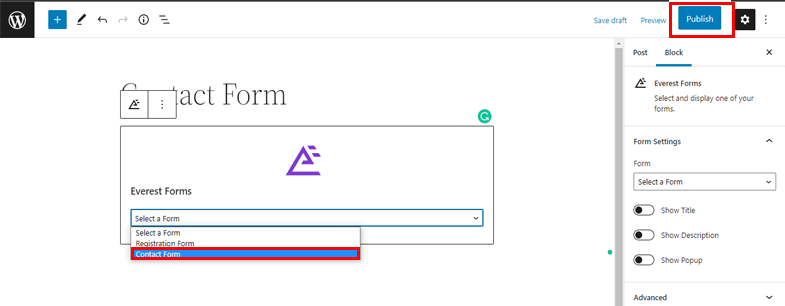
After that, hit the Publish/Update button as before.
Conclusion
To summarize, Everest Forms enables you to customize your WordPress form style. It’s a one-of-a-kind plugin that allows you to edit every design aspect of your form without writing a single line of code.
However, that’s not all you can do with Everest Forms. Besides a contact form, you can use it for creating Likert scale survey forms, quote request forms, etc. You can even add Google Maps, payment systems, and more to the forms.
We’ve covered tons of its features in similar articles, so head on over to our blog if you’re interested.
Also, follow us on Facebook and Twitter for exciting updates.


![Zakra 3.0 | Zakra Pro 2.0 Release [Major Updates!]](https://i.ytimg.com/vi/g3rifl7kWvg/maxresdefault.jpg)