Want to create multi-step form in WordPress but don’t know how? Let us help you with an easy beginner’s guide that’ll assist you in making one for your WordPress site.
Anyone who has ever had to fill up a form can tell you that it can get boring when the form’s too long. If you want your users to actually complete and submit your forms, you’re going to have to get clever.
One way of doing so is by using a WordPress multi-step form that divides the form into multiple parts. For that purpose, WPEverest brings you the Multi-Part Forms add-on for its popular form builder plugin, Everest Forms.
Hence, in the tutorial below, we’ll be showing you how to create multi-part forms in WordPress using Everest Forms.
First, let’s look at why you should use the multi-step form in WordPress before jumping into the steps!
Table of Contents
Why use a WordPress Multi-Step Form?
If you’ve decided to create a multi-step form in WordPress, you must obviously know the many reasons behind it. However, let us point them out again for you.
Collect User Information: You can effortlessly collect your user’s information with a multi-step form and avoid the single-page hassle.
Categorize Questions: When you group your form questions, you get to break down information to the particular area of focus.
Decrease Form Abandonment: Users are more likely to fill out complete information when the form’s divided into pages. Form abandonment mainly occurs when data is asked for in one long format.
Lead Capture: With multi-step forms, you can capture responses and convert them into leads seamlessly.
With that said, here’s a detailed tutorial on how you can create multi-step form in WordPress.
How to Create Multi-Step Form in WordPress?
When it comes to form building, Everest Forms is one of the best in the market. Even better is the Multi-Part Forms add-on it offers in its premium plans. That’s why we’ll be using Everest Forms to demonstrate the step-by-step process of how to create a multi-step form in WordPress.
1: Install and Activate Everest Forms
First and foremost, you need to install Everest Forms and activate it on your WordPress website.
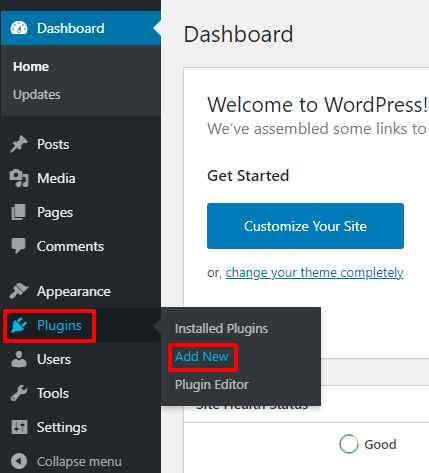
To do this, log into your WordPress dashboard and navigate to the Add New section under Plugins.
On the Add New page, search for the plugin by typing “Everest Forms,” and it’ll show up in the search results.
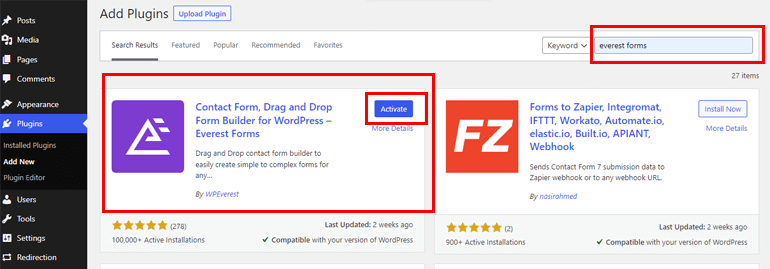
Then, click on the Install Now button and then choose to Activate the plugin.
This is just one way of installing the plugin. Alternatively, you can download the plugin file from the official WPEverest page or the WordPress repository. It’ll be saved as a ZIP file on your device.
After that, open Add New under Plugins and click on Upload Plugin.
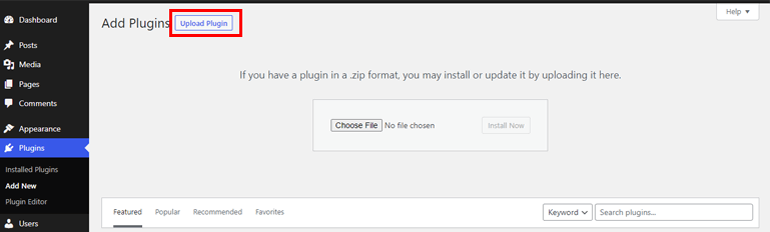
Now, upload the file you just downloaded and choose Install Now.
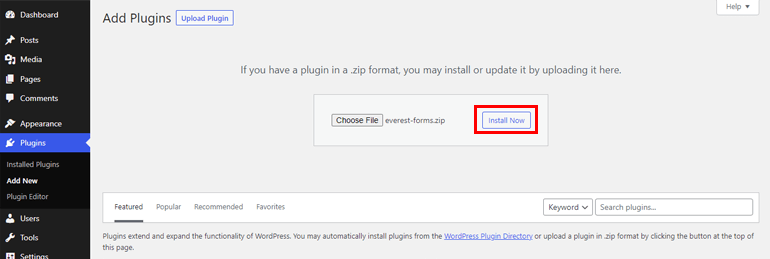
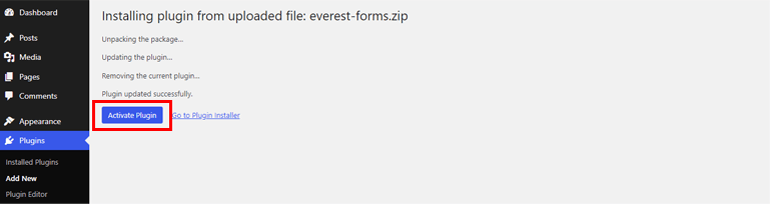
And finally activate it by clicking on Activate Plugin.
2. Download and Install Multi-Part Forms add-on
As mentioned before, the Multi-Part add-on is only available to premium users. Thus, you have to buy the Plus plan or above to access this add-on.
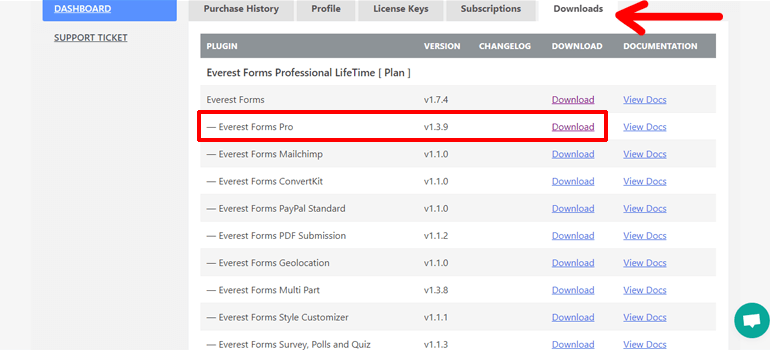
Once you’ve bought a plan, you can log into your WPEverest account. There, find the Downloads tab and download the Everest Forms Pro file. Note that you need to install this add-on before installing the actual Multi-Part add-on. Otherwise, you won’t be able to use it to create a multi-step form.
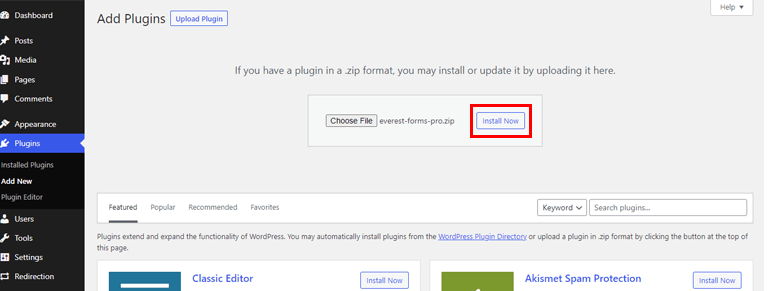
So, go back to your WordPress dashboard and open the Add New page again. Next, upload the file you just downloaded and click Install Now.
After installing it, activate it by clicking on Activate Plugin.
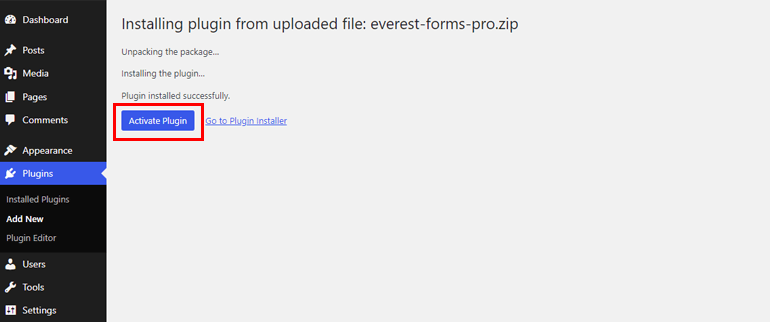
You’ll see a notice at the top of the Installed Plugins page telling you to enter your license key.
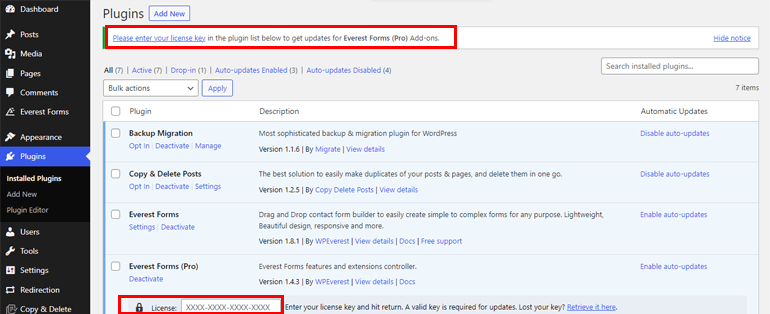
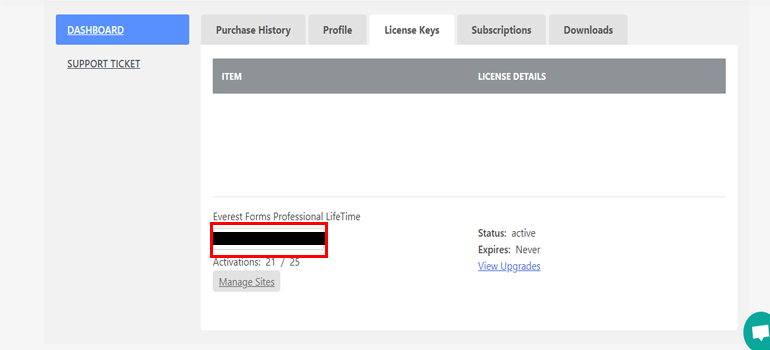
You can find this key in the License Keys tab in your WPEverest account.
Just copy the license and paste it into the field under Everest Forms (Pro). We recommend doing this without fail to enable quick updates right from the Plugins page.
We’ve yet to download the Multi-Part add-on. Thus, navigate to Add-ons under the Everest Forms tab. Here, you’ll find all of the add-ons available in your premium plan. Simply click on the option that says Install Addon for Multi-Part Forms.
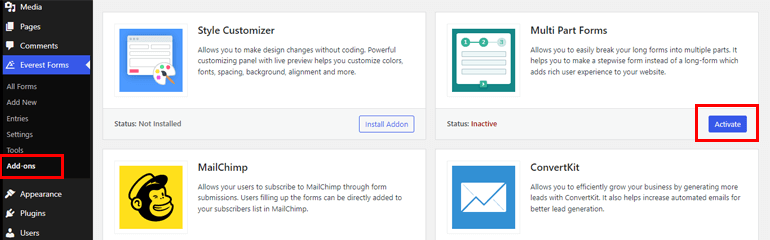
Finally, click on Activate to start using the add-on.
3. Create a New Multi-Step Form
It’s now time to create a multi-step form using Everest Forms’ form builder. Start by clicking on Add New under the Everest Forms tab in your WordPress dashboard. This will open up the form builder with all the available Fields on the left side.
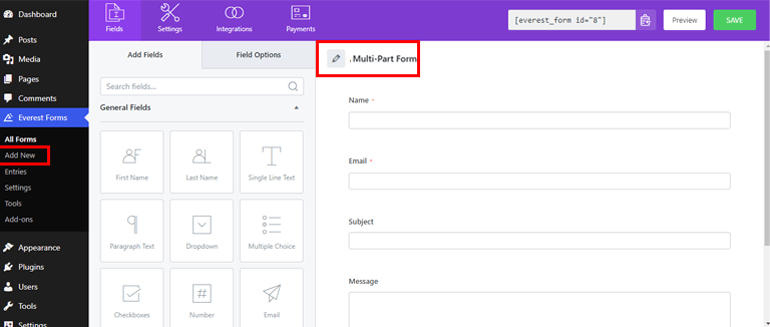
You can start by naming your form, for example, here we’ve named the form Multi-Part Form.
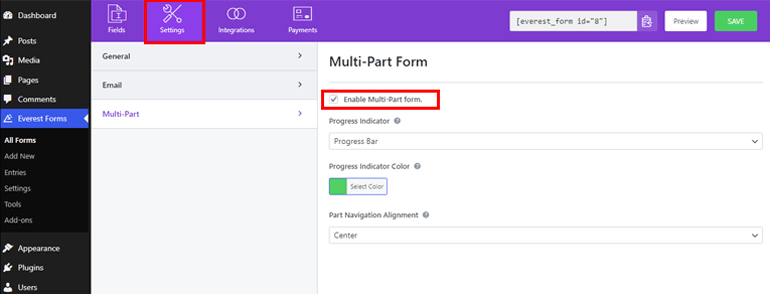
Now before you start building the multi-step form, you need to enable the multi-part feature.
For that, navigate to the Settings tab at the top. Then, open the Multi-Part tab and click on Enable Multi-Part form option, and you’re good to go!
As soon as you turn this option on, you’ll see the first part appear in the form builder. It’s titled Part Title but you can change it from the Page Options.
Now, you just need to drag the necessary fields and drop them into the form. For example, create a contact form by dragging and dropping First Name, Last Name, Number, etc. You can use Multiple Choice fields to add age or anything you wish.
Now to add another part to your form, click on the Add New Part that’s located at the bottom of the form. This takes you to the next blank page, where you get to add fields again.
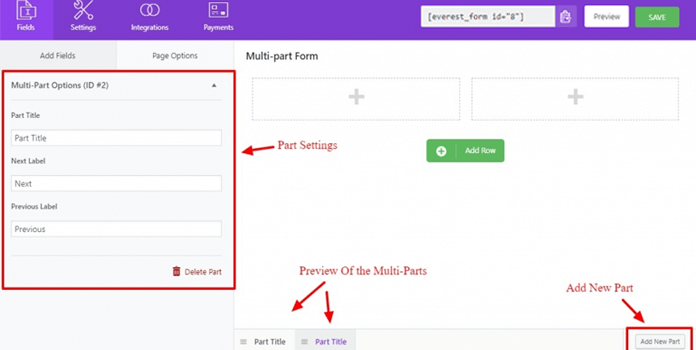
You can also move the individual parts to adjust their position. Simply drag the parts left or right.
Like we mentioned earlier, you can edit the part title and labels under the Page Options tab on the left-hand side. For example, we’ve named the parts in our form Contact Details and Additional Information.
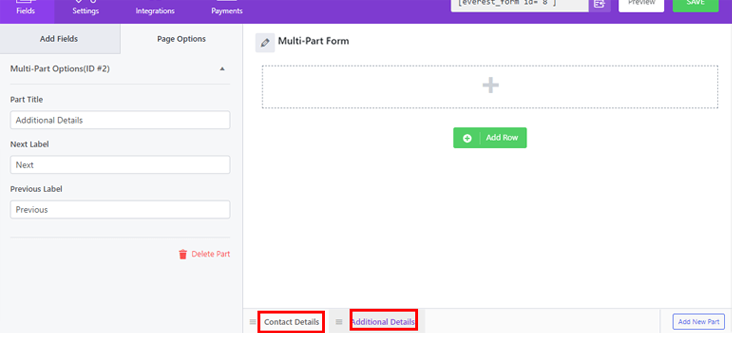
Pretty simple, isn’t it? So, create as many parts as you want, customize the part title and labels, and add the required fields.
Finally, click on the Save button to save the changes you make to your form.
4. Customize Form Fields
You can easily customize your fields with Everest Forms. Go to Field Options under the Fields tab and you’ll see all the field information that you can edit. Hence, you can customize the Label, Description, and more.
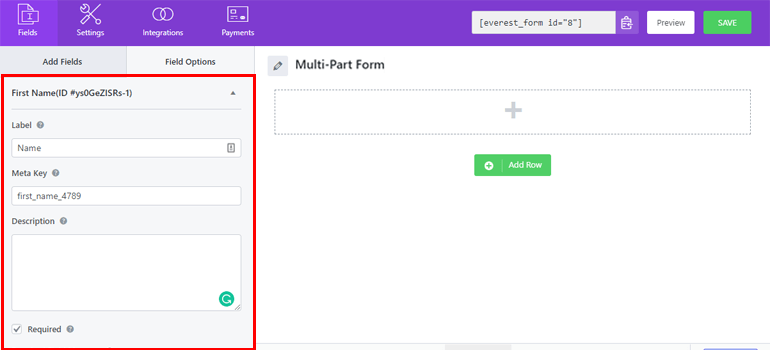
You can also set a particular field as Required, meaning users will have to fill this field without fail.
Under Advanced Options, you’ll be able to type in custom Placeholder Text and set Default Value for fields.
Since the customization options are pretty easy to understand, you should have no problem editing the individual fields in your muti-page form.
Don’t forget to save all the changes you just made by clicking on the Save button at the top right corner of the builder.
5. Configure the Multi-step Form Settings
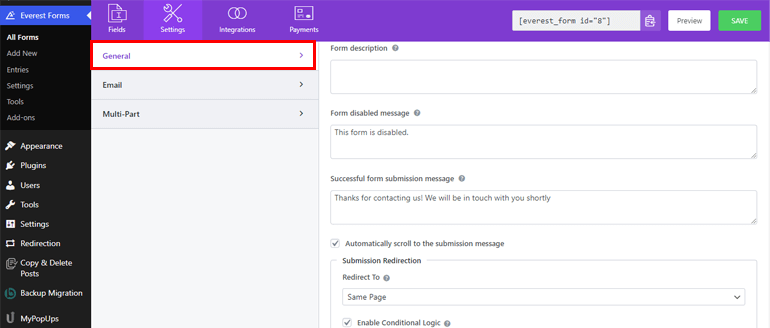
Now click on the Settings tab to configure the multi-step form settings.
You’ll see that there are 3 tabs: General, Email, and Multi-Part. Click on General to configure Form description, Form disabled message, Enable Conditional Logic, and Layout Designs.
Similarly, you can configure the email settings for admin and users as well.
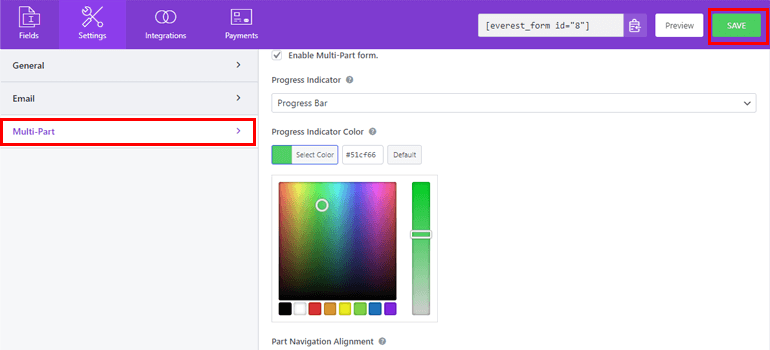
Now, here comes the important part. The Multi-Part settings has all necessary configuration options for your form. So, you can edit the Progress Indicator, Progress Indicator Color, and Part Navigation Alignment.
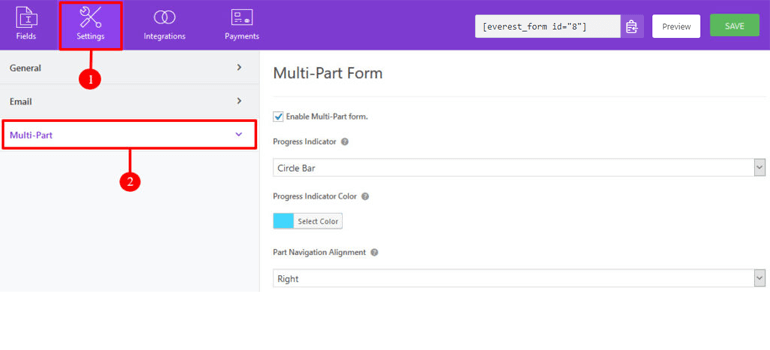
The Progress Indicator is a progress bar by default, but from the drop-down menu, you can choose Circle Bar, Arrow Steps, or None.
Now, choose your Progress Indicator Color by selecting the color you wish. Also, click on Part Navigation Alignment to select an alignment where you get options like right and more.
Then, click on Save to save the changes you’ve made to your form.
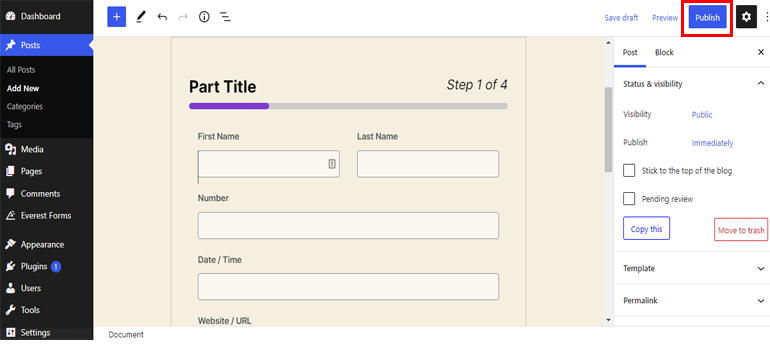
6. Add the Multi-step Form to Your Site
After creating your form, you need to add it to your site.
To do that, create a new post or page in WordPress, or either you can choose to update the form on an existing one.
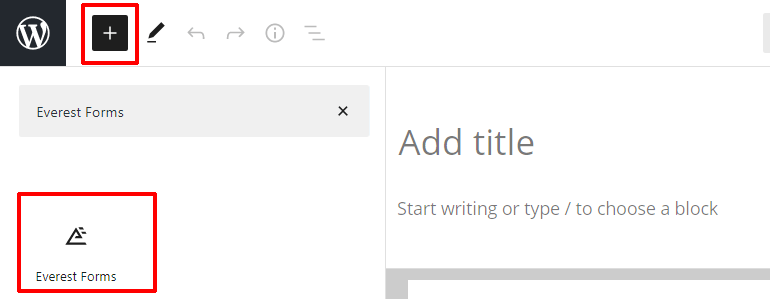
Click on the ‘+’ icon and choose the Everest Forms Block.
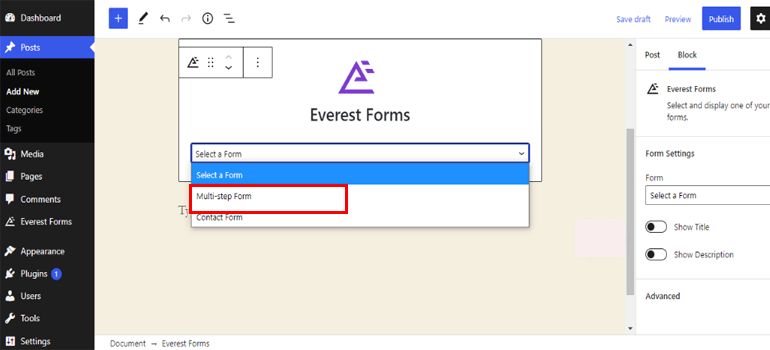
After that, select the multi-step form you’ve created from the drop-down to add them to your page.
Alternatively, you can add it by copying and pasting the shortcode on either your page or post.
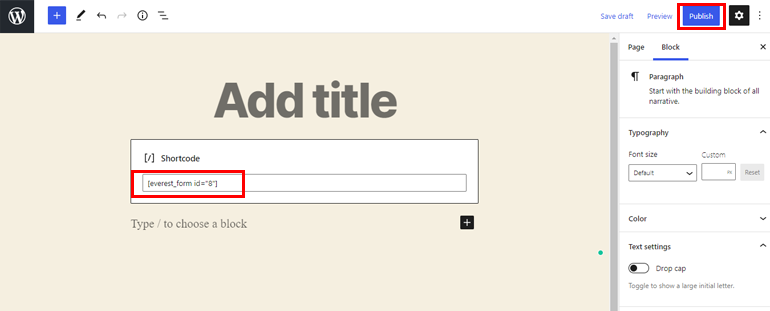
After you’re done, add the page name and click on Publish.
That’s it! With this, your multi-step form is ready to be used on your site!
Conclusion
It’s always a good idea to create multi-step form in WordPress if you need detailed information on your users. Instead of placing all the fields in one long form, you can break it into multiple parts. The fields categorized carefully into multiple sections encourages users to complete filling up the form.
All you need is a form builder plugin to achieve this. And Everest Forms is one of the best plugins for multi-part forms WordPress offers. You can easily build multi-page forms for any purpose such as survey forms and contact forms with the drag-and-drop interface.
However, if you need to create a User Registration Form in WordPress with multiple parts, try the User Registration plugin. It comes with a dedicated set of features to help you make custom registration forms. And just like Everest Forms, it offers the Multi-Part add-on to break your registration forms into multiple sections.
Besides that, you’ll also be able to manually approve users in WordPress after front-end registration and allow users to post guest articles.
To understand Everest Forms, User Regsiration and their features, we suggest you go through our blog full of articles detailing how you can use these two plugins for your site.
Also, follow us on Twitter and Facebook to stay updated on new posts and product releases.


![Zakra 3.0 | Zakra Pro 2.0 Release [Major Updates!]](https://i.ytimg.com/vi/g3rifl7kWvg/maxresdefault.jpg)