Do you want to accept credit card payments on your WordPress site and don’t know how? No need to worry! In this tutorial, you’ll learn how to accept credit card payments using Stripe in WordPress forms with ease.
Table of Contents
Why Accept Stripe Payments in WordPress?
For the people who don’t want to set up an e-commerce store to sell their products, creating a form that accepts payments from customers is the best solution. And, allowing customers to pay with their credit cards online is a great advantage for your site. It is more convenient and feasible for your customers. There are various payment gateways that provide credit card payment services. Payment gateways allow you to integrate debit or credit card transactions on your website.
Among these payment gateways, Stripe is the best option for credit card transactions. It can process multiple credit card services and provides a safe and secure transaction. Unlike in PayPal, your customers can complete the transaction without having to leave your site. Also, it is much easier to set up an account in Stripe.
Therefore, you need to use a plugin that allows you to add payment options on your forms to accept credit card payments on your site. For this tutorial, we are using our Everest Forms plugin. It is a stripe WordPress plugin that allows you to easily integrate Stripe in your WordPress forms.
But first, make sure you enable HTTPS/SSL on your site before you start accepting credit card payments to avoid security issues.
How to Accept Credit Card Payments in WordPress?(Using Stripe)

With Everest Forms, you can not only create amazing contact forms but, you can also integrate payment gateways in your forms. This Stripe WordPress plugin includes a Stripe extension to integrate Stripe to your site. You can use Stripe add-on to allow accept credit card payments on your WordPress Forms with no trouble.

The Stripe Add-on is available on our Agency and Professional plans. If you want more details on the pricing, go to our Plans and Pricing page to choose the best plan for you.
After you download and install the Everest Forms plugin and the Stripe add-on, follow the instructions below.
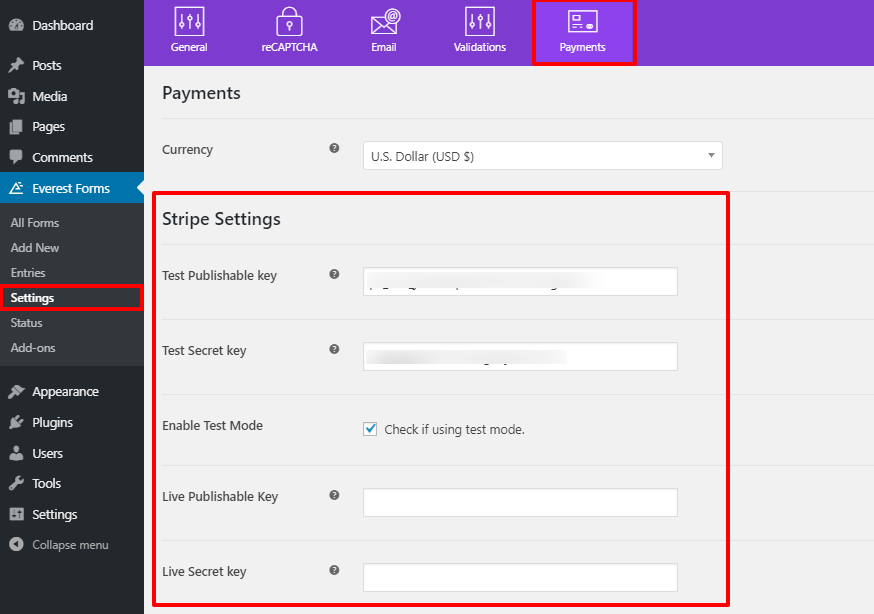
STEP 1. Set up Stripe Settings
First, you need to set up Stripe in your WordPress site to start accepting credit card payments.
Go to Everest Forms → Settings and click on the Payments tab on the top. Here, you can see the Stripe Settings where you need to insert the Publishable and the Secret Key.
You need to get the API Keys from your Stripe account for this. Don’t forget to Enable Test Mode if you want to test your integration first.
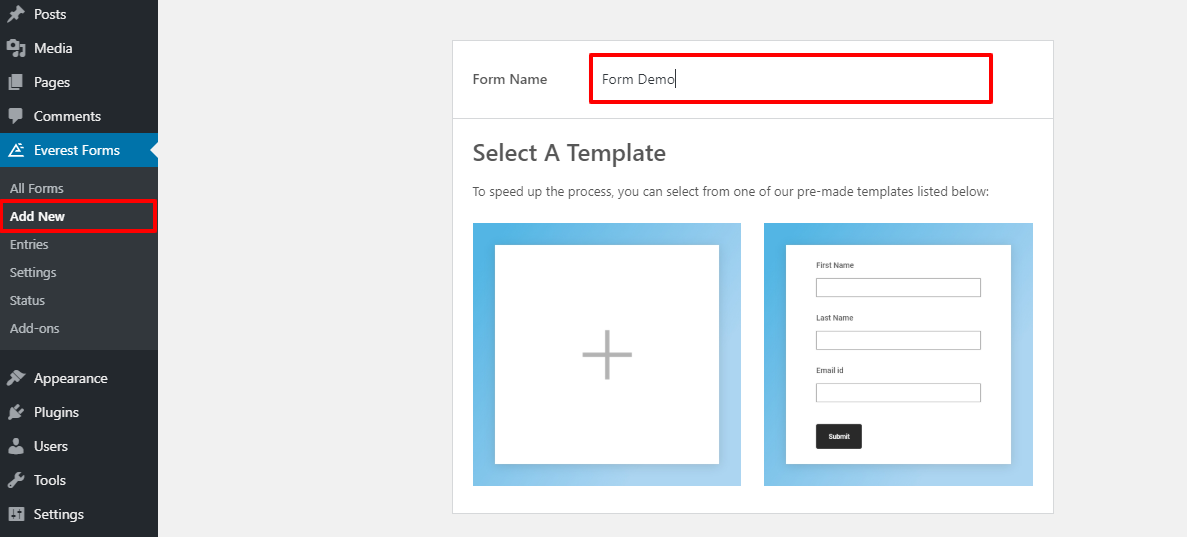
STEP 2. Create a New Form
Now, if you haven’t already created a form yet, you need to create a new one. So, go to Everest Forms → Add new. Next, give a Name to your form and select a template.
Then, you can use the easy drag-and-drop feature of Everest Forms to insert the required form fields.

STEP 3. Add Payment Fields.
If you scroll down further in the form builder you can see the Payment Fields there. There are four payment fields that you can add for product pricing and total amount. The fields are:
- Single Item: Displays Single product item with the price on the form.
- Multiple Choice: Allows customers to choose one item from multiple items.
- Checkboxes: Allows customers to choose more than one item.
- Total: Shows the total amount of items selected by the customers.
Go to the Field Options for each field to change the label, description, price and more.
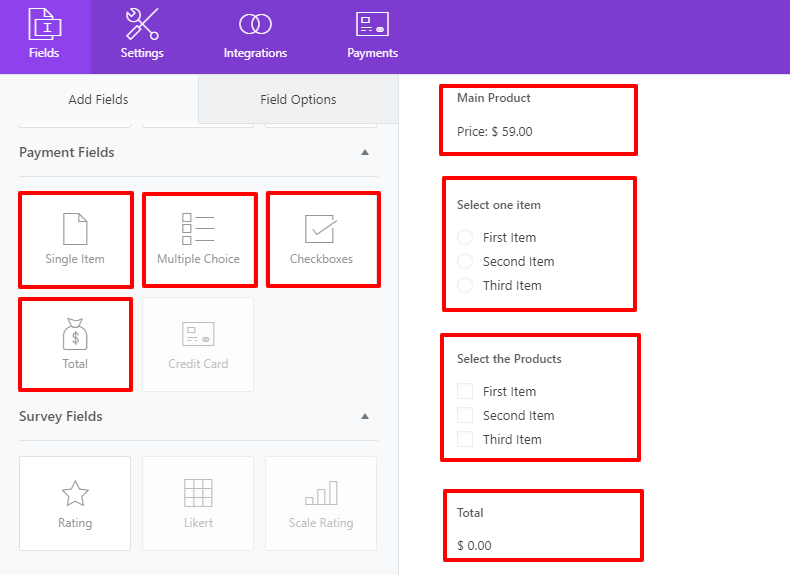
Note: You can only add the Credit Card field after you enable Stripe in WordPress as the payment option.
STEP 4. Enable Stripe as the Payment Method.
Next, you need to enable Stripe in WordPress as the payment option. So, click on the Payments tab on the top and you can see the Stripe integration. Then, on the Stripe settings, check the Enable Stripe option.
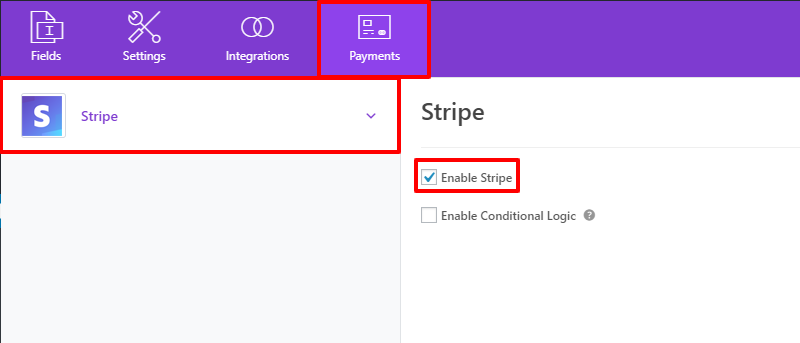
Now, you’ll be able to add the Credit Card form field to your form. After that, SAVE your form.

STEP 5. Add Form to your Website.
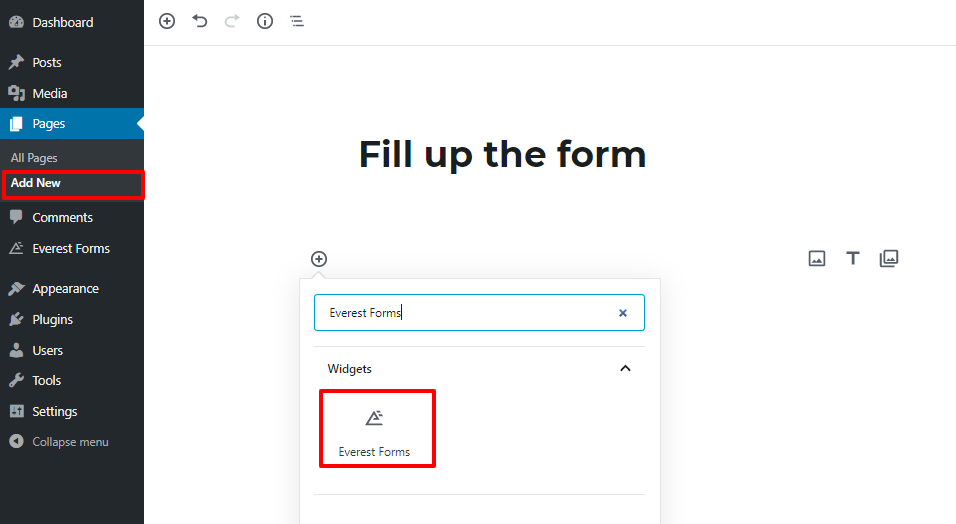
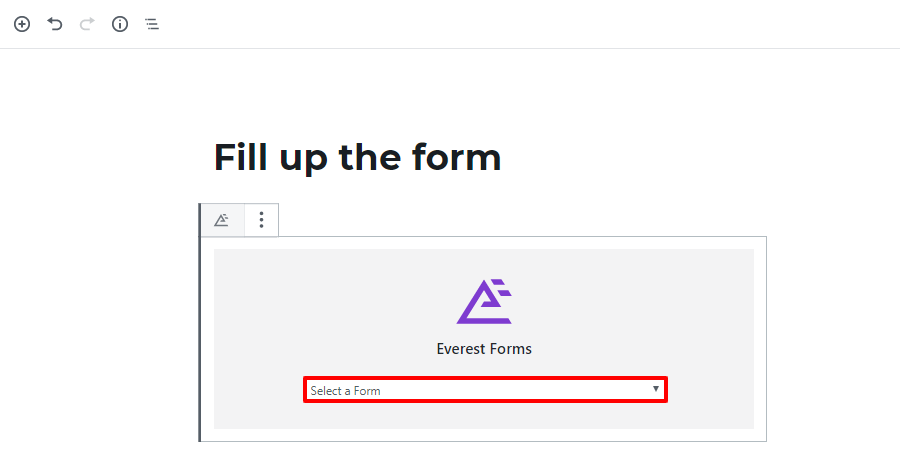
After you finish creating a form, you need to add it to your site. So, go to Pages → Add New and Add block. And, search for the Everest Forms block and insert it.
Then, select the form you want to add so you can accept credit card payments on your site.
Now, you can start accepting credit card payments online effortlessly.

Wrapping Up:
Hence, you can easily accept credit card payments on your website with Everest Forms. Your customers can make payments in your forms without any hassle. Also, credit card payments make it easier for you as the website owner. You can maintain secure online transactions and manage your payments easily.
Now you know how to integrate Stripe in WordPress to accept credit card payments on your forms with no trouble. Please share if you found this tutorial helpful.


![Zakra 3.0 | Zakra Pro 2.0 Release [Major Updates!]](https://i.ytimg.com/vi/g3rifl7kWvg/maxresdefault.jpg)